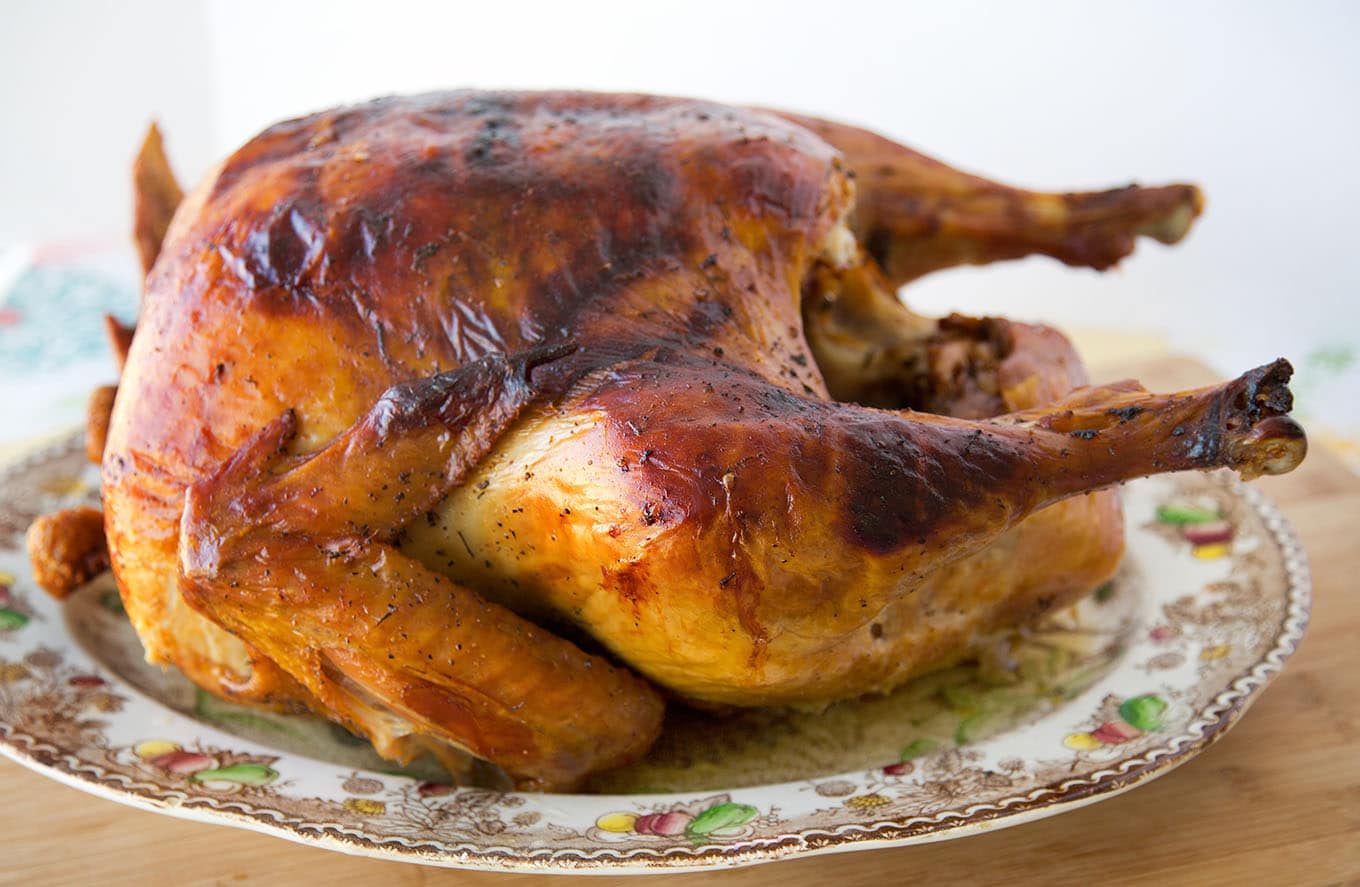
If you want the most perfectly moist, flavorful, and juicy Thanksgiving Turkey, my dry brine turkey recipe is what you’re looking for. All you need to do is rub the turkey down with salt, seasonings, and fresh herbs. Then, place the turkey in the fridge and let the dry brine work its magic for the next 48 to 72 hours.
That’s all you need the prep you need to do, and you’re on your way to enjoying the best turkey you’ll ever eat!
Audio Player
When it comes to cooking a turkey, what you do before it goes into your oven makes all the difference in the world.
Don’t be intimidated by the thought of cooking a turkey. Because I’m here to share my dry brining and roasting methods to make your holiday turkey the star of the holiday dinner
There are different thoughts on brining a turkey, with the choices being wet brine or dry brining. While both techniques will help you cook the most succulent turkey you’ve ever had, the smartest, easiest way to achieve the best results every time is with a dry brine.
It doesn’t matter if this is your first Thanksgiving dinner, my dry-brine method will make you look like a seasoned veteran of Thanksgiving and turn out an impeccably juicy, flavorful bird.
If you’re looking for a non-traditional dessert for the holidays, my Tiramisu will be the perfect ending to your holiday meal.
Ingredients
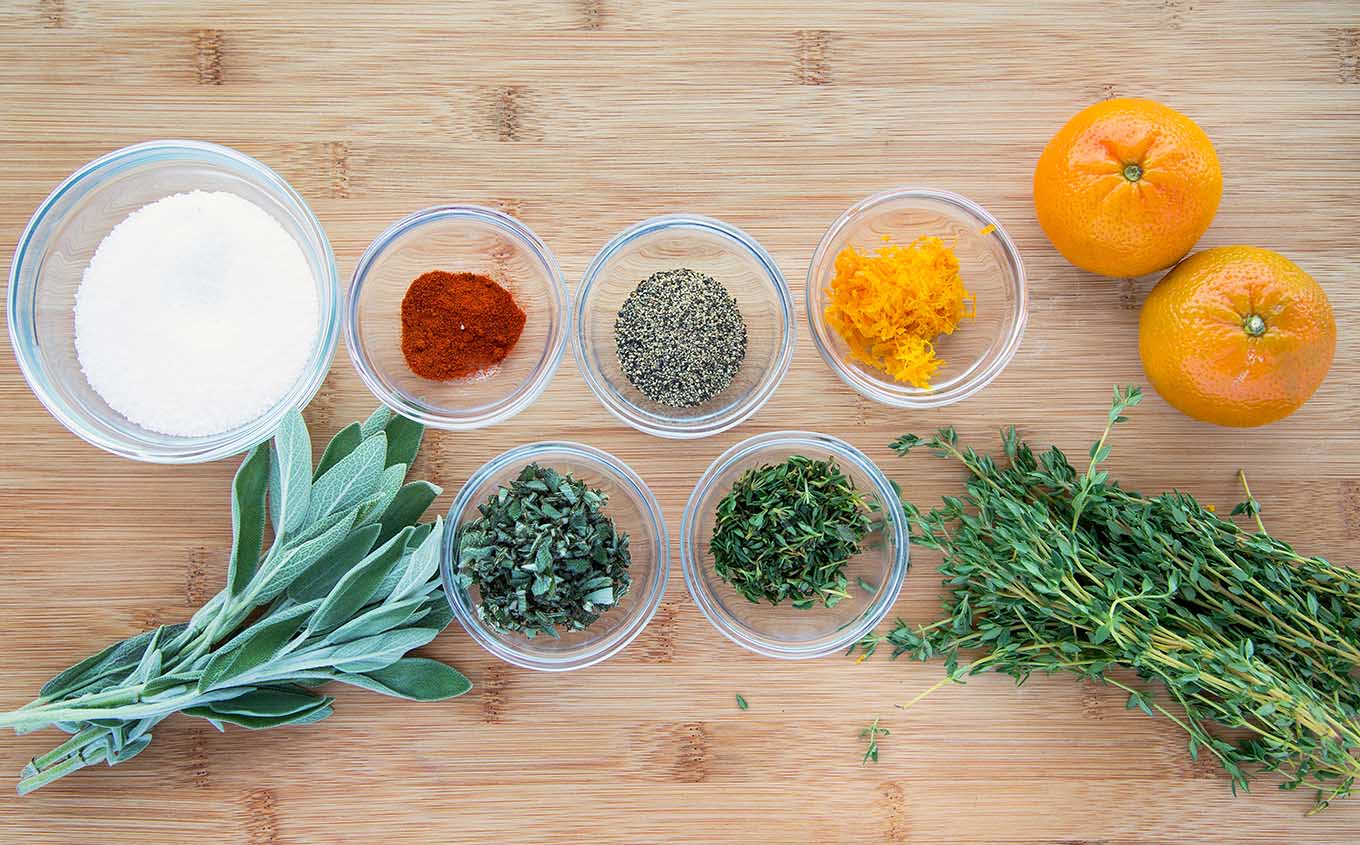
Let’s start by gathering the ingredients we need to dry brine our turkey. In Chef Speak, this is called the Mise en Place, which translates into Everything in its Place.
Not only does setting your ingredients up ahead of time speed the cooking process, but it also helps ensure you have everything you need to make the dish.
- Kosher Salt
- Black Pepper
- Smoked paprika
- Citrus zest
- Fresh thyme
- Fresh Sage
Do I have to use specific herbs and spices to dry brine a turkey?
That’s a tricky question because if you want a traditional Thanksgiving turkey, the answer is yes.
But If you like specific flavorings and aren’t into traditional Thanksgiving flavors, then by all means, have fun substituting spices that you like.
Recipes should be used as guidelines, and in all honesty, the salt is the only ingredient you really need for dry brining; the rest are added for flavor.
Why Should I dry-brine my turkey?
When you’re dealing with a large piece of meat like a whole turkey, it’s easy to overcook it into a dry, flavorless disaster. Dry Brining gives the dry brine mixture time to penetrate into the meat.
Dry brining (dry rub) is a way to inject both flavor and moisture into a turkey, giving you a flavorful, moist, roasted turkey.
Rule #1 of Dry Brining
The larger the piece of meat, the more time is needed for the brine to be effective.
A dry brine, also called pre-salting, involves rubbing the salt, seasonings, and/or sugar directly onto the meat and skin and then letting the meat rest in the refrigerator for a period of time before cooking. During the process of dry brining, the salt draws out the juices through osmosis.
As the salt dissolves into the juices, it begins turning into a natural brine without any added liquid. This Natural brine is then reabsorbed into the meat and starts breaking down the tough muscle proteins. That is why this process needs up to 3 days to complete.
How to thaw a frozen turkey
The best way to thaw your turkey in the refrigerator in its original packaging. General defrosting times are 24 hours for every 4 pounds of Turkey.
If you have no choice and must thaw your turkey quickly, fill the kitchen sink with cold water and put the turkey in it, breast side down.
Make sure to completely submerge the turkey in water (in its original packaging) for the quick thaw method. Make sure to change the water every 30 minutes. This defrosting method will take 30 to 40 minutes per pound of turkey.
*When finished thawing the turkey, make sure to clean and disinfect the sink, spigots, and all surrounding surfaces.
*Don’t leave the turkey out to thaw on the countertop.
Chef Tips
- Don’t buy a preseasoned or kosher turkey (pre-salted) or self-basting turkeys. I always look for free-roaming or a heritage bird. But most importantly, no added salt.
- Make sure your turkey is thawed if you buy a frozen turkey. *Buy your turkey early enough so that it’s thawed and ready to brine on the Monday before Thanksgiving.
- It doesn’t have to be a whole turkey; you can dry brine a turkey breast.
- Getting under the skin of the turkey and applying the brine directly to the meat will make a tastier, moister turkey. If you’re only going to brine the skin, try and brine it for the full 72 hours.
- Don’t rush dry brining. To enjoy the best turkey you’ll ever have, you need to give it enough time to be effective. 2 days is the minimum, and can go as long as four days if you’re working with a 20-pound plus bird. *Any length of time you can brine the turkey is better than not brining the bird.
- You can use any herbs that you like, but the salt really does matter. Use Morton’s Kosher Salt for the best results. Diamond Kosher salt is a larger grain; if you use Diamond, increase the amount of salt by half. Don’t use table salt, it’s too fine and will make the turkey too salty.
- If you don’t have Kosher Salt, you can use Coarse Sea Salt or Coarse Himalayan Pink Salt because of the size of the coarse grains.
*The standard is one tablespoon of salt for every 5 pounds of turkey, but I like to go a little below that at one tablespoon of salt for every 6 lbs. So if you’re turkey is smaller, adjust the amount of salt and herbs.
Does it Matter Where I Apply the Mixture?
It does make a difference where you apply the dry brine. Separating the skin from the meat so that some of the dry brine can be rubbed directly on top of the meat (below the skin) will give you the best results.
If you apply the brine directly on the skin, it will need more time to penetrate the skin and get to the meat. The breast will also get more of the dry brine than the rest of the turkey. The turkey breast has the largest amount of meat on a conventional turkey.
- After applying the dry brine, place the turkey breast side up in a roasting pan. Cover the turkey securely using plastic wrap. Or place it into a small plastic bag and seal it, removing as much of the air as possible. Refrigerate for 48 – 60 hours.
- Remove the plastic wrap and keep it refrigerated uncovered for the last 12 hours of brining. This will help crisp the turkey skin.
Can I use Dry Herbs?
Yes, you can, although I prefer fresh herbs. You can find them at most grocery stores in convenient little plastic containers. If fresh herbs are not available, by all means, use dry herbs. You can also add any other herbs or aromatics that you like.
Should I cook a Heritage Turkey Differently?
A heritage turkey is more elongated with drumsticks that are a good 1 to 2 inches longer than a modern bird, extending well beyond the tip of the breast.
Because of its more elongated shape, a heritage turkey cooks a little more quickly than a conventional turkey, so the biggest danger is overcooking. To make sure your Heritage Turkey is not overcooked, follow my recipe and change the cooking times.
Roast an unstuffed turkey at 425° for 20 minutes, then turn down the temperature to 325°F until the internal temperature of the thigh meat reaches 155°F.
Cooking 15-20 minutes per pound for the total cooking time. That being said, I would start checking the internal temperature 2 hours after the second phase of the process using an Insta-read thermometer in the thigh.
Also, make sure to allow 1-½ lb. per person compared to about one lb. for a conventional turkey. As an example, expect a 12-lb. heritage turkey to feed about eight people. Also, keep in mind that you’ll have as much dark meat as light meat. A conventional turkey will have more white meat.
Chef Tips for Roasting
- Set your oven rack in the bottom third of the oven.
- Let the turkey sit out of refrigeration for about 30 minutes so it can come to room temperature before roasting.
- Allow the turkey to sit at room temperature for one hour before roasting. **Do Not Rinse The Brine Off Turkey
- Start off roasting the turkey at 425°F, and roast upside down for the first 45 minutes. At the end of that time, very carefully turn the turkey over with the breast side up to continue cooking.
- You’ll find that some ovens have cold spots. This is why it’s a good idea to rotate the turkey halfway through and baste for even cooking and browning. Keep some turkey or chicken stock handy in case your turkey doesn’t produce enough juice during the roasting process, and use that for basting if necessary.
- Always use an instant-read thermometer to ensure that your turkey has been cooked properly. Insert the thermometer into the thickest part of a thigh without touching the bone registers. Your turkey will be done when the thermometer reaches 165°F. It will continue to cook once you remove it from the oven, increasing by another 10 degrees.
- Let the turkey rest for 20-30 minutes before carving.
I absolutely love my Meater Plus | Smart Meat Thermometer. It takes all the guesswork out of cooking meats in the oven, on the grill, or in a smoker.
Do I have to start the turkey upside down?
No, you don’t. Safety should always come first and if you don’t think you can flip the turkey safely, skip that step. Still use the instruction for roasting starting at 425 degrees, then lowering to 325 degrees.
**If you do flip the turkey, take the pan out of the oven first. Don’t attempt this while the pan is in the oven.
You might also find heat-resistant gloves a good option. They’ll come in handy throughout the year.
Can I still Dry-Brine a Self-Basting or Kosher Turkey?
No, you can’t. That will make the turkey too salty! What you can do, is leave the salt out of the dry-brine ingredients and use the remainder of the seasonings as a dry rub. Feel free to add in your favorite spices.
Apply the dry rub for 24-36 hours and follow the roasting instructions.
My Turkey has been injected with a saline solution can I still use a dry brine?
While it’s not a good idea to add more salt to an injected turkey, you can still use the dry brine method. If your turkey is in the 15-pound range cut the Kosher Salt down to 1 Tablespoon. If your turkey is under 15 pounds reduce the salt accordingly. You can use the rest of the ingredients as stated in the recipe.
Why shouldn’t I stuff my turkey?
I know that the stuffing from inside the turkey is the best you’ll ever have. But it’s not a practice I recommend for two very important reasons.
The stuffing sucks a lot of the moisture (and flavor) out of the turkey. That’s why a stuffed turkey is often dry and overcooked. And the really bad news is, it puts us at risk for foodborne illness.
The longer it takes the turkey to reach an internal temperature of 165 degrees gives bacteria more time to multiply. And that means that uncle Sal (salmonella) might be paying you and your guests an unexpected holiday visit, which will definitely put a damper on the festivities.
**Stuffed turkeys also take longer to cook.
If you have leftover turkey, try my Old Fashioned Turkey Croquettes.
If you’re looking for a new Chef Knife, check out Misen. I’ve been using their kitchen knives for years!
Recipe FAQs
Dry-brining, also referred to as salting, is the process of rubbing the meat down with salt. The natural moisture content of the meat creates a concentrated brine that is naturally absorbed back into the meat before cooking.
A whole turkey needs two to three days of brining time. The dry-brining can be done days before Thanksgiving, giving you extra time on Turkey Day.
For the last 24 hours of the dry brine, leave the turkey uncovered in the refrigerator. This will dry out the skin, which in turn gives you incredibly crispy, golden-brown skin on the finished turkey.
Recipes to serve with turkey!
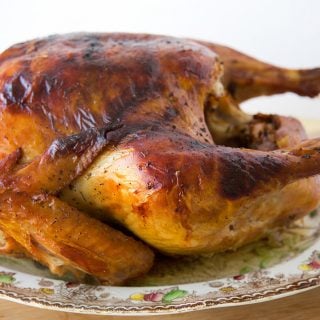
How to Dry Brine a Turkey
Ingredients
Dry Brine Ingredients
- 3 tablespoon coarse kosher salt I use Morton's Kosher Salt (coarse grain sea salt may be used)
- 1 tablespoon coarse grind black pepper
- 1 tablespoon thyme finely chopped fresh or dry
- 1 tablespoon sage finely chopped fresh or dry
- 1 tablespoon clementine peel finely zested any citrus may be used
- 1 teaspoon smoked paprika optional
Roasting Turkey
- 1-2 carrots rough cut
- 1 onion rough cut
- 3-4 stalks celery rough cut
- 2 cloves garlic peeled
- 16-20 lb turkey fresh or frozen
- rough cut onion, carrot, sage, thyme and orange skin for inside the turkey (optional)
Instructions
Prep and Dry Brining
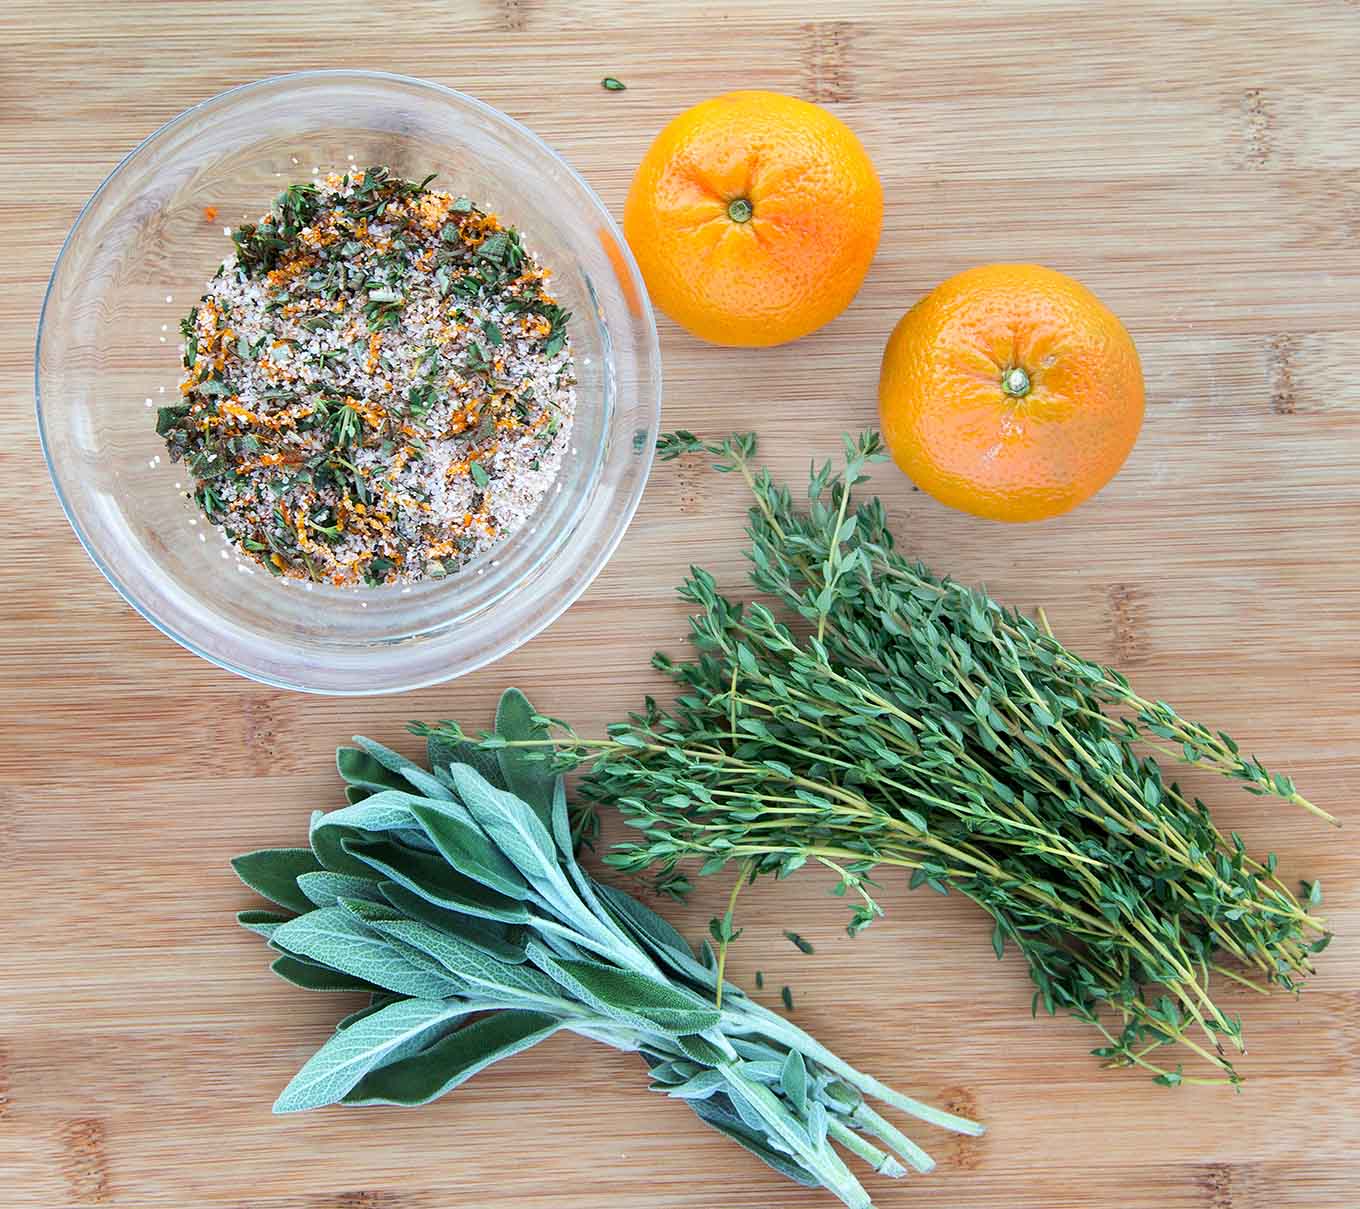
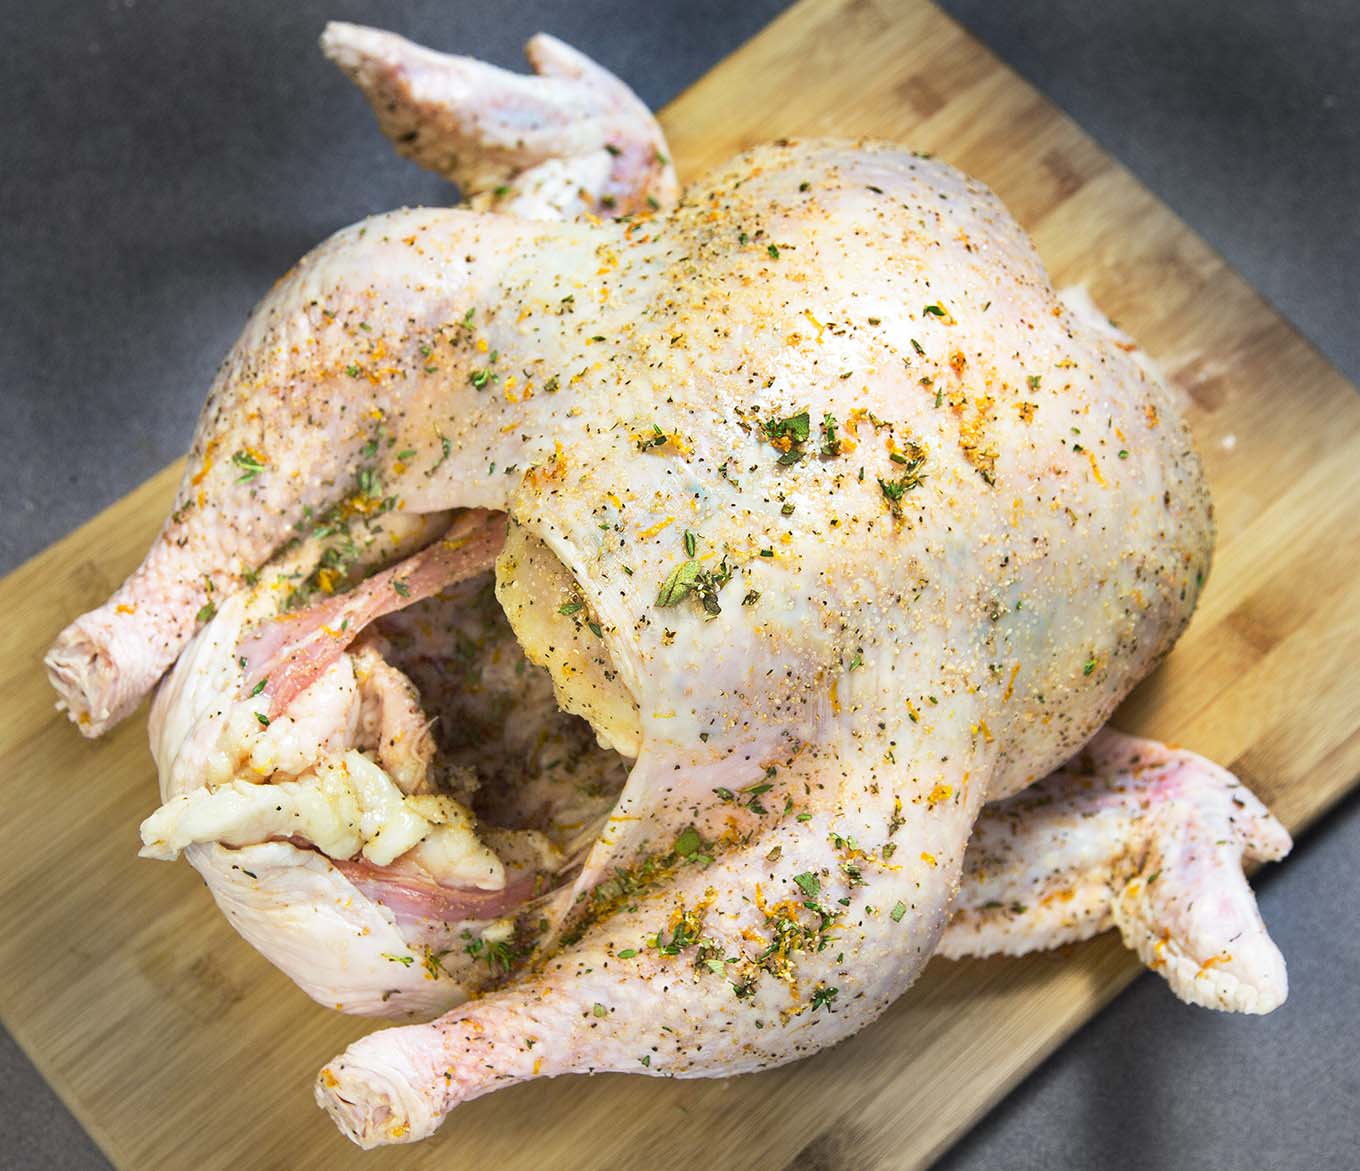
- Mix the dry brine ingredients together in a small bowl and set aside
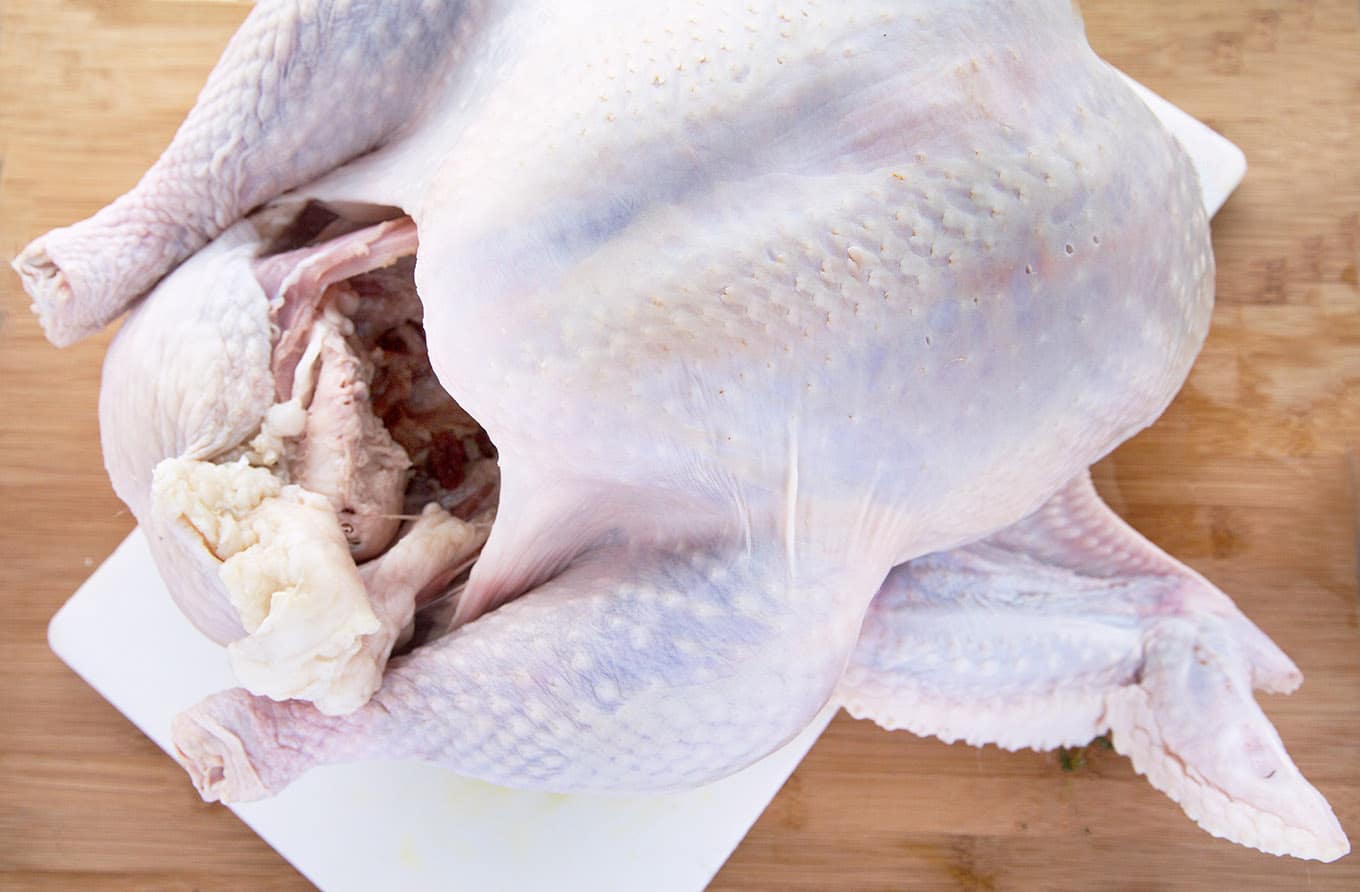
- Remove the turkey from the wrapping and remove the giblets and neck from inside the cavity and save for another use. Remove or discard any plastic or metal cages or pop-up thermometers.
- If you can follow safe procedures, rinse the entire turkey in cold water thoroughly. Then pat the turkey dry using paper towels, inside and out. The FDA Does Not Recommend Rinsing Turkeys. If you do rinse your turkey make sure to clean and sanitize the counters, sink, faucet and any areas possibly exposed.
- Using your hands, gently loosen the skin over the breast and separate it from the meat, making sure to break through the thin membrane between the skin and breast while leaving the skin itself intact.
- Sprinkle 2 teaspoons of the salt mixture into the cavity of the turkey and rub it into the cavity.
- Rub 4 teaspoons of the salt mixture into the meat of the breasts (under the skin). Then sprinkle the remaining salt mixture over all the skin of both the breasts, legs and wings
- Place the turkey breast-side up in a roasting pan. Cover the turkey securely using plastic wrap, or place it into a small plastic bag and seal it, removing as much of the air as possible. Refrigerate for 48 – 60 hours.
- After the time has expired, uncover the turkey and allow it to remain uncovered and refrigerated for 8-12 hours.
The Secret to Roasting
- Allow the turkey to sit at room temperature for one hour before roasting.**Do Not Rinse The Brine Off the Turkey
- Preheat the oven to 425º.
- In the bottom of your roasting pan add roughly cut celery, onions, garlic, and carrots. Include the skin from the onion and carrots. Add 1 cup of chicken broth or water to the pan.**You can also place some aromatics inside the cavity of the turkey before cooking. Onions, carrots, herbs of your choice, orange peel and any other spices you like.
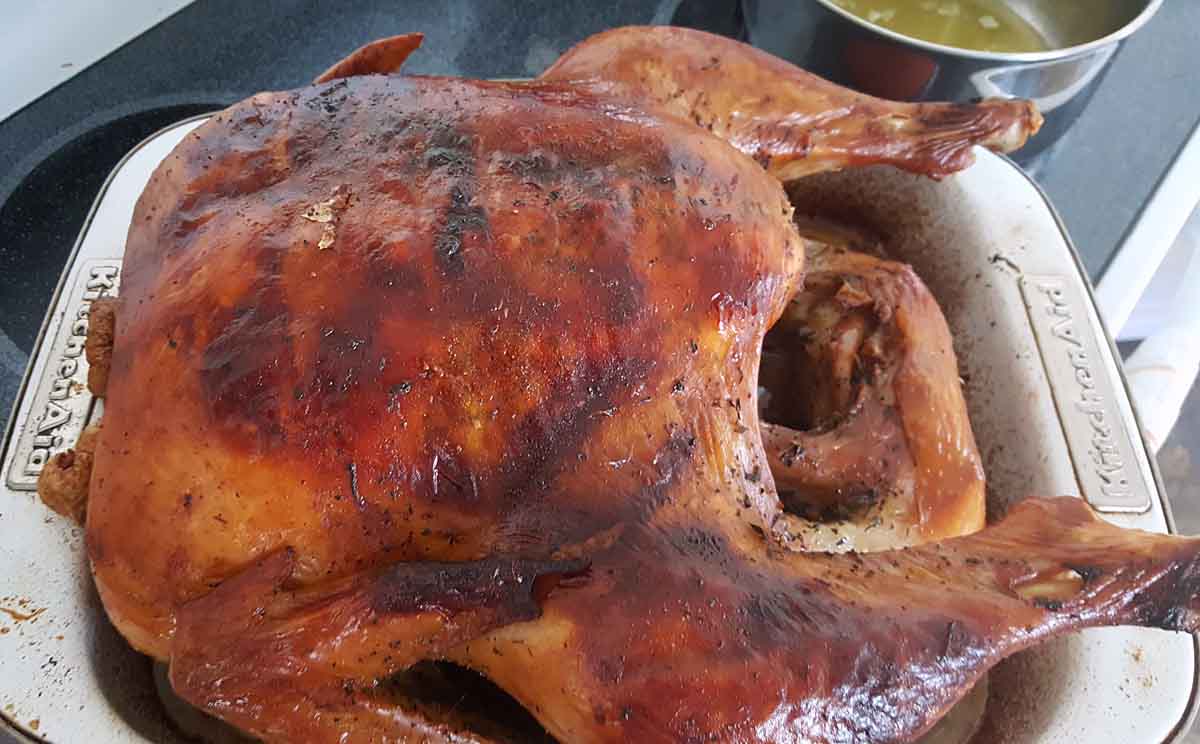
- Place the turkey upside down on a rack in a roasting pan. This will allow the turkey to self baste the breast as the fat from the underside and dark meat flow into the breast.**If you don't feel comfortable turning the hot turkey, cook your turkey right side up for the entire process. The breast meat won't be quite as moist, but it's not a deal-breaker. Safety First!
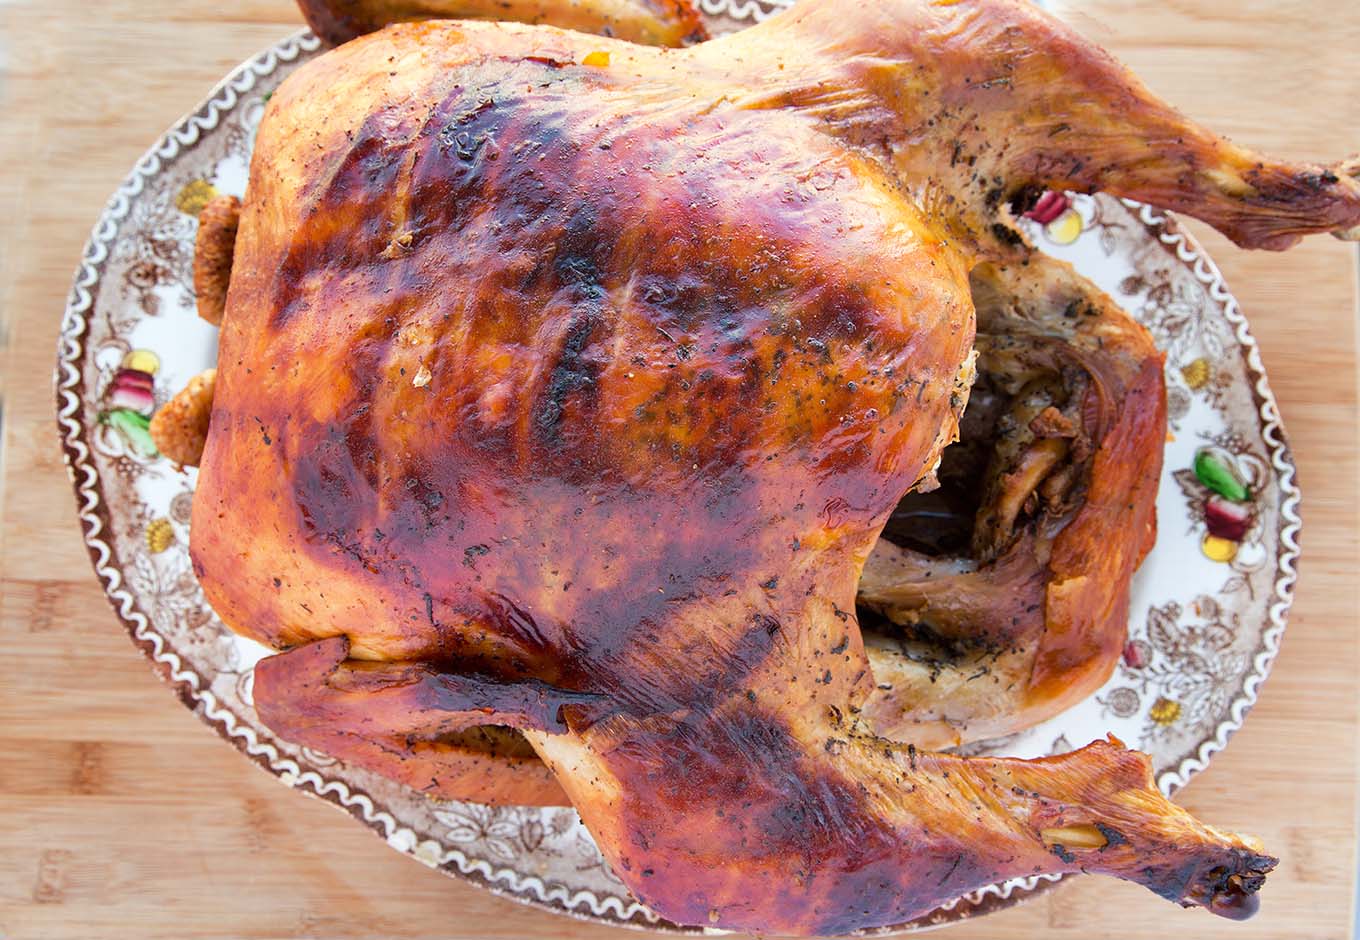
- Brush the turkey with melted butter and roast upside down for the first 45 minutes. At the end of that time very carefully turn the turkey over with the breast side up to continue cooking. ( I used heat resistant gloves) Brush again with melted butter if you like.Decrease oven temperature to 325º. Cook the turkey until it reaches the temp of 165º for the breast and 175º for the thighs. The meat will rise an additional 10º continuing to cook as it rests.*My 20-pound turkey only took an additional 3 hours to cook using this method. Make sure to check your turkey around the 2 ½ hour mark.
- Allow the turkey to rest 30 minutes before slicing. This will ensure that the juices stay in the turkey and don't all run out as you slice it.
Video
Notes
Dry Brining Turkey Tips
- Don’t buy a preseasoned or kosher turkey (pre-salted) or self-basting turkeys. I always look for free-roaming or a heritage bird. But most importantly no added salt.
- Make sure your turkey is thawed if you buy a frozen turkey. Buy your turkey early enough so that it’s thawed and ready to brine on the Monday before Thanksgiving.
- It doesn’t have to be a whole turkey, you can dry brine a turkey breast.
- Getting under the skin of the turkey and applying the brine directly to the meat will make a tastier, moister turkey. If you’re only going to brine the skin, add an extra day to the process.
- Don’t rush dry brining. To enjoy the best turkey you’ll ever have, you need to give it enough time to be effective. 3 Days really is the minimum, 4 is even better especially if you’re working with a 20 pound plus bird.
- You can use any herbs that you like, but the salt really does matter. Use Kosher Salt for the best results. Salt that is too fine will make the bird too salty. Kosher salt, say it out loud, twice.
- The standard is 1 tablespoon of salt for every 5 pounds of turkey, but I like to go a little below that at 1 tablespoon of salt for every 6 lbs. So if you’re turkey is smaller adjust the amount of salt and herbs.
- Add more water to roasting pan if necessary to prevent pan drippings from burning.
- If you absolutely don’t have Kosher Salt and have to use Regular Salt decrease the amount of the salt by ⅓.
Helen Corey says
I feel so dumb. I read remarks after I put spice mixture as written in recipe on my 14lb turkey. I should have adjusted seasoning to accommodate smaller turkey than recipe called for. I just put over spiced turkey in fridge. Should I do anything to reduce spices midst dry brining turkey or hope guests like salty turkey? Help!!!!
Chef Dennis Littley says
hi Helen
it really won’t make the turkey too salty, but you can wipe off some on the exterior of the turkey, Use a clean wet cloth.
The usual amount most recipes suggest is 1 tablespoon per 5 pounds of turkey, so you’re really not far off. I just like a little less salt in my recipe.
Lindsey says
My Turkey is 22 lbs. What would be the cook time for that large of a turkey?
Chef Dennis Littley says
hi Lindsey
It should only add 20 minutes or so to my cooking times since I did a 20 lb bird.
If at all possible use a meat thermometer and start checking your turkey around 2 1/2 hours into the second phase of roasting (after the initial 45 stage at 425) It will more than likely still need more time but ovens are all calibrated differently and it’s always better to check it earlier than risk overcooking.checking the temperature
Melissa says
Hello,
I found this recipe online. I bought a 22 lb turkey. You say it only took you 3 hours to cook. I’m guessing that’s not including the 45 minute preheating step. Also, when you say to preheat at 425 degrees and roast upside down on the rack, is it ok if my oven doesn’t have the button that says “Roast”? Can I press the “Bake” button and do the same steps? Will it take more time to actually roast? Hope you see this question soon! Thank you!
Chef Dennis Littley says
hi Melissa
yes bake is good, you are roasting in the oven, that’s just the cooking process when it comes to meat.
And yes 3 hours after the initial 45 minutes. If at all possible use a meat thermometer and start checking your turkey around 2 1/2 hours into the second phase of roasting. It will more than likely still need more time but ovens are all calibrated differently and it’s always better to check it earlier than risk overcooking. Since your turkey is a little heavier it may take a bit longer.
Melissa says
Hi Dennis,
Thank you for answering back. I was freaking out because after I sent the comment, it didn’t show up on the page and I decided to just check the comment section to see if you got the comment and responded. So thank you for that.
My new issue that I am facing now is that I defrosted the 22lb turkey in the fridge from 5PM Friday 11/16 until 1AM Monday 11/19. I dry brined it last night. Only thing was I can’t take off the plastic that holds the legs together. It is still frozen inside. I was able to take out the heart, gizzard, and liver in the package in the neck cavity. I also was able to separate the wings from the body. I can’t take out the neck because it is frozen in the stomach cavity. I did brine the inside with the 2 tsp of dry brine and rubbed it in even though it was frozen inside. Some brine is better than nothing. I covered it with Saran Wrap and put it in the fridge overnight. Today around 12noon, I took it out of the fridge and am letting it sit outside on the countertop for a few hours. Is it ok for it to still be defrosting with the dry brine on it? Will it be fully defrosted by 10am on the 22nd? How do I speed up this process of defrosting it, with the dry brine on it, and least risk of salmonella? Please answer back soon, I’m freaking out. FYI, this is my first turkey and thanksgiving at my house with 14 hungry people haha no pressure
Melissa says
Dear Clef Dennis,
I replied back but I haven’t seen a response from you yet to my. Ew comment and could really use your help. Hope you see this!!!
Chef Dennis Littley says
hi Melissa
Your best bet now is to just get it thawed as quickly as possible and that means in cold running water.
Forget the brine and just get it thawed, and then reseason it, but cut the kosher salt down to 1.5 tablespoons. Follow my roasting techniques and although you won’t have the benefits of the dry brine, following my techniques the turkey will come out moister and seasoning it well will have it be more flavorful.
If you can separate the skin from the breast, even if its tomorrow morning rub some of the seasonings into the meat under the skin. If you can’t do that, just season the outside really well.
Everything will be okay and next year you’ll be better prepared. Your turkey will be perfect and your guests are coming because they love you, not because you’re feeding them.
Sorry I didn’t answer sooner my wife had me outside working.
trisha says
This is my first time with dry brine – are fresh or dry herbs best? And just to confirm the salt/brine is not to be rinsed off before roasting? I’ve seen some other recipes that wash it off…
Thank you,
Trisha
Chef Dennis Littley says
hi Trisha
I would use fresh herbs if at all possible, and you do not have to rinse the turkey.
wayne kemmet says
Chef Dennis I will be dry brining my turkey with your recipe. I have a 13 lb. turkey how long should you cook it at 425 then how long should you at 325 thank you again happy holidays
Chef Dennis Littley says
hi Wayne
I would cut the initial time at 425 to 30 minutes and then start checking your turkey after 75 minutes at 325. (It should take 75-100 minutes to finish, this all depends on your oven) A brined turkey will cook faster so I would suggest investing in a meat thermometer to make sure you don’t overcook. You want the thermometer to read 175 at the thigh meat.
Meryl Siff says
I thought 180 for thigh, 165 for breast. As you suggested in the original post. Thnks
Chef Dennis Littley says
I did just change that recently Meryl upon adding directions for a Heritage Turkey. For a conventional turkey, the internal temp at the thigh should be 175, at the breast 165.
ray wolter says
I wonder if it would be more effective if you would remove the skin? Maybe the salt and herbs would penetrate the carcass more?
Chef Dennis Littley says
You could remove the skin to get better absorption, but It will definitely affect the cooking and not something I would really recommend.
Lucie Johnson says
I am planning to boned my 12 lbs turkey this year. Can I brine it after the boning? or should I brine then bone it?
Thanks for the advice.
Chef Dennis Littley says
hi Lucie
After prepping the turkey you can still dry-brine it. I have tried this on a splatcook and pieces with good results.
Judy Tripp says
I’m planning to buy a fresh turkey. Everything I’ve read says to cook it within 2 days of purchase. If I buy the turkey Monday, brine Tuesday and Wednesday, will it be safe to eat when cooked on Thursday?
Chef Dennis Littley says
From what I understand you have 2-3 days to cook a fresh bird, but I would ask your supplier to make sure. I have not worked with fresh turkeys in years and never brined one. The best source of information will be the person you’re buying the turkey from they should know better than I.
Depending on what they tell you, you can always cut back the brining time if necessary. A fresh turkey will also cook faster, I would reduce the final cooking time to 325 and keep an eye on the internal temperature with a meat thermometer to make sure it doesn’t overcook and dry out.
Suzanne Hervey says
Are there different instructions for a Heritage Turkey? I worry about drying the meat out. Iam picking up a fresh 16 pounder tomorrow.
Chef Dennis Littley says
hi Suzanne
I would be more concerned with the cooking time for a heritage turkey. You will definitely reduce the time for cooking by about 30 minutes but the easiest way to tell is with a thermometer. You want the internal temp of the breast of heritage turkey to be at 155 degrees, which is less than a conventional turkey. I would also reduce the salt by 1/2 tablespoon
Chelly says
Though I don’t like it, my mom is relentless in her desire for a stuffed bird like grandma used to make (already tried suggesting stuffing afterwards… no sale). I anticipate 4- 5 hours for @20# bird and am wondering what u think the best way to go about this is. I brainstormed and came up with 2 ideas… 1) cook it 30 min longer before turning and cook to temp or 2) covering the breast with foil for the first hour after flipping the bird. Any suggestions or feedback on my ideas would be greatly appreciated & thank you
Chef Dennis Littley says
thats going to make it more difficult to turn, just be prepared and make sure you have insulated kitchen gloves with the extra weight it’s going to be precarious. The stuffing is going to suck the moisture out of the turkey so leaving it facing downward longer isn’t going to do as much. Also make sure not to salt the stuffing as much as normal since it will also pull some of the brine into it.
I would let it get almost as browned as you want and then cover it for the rest of the time, taking the foil off for the last 10 minutes or so.
Good luck with the process and please let me know how it turns out.
Chelly says
Thanks for your advice, my first attempt in roasting a stuffed bird was a smashing success (minus my unsuccessful dispute attempting to tuck the wings… wings won that battle, so I covered them with foil to win the war!). I let my 23# turkey normalize for a little more than an hour and mixed my bread stuffing at the last minute so it was piping hot going into the bird which directly went into the oven. The 45 minute turn went easier than expected and per your suggestion i foiled the breast at my desired color (@ 2.5 hours) An additional 2 hours and everything was good temp. Due to distractions and sharing space my total bake time was 5.25 but in honesty I think 4-4.5 would have been fine. I definitely look forward to trying your dry brine and roasting technique again now that ive successfully completed my maiden voyage (and learned a couple do’s and don’ts for next time!)
Chef Dennis Littley says
I’m happy to hear that you had success with your turkey and every time we cook we learn things. Next time you roast a turkey it will be even better!
Beth says
I have a 10lb turkey breast. What is your suggestion for adjusting the cooking times?
Chef Dennis Littley says
it should take about 2 hours Beth. Check it with a meat thermometer to make sure. It should be 165 degrees when you remove it from the oven.
deborah pryro says
how much kosher salt should i uses for a 15 ib turkey
Chef Dennis Littley says
hi Deborah
I would reduce the amount by 1/2 – 3/4 a tablespoon so use 2 1/4 – 2 1/2 tablespoons of Kosher salt
Chasity says
I’m doing a 9.5 pound bone-in turkey breast this year. I can use this recipe with it? It looks amazing & can’t wait to try it! Thank you!
Chef Dennis Littley says
hi Chasity
yes you can, just cut it half since the recipe is for a 20 lb turkey.
Kyle says
If using a frozen turkey, do you need to thaw first and then begin the brining process? How long would it take a 15lb frozen turkey to thaw?
Chef Dennis Littley says
Hi Kyle
Yes you do have to thaw the turkey first. It should take 2-3 days in your refrigerator.
Jane Reinsel says
How long at at each temperature for a 12-14 lb bird?
Thanks
Chef Dennis Littley says
hi Jane
for a 12-14 pound turkey I would reduce the overall cooking time 30-45 minutes. Reduce the first step by 15 minutes, then reduce the second 15 minutes checking the internal temp (165 degrees) and continue to roast an extra 15 minutes if necessary.
Jane Reinsel says
Thank you!!!!! I did a 20 lb bird last year, and it was AMAZING!
Jane Reinsel says
I made big 20 lb turkeys last year using this method for both Thanksgiving AND Christmas, and everyone loved it!
This year, however, I only need a 12 pound bird. How long should I cook it? The bigger bird cooked much quicker than normal, so how shortened will the time be for the smaller bird?
THANK YOU
Jane