• Skip to primary navigation
  • Skip to main content
  • Skip to primary sidebar
Chef Dennis
  • Recipe Index
  • On the Road
  • About
menu icon
go to homepage
  • Recipe Index
  • About
  • Contact
    • Facebook
    • Instagram
    • Pinterest
    • Twitter
    • YouTube
  • subscribe
    search icon
    Homepage link
    • Recipe Index
    • About
    • Contact
    • Facebook
    • Instagram
    • Pinterest
    • Twitter
    • YouTube
  • ×

    Home » Recipes » Bread Recipes

    Almost No-Knead Artisan Bread Recipe

    Published: May 10, 2020 · Modified: Mar 1, 2022 by Chef Dennis Littley

    1.3K shares
    • Facebook592
    • Yummly
    5 from 91 votes
    Jump to Recipe Jump to Video Print Recipe
    Pinterest image for Homemade Artisan Bread

    I’ve been making no-knead homemade artisan bread for the last 15 years and it’s always been good but never quite what I hoped it would be. It just wasn’t quite right.

    Of course, it was still delicious and we enjoyed the homemade bread, but it always left me thinking it could be better.
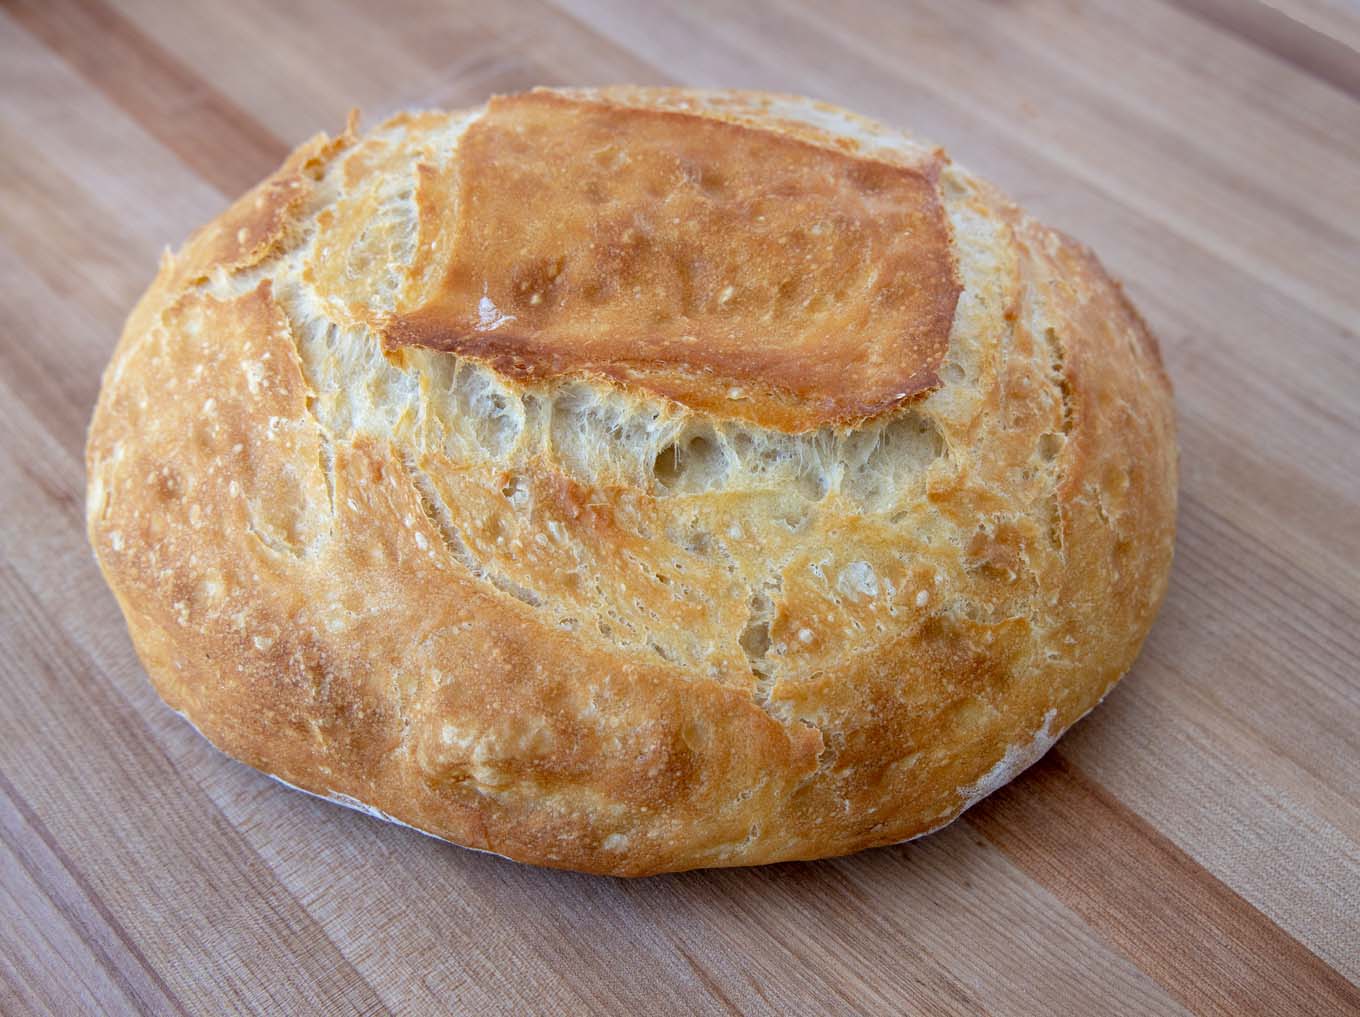
    loaf of homemade artisan bread on a wooden cutting board

    I’ve experimented with different quantities of yeast and salt. I’ve added sugar, honey and other types of flours to the recipe in my quest for the perfect no-knead bread recipe.

    Then one day I was watching a sourdough bread video, which was way too much work for a loaf of bread, but the technique that was used to knead the dough intrigued me. And I thought I would try that method with my much easier to make no-knead bread recipe.

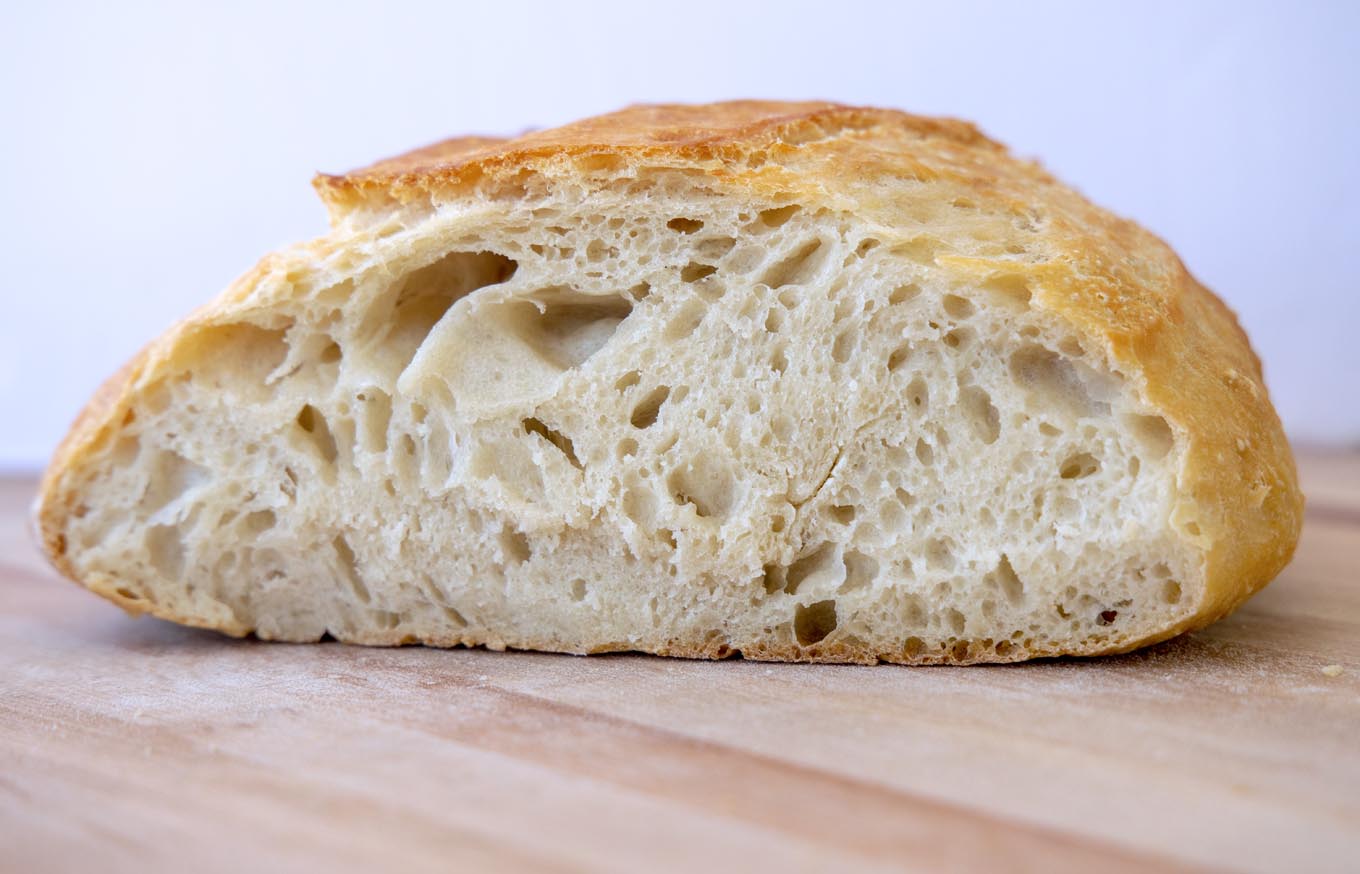
    side view of cut loaf of homemade artisan bread

    And it was amazing! The results finally yielded the bread I’ve been hoping to make for the last 15 years. It does require a small amount of kneading but it’s pretty darn easy to make.

    See all those little air holes, that’s what I’ve been missing in my no-knead bread all these years! It has a nice crisp crust, a lighter texture and a wonderful flavor.

    Ingredients to make Artisan Bread?
    This post includes affiliate links. As an Amazon Associate, I earn from qualifying purchases.

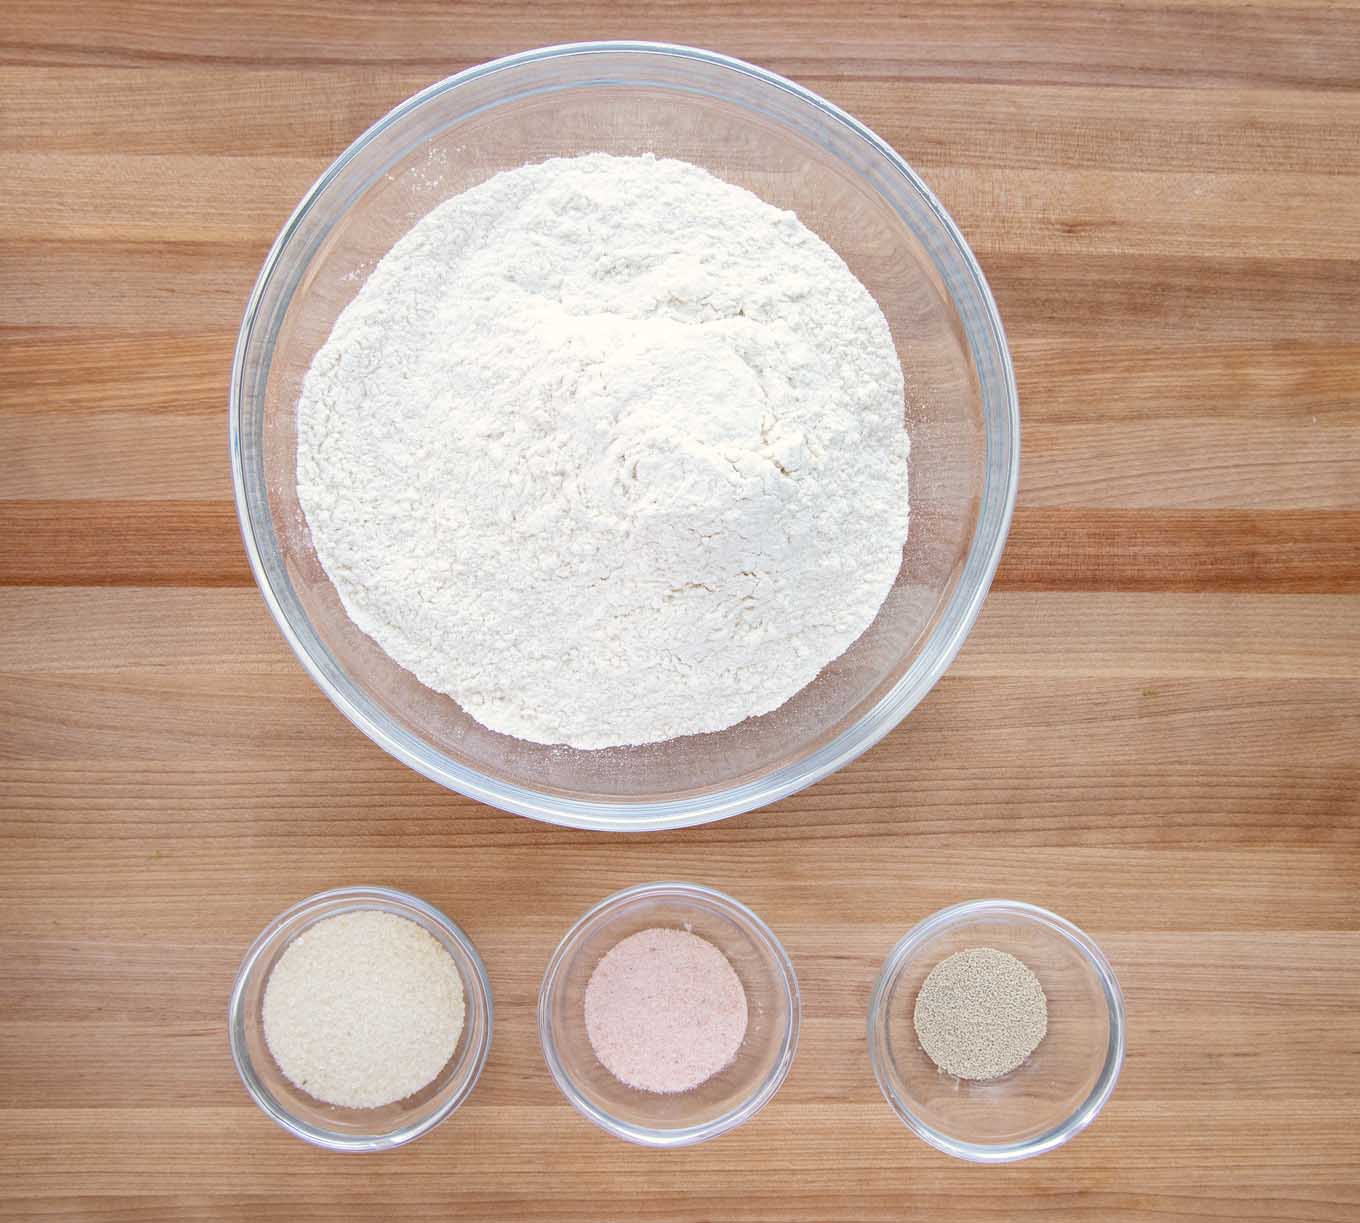
    Ingredients to make homemade artisan bread

    It’s a very short list of ingredients to make this perfect loaf of homemade artisan bread. All-purpose flour, sea salt, yeast and sugar are the only ingredients you need.

    I use Sherpa Pink Himalayan Salt in my kitchen. The other products I use are King Arthur Flour, Active Dry Yeast and Natural Cane Sugar.

    Why do I need sugar in my Bread Recipe?

    That’s a good question and one I had pondered until I spoke with a master baker about what each ingredient did to make the end result in the bread I wanted.

    Sugar has quite a few jobs and provides substantial improvements to yeast bread. It’s not an essential ingredient but it helps make a better loaf of bread.

    • Sugar provides an additional source of food for the yeast. The yeast converts this food to carbon dioxide and alcohol
    • Sugar (like salt) enhances the flavor of the bread
    • Sugar helps gives the crust that golden color we love
    • Sugar improves the crumb texture of the bread
    • Sugar helps retain moisture in bread and slows down the fomation of gluten strands, which helps keep the bread fresher longer

    Will sugar make the bread sweet?

    That’s a great question and the answer is no. We are not using enough sugar to make this a sweet bread. You won’t even notice it’s in the bread.

    Why do I need salt in my homemade bread?

    • Salt regulates the rate of yeast activity. It provides a slow and steady rise which is even more crucial in this semi no-knead bread. The slower rise gives the yeast time to develop the characteristic bread flavors we love
    • Salt also strengthens the gluten structure of bread dough. It keeps the trapped carbon dioxide bubbles to expand too quickly
    • Salt makes bread taste better

    How to make Artisan Bread
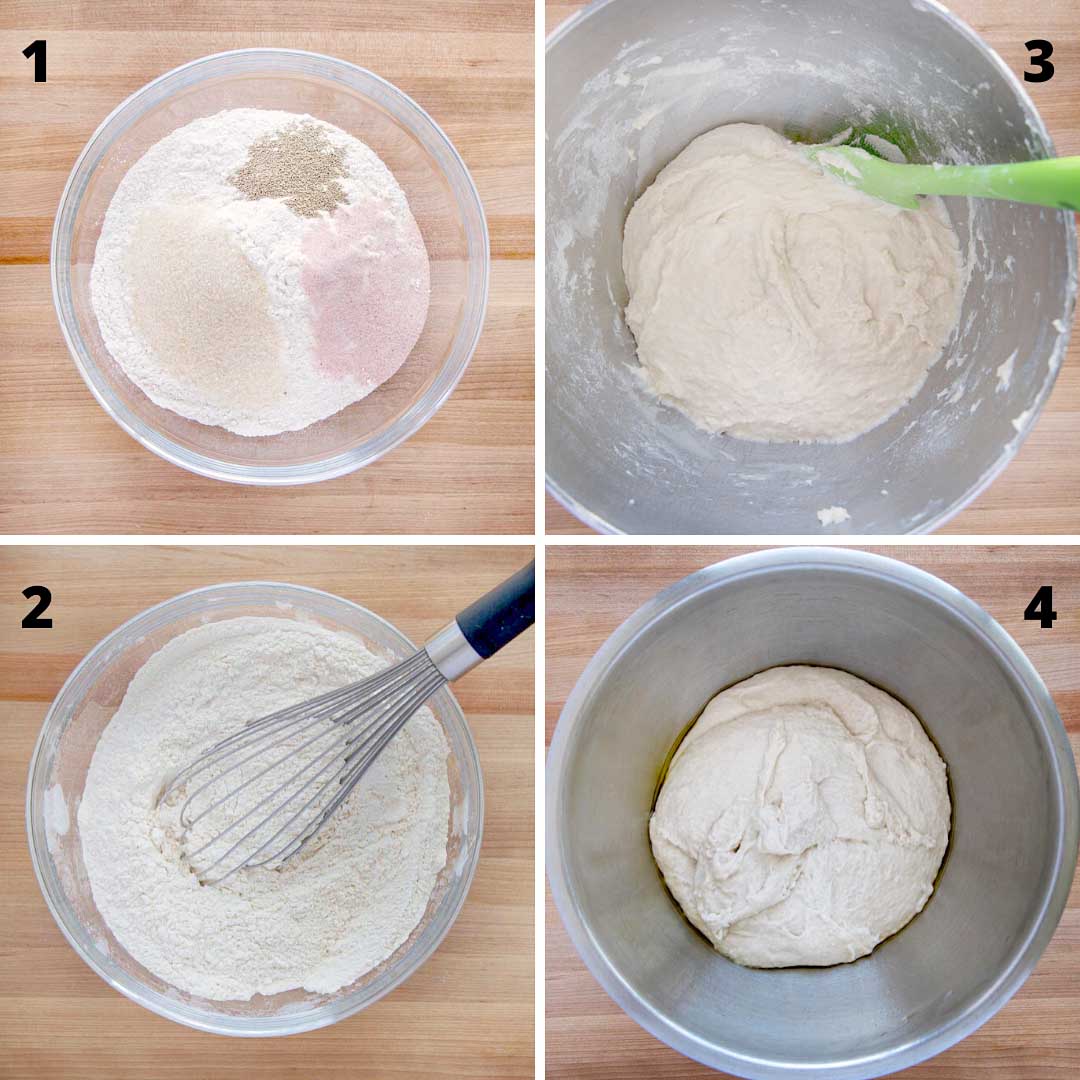
    collage showing steps to make bread dough

    The process is fairly simple and only takes about 10 minutes to make the bread dough and get it set up for the first rise.

    Following the recipe add the salt, sugar and yeast to the flour. Whisking it all together to make sure everything is equally distributed.

    Then in a stand mixer (or by hand) add in the water. Depending upon the brand of flour you use, you may need a little less or a little more water. So start with about ¾’s of the water adding more if needed. The dough should be a little wet and sticky.

    The last step is to place the bread dough in an oiled bowl and cover it with plastic wrap. Place the bowl on your counter away from drafts for the initial rise.

    The rise time will be 12 -16 hours.
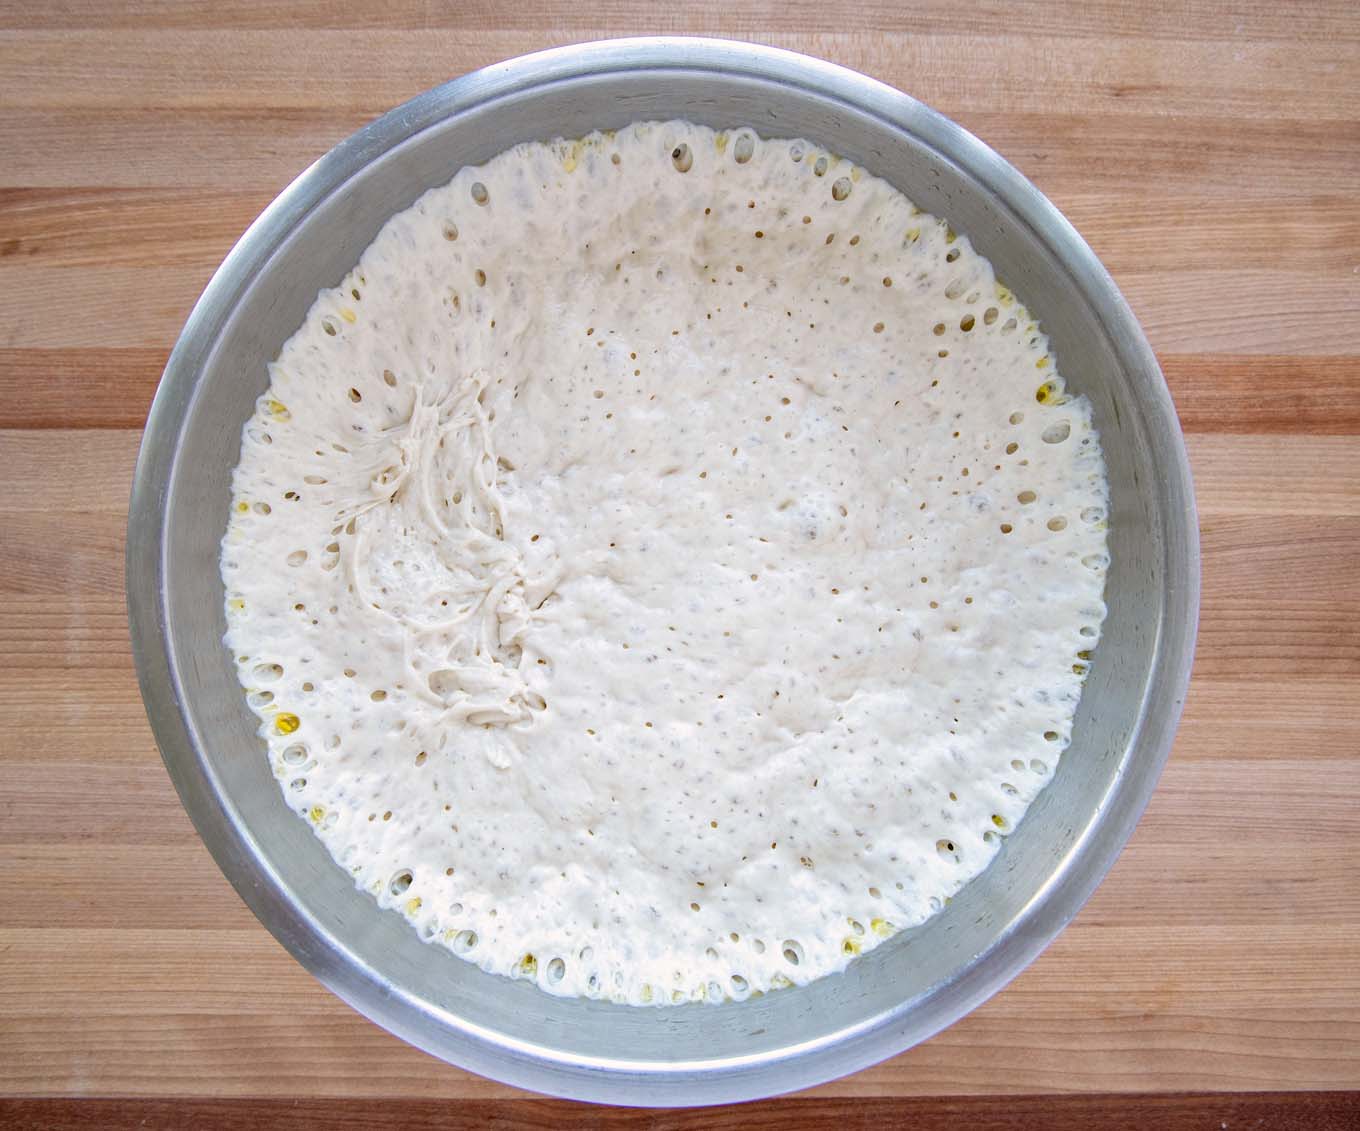
    bread dough in a metal bowl,  with bubbles after the first rise

    When the first rise is done, the bread dough should look like this. The dough may rise a little more, than fall a little. That’s normal, don’t worry.

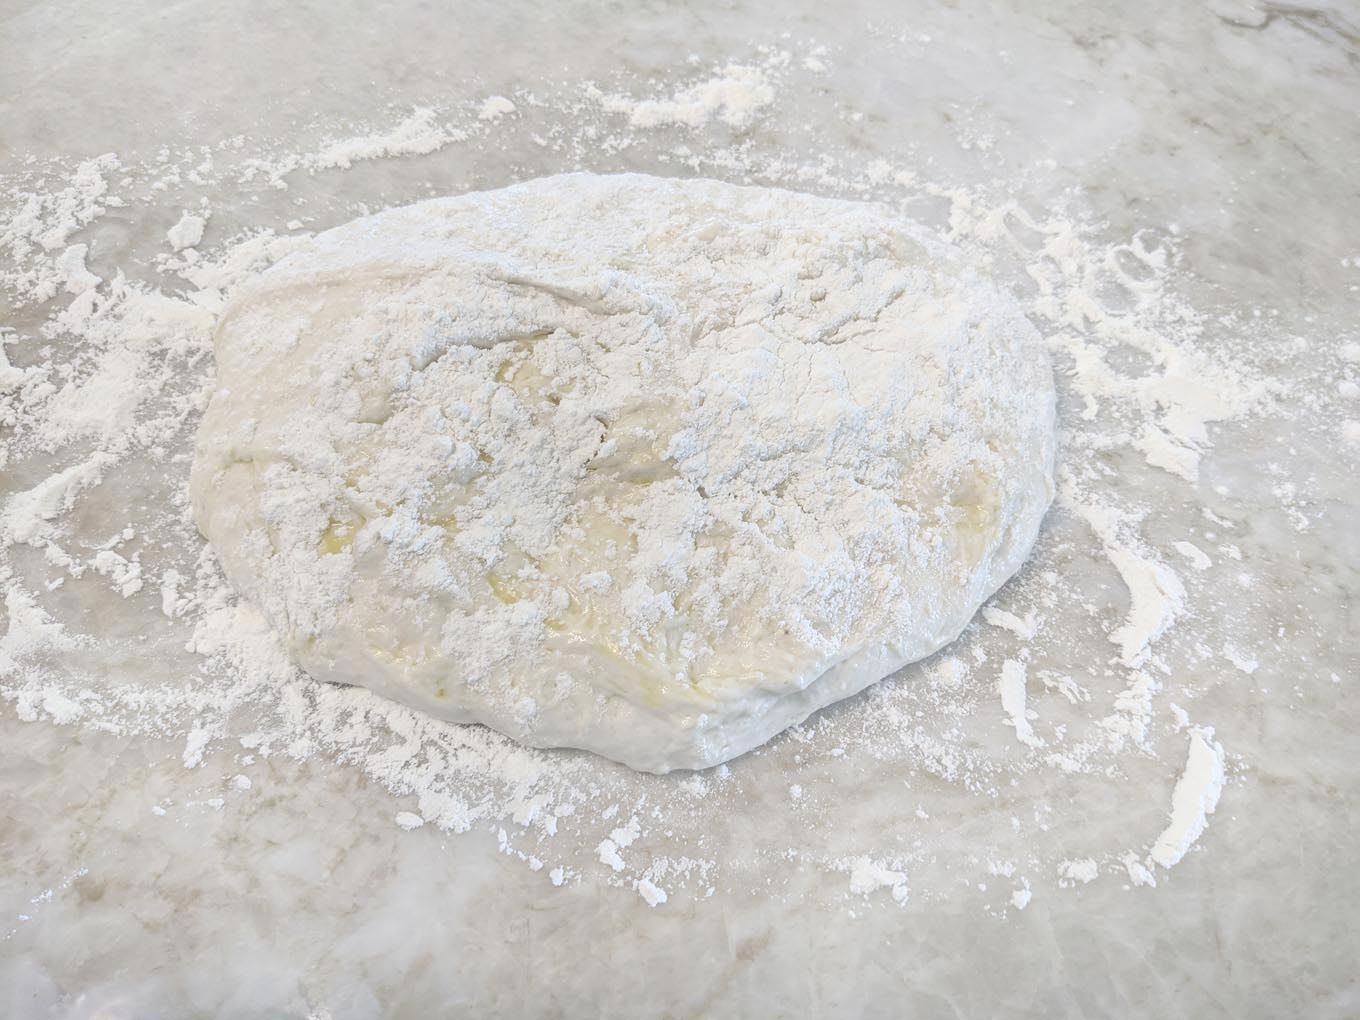
    bread dough floured on a marble counter top

    The first step is to lightly flour a countertop and place the bread dough on the floured area. At this point, you are going to begin adding additional flour to the bread until the dough is no longer wet and sticky.

    You don’t want the dough completely dry, but it should be easy to work with when you’ve added enough flour. This should take you about 5 minutes.
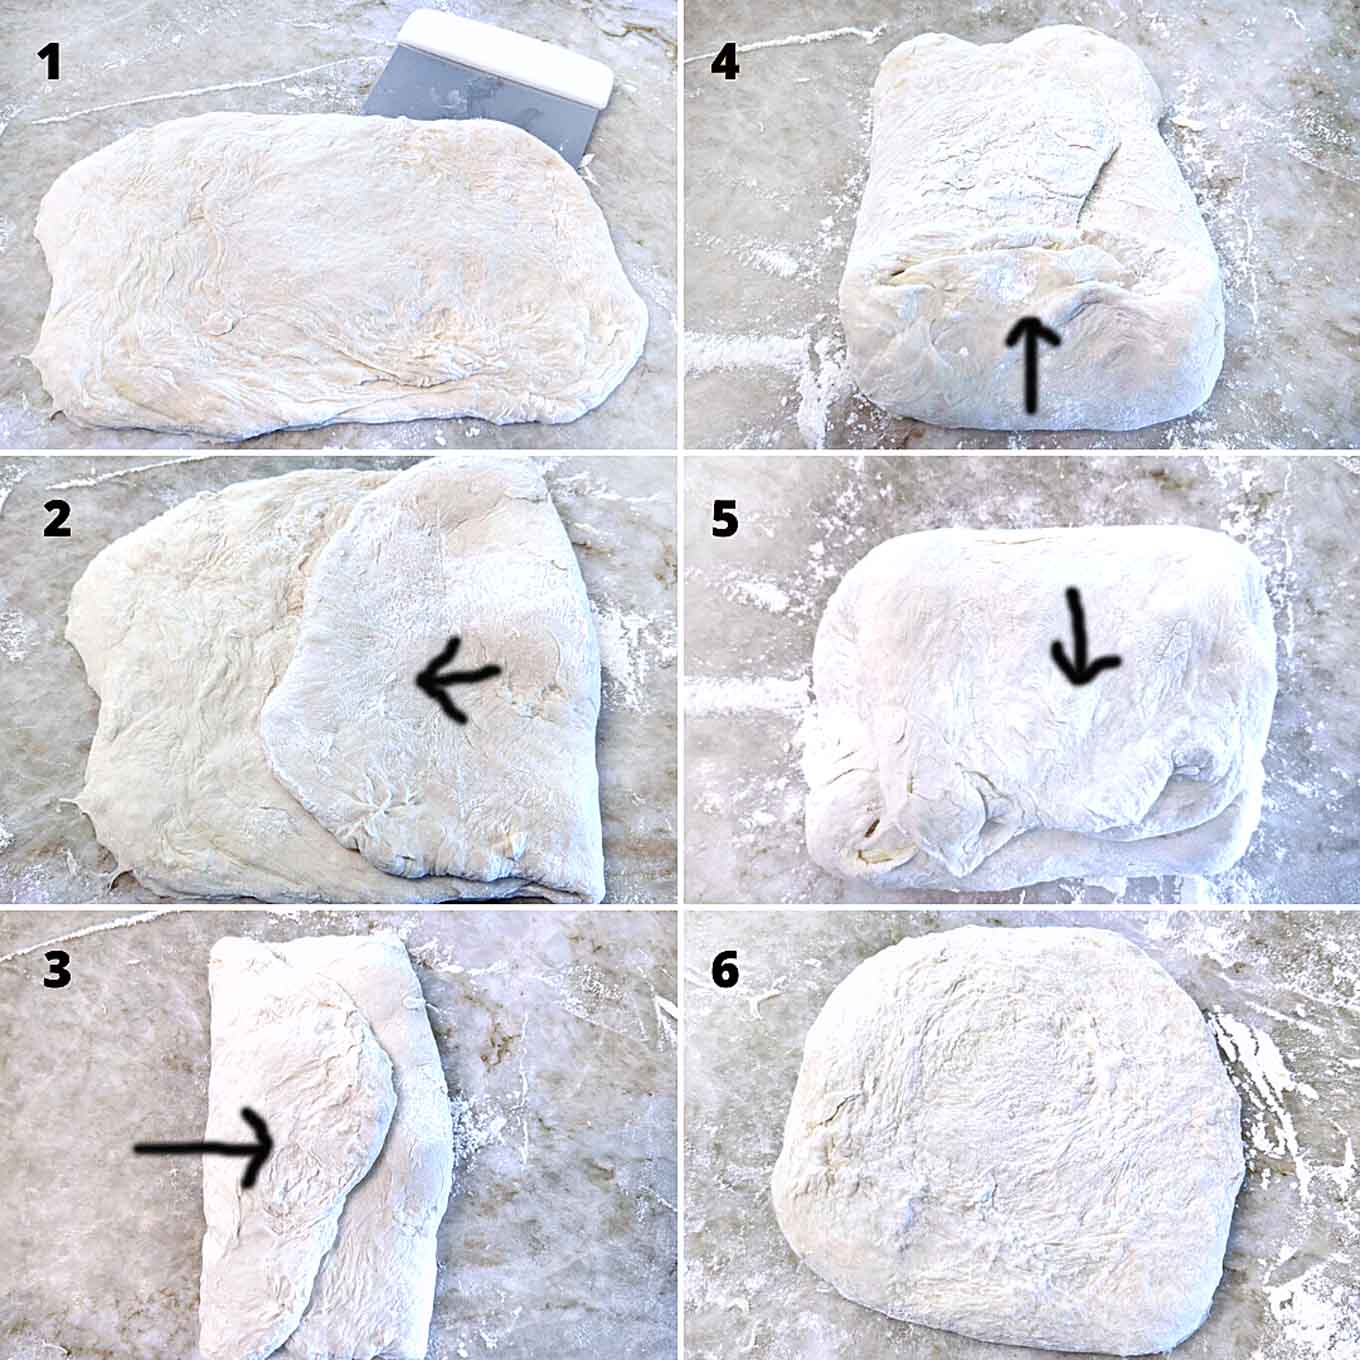
    collage showing the process of folding the bread dough

    The next steps are the folding process that will give the dough the textures and appearance we want.

    • On a floured surface flatten the dough out to make a rectangle
    • Fold over ⅓ of the dough to the center (you’re folding the widest part first as shown in the pictures above)
    • Fold over the other side of the rectangle overlapping the first fold of the dough
    • Continue the folding process by folding the bottom ⅓ of the dough upwards toward the center of the little package you’ve made
    • Now fold the top part of the dough down overlapping the fold you just made
    • Turn the dough over (seam side down) and make a disc or oblong loaf depending upon what shape bread you want to make.

    A Dough Scraper/Cutter will make the process easier and will help move the dough around without touching it all the time.

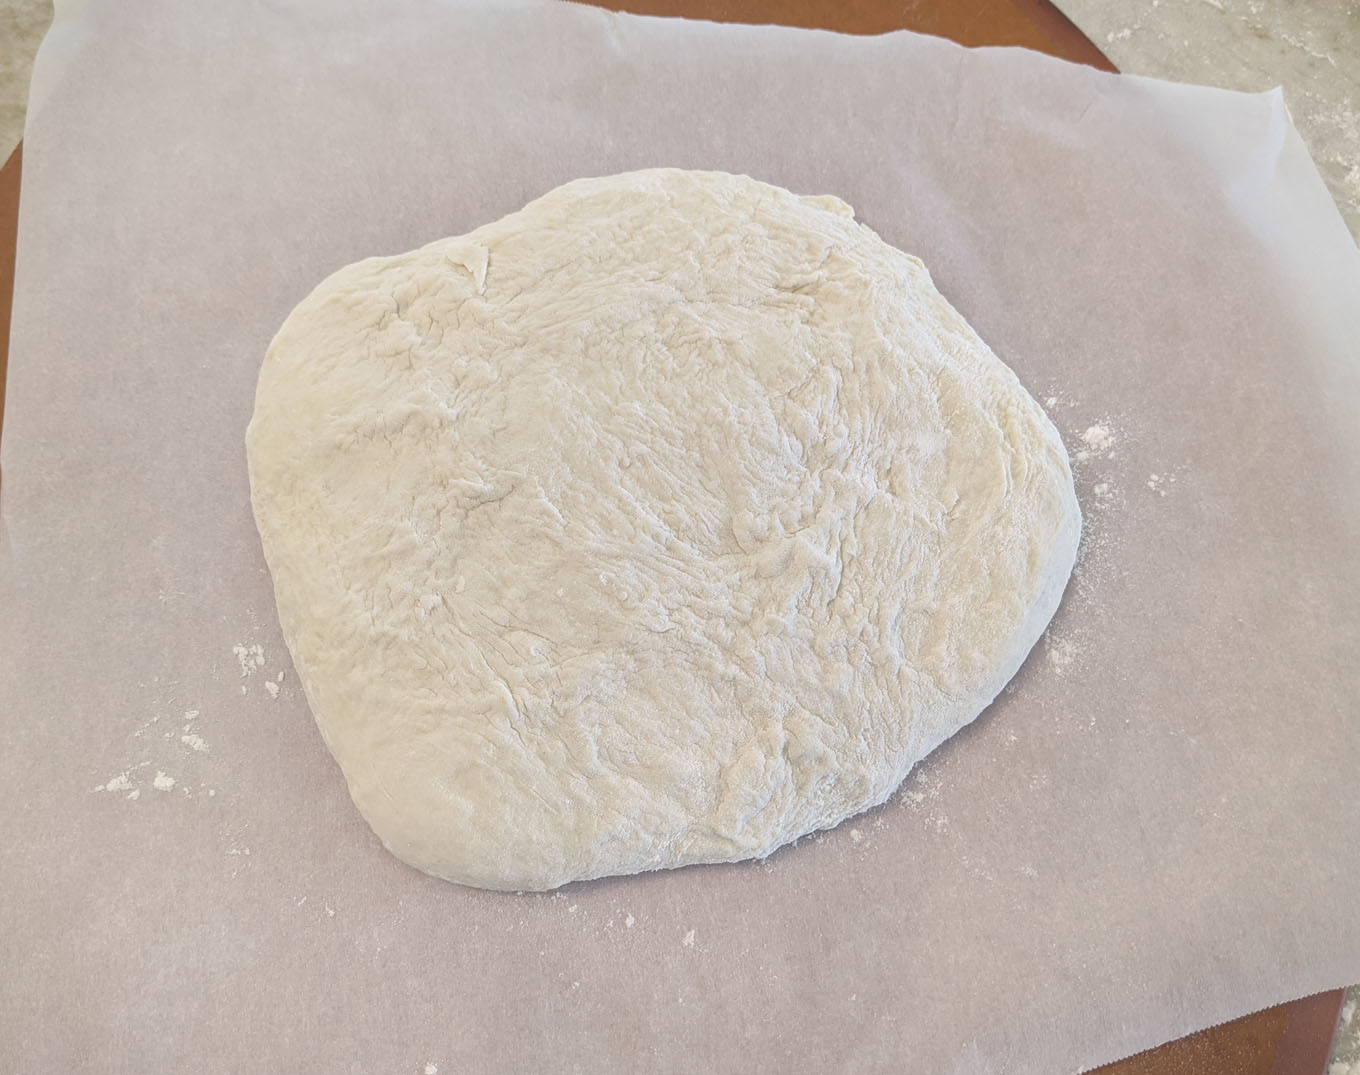
    dough on parchment paper on pizza peel for the second rise

    Place the finished dough on parchment paper (sprinkle cornmeal or flour on the parchment before placing the dough)
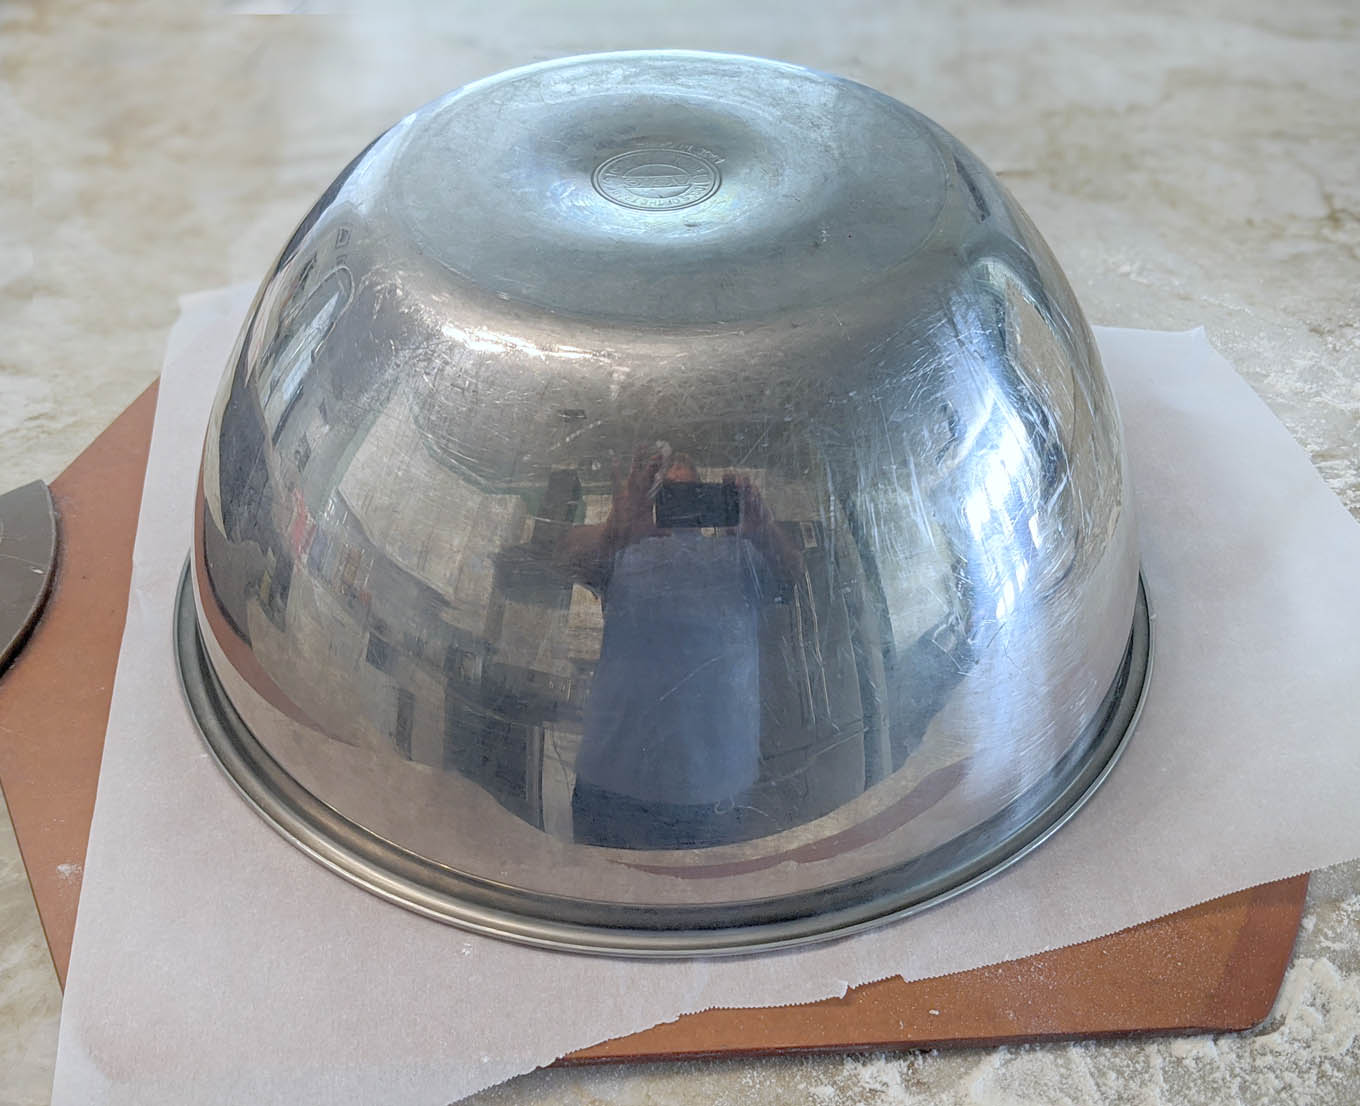
    stainless steel bowl covering the bread dough on the pizza peel

    Cover the dough with a bowl or damp tea towel for the second rise. Preheat your oven to 450 degrees F. and place the dough on top of the stove.

    The rise time will be 30-40 minutes for the second rise.
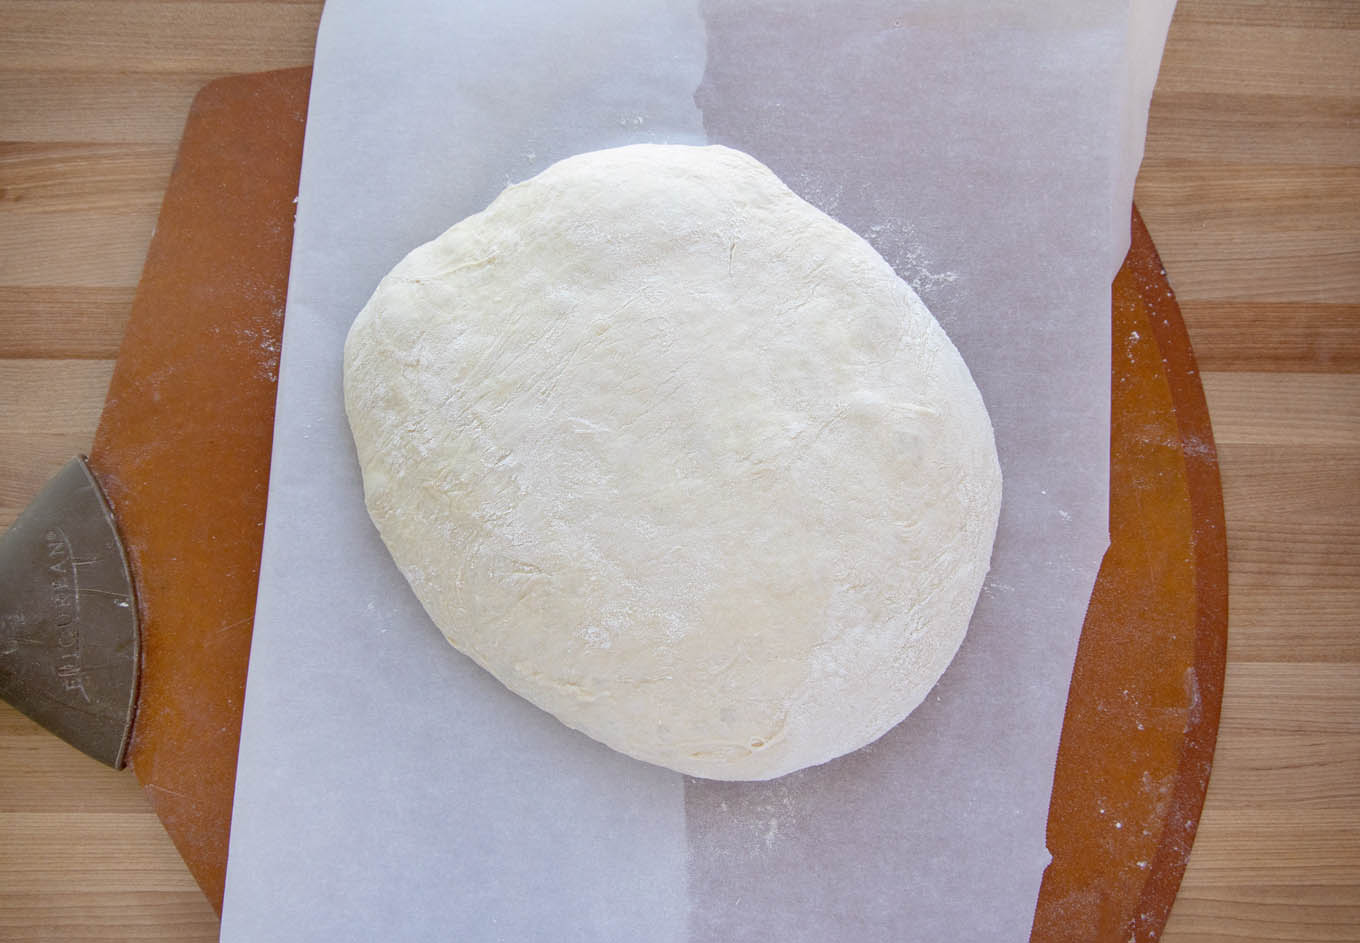
    bread dough after the second rise on parchment paper on a pizza peel

    When the bread has finished rising it should have a pillowy appearance and feel. When you shape the dough, don’t handle it any more than you have to.

    The next step is cutting a design (if you want to) on the top of the bread. I used one of my kitchen knives but they never really make great cuts so I ordered a Bread Lame and Scoring Tool from Amazon. You don’t really need this, but you know what they say about a boy and his toys.

    The last step before placing the bread dough in the oven is to brush the dough with water. Water helps crisp up the outer crust of the bread, making the crusty bread I love.

    • Brush with olive oil for a smooth chewy crust
    • Dust the bread with flour for a rustic look and chewy crust
    • Brush with melted butter for a softer crust and appearance
    • Brush with egg to get a shiny brown crust

    **If you want to add seeds to the bread, any of the wet methods will help the seeds stick to the bread.
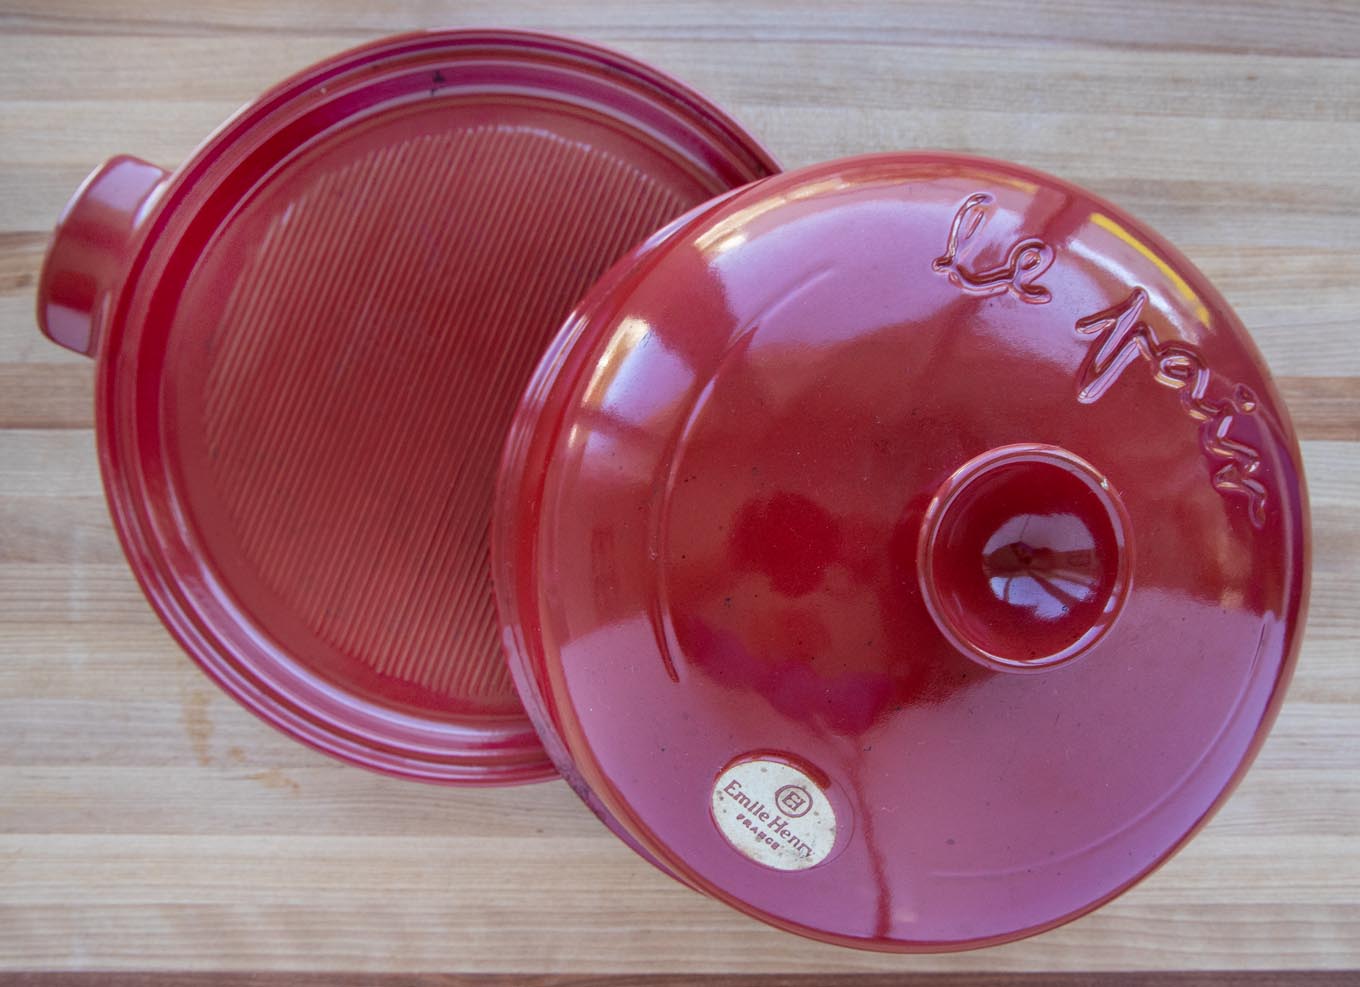
    red round bread cloche for baking

    I use an Emile Henry Cloche to bake my bread in. You can also use a Dutch oven for this Artisan Bread.

    What size dutch oven should I use to bake this recipe?

    To make one loaf from my recipe, you will need a 7 qt. dutch oven or bigger. If you have a 5 qt dutch oven, you can reduce the recipe by one-third or make two loaves.

    What if I don’t have a cloche or a dutch oven?

    If you don’t have a cloche or a dutch oven, a heavy metal cake pan (round or oblong) will work. If you use a cake pan, you will do your final rise in the pan. The bread will come out a little darker because it won’t be covered.

    Recipe FAQ

    What is the difference between artisan bread and regular bread?

    Bread that is mass-produced using large machines is referred to as Supermarket Bread. Artisan bread is usually made by hand using longer and more traditional processes.

    Does folded no-knead bread taste better?

    My side-by-side tests showed that my folded no-knead bread had a rounder, more appealing flavor and had a better balance between acid and sweet than the loaves without folds.

    Why isn’t my no-knead bread crusty?

    The main reason your bread isn’t crusty is due to moisture. This moisture comes from inside the bread. When cooling, you must give your bread enough room to breathe. Keep your bread on a cooling rack with enough space under it.

    How can I make my no-knead bread even crustier?

    after my bread has cooled I give it 7- 10 minutes, placed directly on the center rack in a 350-degree oven. This crisps the outside of the loaf nicely.

    Can I use bread flour to make artisan no-knead bread?

    Yes, you can, but not using this recipe. Bread flour has a higher protein count which means the ingredients would have to be adjusted to accommodate using bread flour.
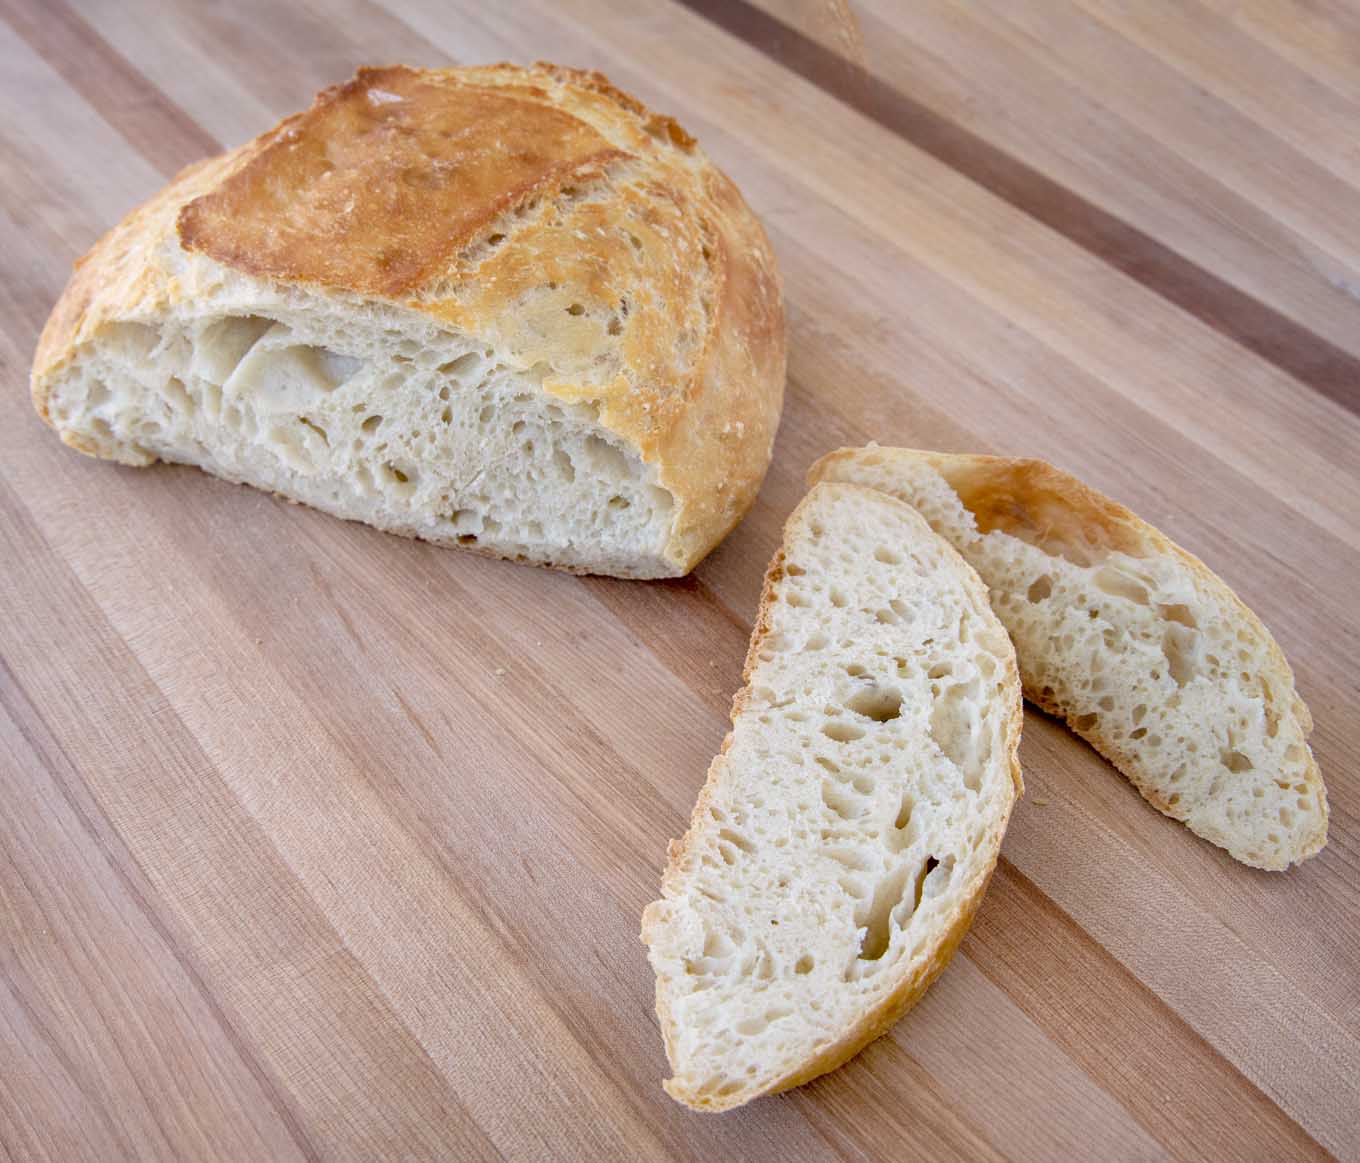
    loaf of artisan bread sliced with slices next to it on a wooden cutting board

    The finished bread is golden brown, crusty and delicious. And once you get the hang of it, the process will only take minutes.

    I keep a ziplock few bags of flour and other ingredients measured out ahead of time. That makes it super easy to make the bread after dinner so it’s ready to bake in the afternoon.

    More recipes you’ll love!

    • overhead shot of white bowl of tomato bisque with shredded cheddar and parsley garnish
      Creamy Tomato Bisque Recipe
    • Tuscan bread soup in a white bowl
      Tuscan Bread Soup {Ribollita}
    • american cheese, pepperoni, pizza sauce,mozzarella cheese, sourdough bread
      Pepperoni Pizza Grilled Cheese Sandwich Recipe
    • partial view of Italian wedding soup in white bowl
      Italian Wedding Soup Recipe

    Did you make this? Please RATE THE RECIPE below!

    Please SUBSCRIBE and FOLLOW ME on FACEBOOK, TWITTER, INSTAGRAM and PINTEREST!

    loaf of homemade artisan bread on a wooden cutting board
    Print Recipe Save Saved!
    5 from 91 votes

    Artisan Bread – Easy Homemade Recipe

    What could be better than a warm loaf of Homemade Artisan Bread that you made in your very own kitchen. You'll amaze your family and friends with my easy to make "almost" no-knead bread.
    Prep Time25 mins
    Cook Time40 mins
    Total Time1 hr 5 mins
    Course: Bread
    Cuisine: American
    Servings: 8
    Calories: 218kcal
    Author: Chef Dennis Littley

    Equipment

    • cloche or ductch oven

    Ingredients

    Bread Dough

    • 3 cups all-purpose flour
    • 2 tbsp sugar *see notes
    • 1½ tsp salt
    • ½ tsp dry active yeast
    • 1½ cup water room temperature

    Proof and Bake

    • 1 tsp olive oil
    • ½ cup flour to finish dough and use on countertop
    • water to brush the bread with to brush the bread with
    US Customary – Metric
    Prevent your screen from going dark

    Instructions

    Bread Dough

    • Mix all the dry ingredients together. Use a whisk to make sure they are mixed well. Place into the bowl of your stand mixer set up with the dough hook.
      **you can also mix this by hand using a wooden spoon or your hands.
    • Add the water and stir into the dry ingredients until a dough forms. It should start to pull away from the bowl. The dough will look wet and sticky.
    • Place the dough in a large bowl that has been lightly oiled. Cover the bowl with plastic wrap and place the bowl in a warm part of your kitchen away from any drafts.
    • Allow the dough to rise for at least 12 hours up to a maximum of 16 hours. 12-14 hours is the sweet spot. Bubbles wil form in the dough and it may drop a bit after rising.

    Proof and Bake

    • Lightly flour the countertop and dump out the bread dough on the floured surface.
    • Add flour into the dough as you work the dough around. This will take about 5 minutes. Keep adding flour until the dough isn't sticky. Form the dough into a ball.
    • On a floured surface, flatten the dough out to make a rectangle.
    • Fold over ⅓ of the dough to the center (you're folding the widest part first as shown in the pictures). Fold over the other side of the rectangle overlapping the first fold of the dough.
    • Continue the folding process by folding the bottom ⅓ of the dough upwards towards the center of the little package you've made.
    • Fold the top part of the dough down overlapping the fold you just made.
    • Turn the dough over (seam side down) and make a disc or oblong loaf depending upon what shape bread you want to make.
    • Place the finished dough on parchment paper (sprinkle cornmeal or flour on the parchment before placing the dough)
    • Cover the dough with a bowl or damp tea towel for the second rise.
    • Preheat the oven to 450 degrees F and place the empty cloche or dutch oven in the oven on the middle rack to preheat along with the oven.
    • Place the covered dough on top of the stove to finish rising for 30 – 40 minutes.
    • When the dough has fully risen, using a very sharp knife cut a design into the top of the bread. Make deep cuts.
      Brush the entire bread dough with water.
    • Very Carefully remove the cloche (or dutch oven) from the oven (close the oven door).
    • Place the parchment paper with the dough onto the cloche, (or inside the dutch oven) cover with the lid and place back into the oven.
      It's okay to bake the bread on parchment paper. 
    • Bake the bread for 30 minutes at 450 degrees F.
    • After the 30 minutes have passed remove the lid from the cloche or dutch oven, leaving the bread in the oven.
      Turn off the oven.
    • Allow the bread to stay in the oven for about 10 minutes (less if it looks like it's getting too dark). This will finish the baking process, crisping up the outside of the crust bread adding more color to the crust.
      Dark Bread is okay, it looks more rustic!
    • Let the bread rest for at least an hour before cutting. Cutting the bread too soon will release the steam (water) and toughen the bread.

    Video

    Notes

    Why do I need sugar in my Bread Recipe?

    That’s a good question and one I had pondered until I spoke with a master baker about what each ingredient did to make the end result in the bread I wanted.
    Sugar has quite a few jobs and provides substantial improvements to yeast bread. It’s not an essential ingredient but it helps make a better loaf of bread.
    • Sugar provides an additional source of food for the yeast. The yeast converts this food to carbon dioxide and alcohol
    • Sugar (like salt) enhances the flavor of the bread
    • Sugar helps give the crust that golden color we love
    • Sugar improves the crumb texture of the bread
    • Sugar helps retain moisture in bread and slows down the formation of gluten strands, which helps keep the bread fresher longer

    Will sugar make the bread sweet?

    That’s a great question and the answer is no. We are not using enough sugar to make this a sweet bread. You won’t even notice it’s in the bread.
    *The Sugar can be left out of the recipe. I use sugar because of all the reasons listed above.  But the bread recipe will still work without it.

    Why do I need salt in my homemade bread?

    • Salt regulates the rate of yeast activity. It provides a slow and steady rise which is even more crucial in this semi no-knead bread. The slower rise gives the yeast time to develop the characteristic bread flavors we love
    • Salt also strengthens the gluten structure of bread dough. It keeps the trapped carbon dioxide bubbles to expand too quickly
    • Salt makes bread taste better

    How to cook the bread on a cookie sheet

    Preheat the oven to 450°F. Set one rack in the bottom of the oven and one rack in the middle of the oven. Place a metal cake pan in the bottom of the oven (you will add water to this later)
    Prepare a sheet pan by dusting it with cornmeal or use parchment paper.
    Place the dough on the prepared cookie sheet for the final rise.
    Follow the recipe for the rest of the dough preparation.
    Place the sheet pan on the middle rack and pour one cup of warm water into the cake pan on the bottom rack.
    Bake for 30 minutes or until the outside of the bread has a nice golden color.
    Allow the bread to rest on a wire rack until completely cool.
     

    Nutrition

    Calories: 218kcal | Carbohydrates: 45g | Protein: 6g | Fat: 1g | Saturated Fat: 1g | Sodium: 440mg | Potassium: 66mg | Fiber: 2g | Sugar: 3g | Calcium: 8mg | Iron: 3mg
    Tried this Recipe? Pin it for Later!Mention @askChefDennis or tag #askChefDennis!

    More Bread Recipes

    • Stack of Naan Bread.
      Homemade Naan Bread Recipe
    • slices of Irish soda bread next to loaf
      Traditional Irish Soda Bread
    • slices of potica on a white plate with the rest of the loaf partially in view
      Authentic Potica {Traditional Slovenian Nut Roll}
    • caramel pecan bun being taken out of the group of buns
      No-Knead Brioche Dough Pecan Caramel Rolls

    About Chef Dennis

    Picture of Chef Dennis

    Chef Dennis Littley is a classically trained chef with over 40 years of experience working in the food service industry. In his second career as a food blogger he has made it his mission to demistify cooking by sharing his time-tested recipes, knowledge, and chef tips to help you create easy-to-make restaurant-quality meals in your home kitchen. Let Chef Dennis help you bring the joy of cooking into your home. For more details, check out his About page.

    Reader Interactions

    Comments

      Leave a Reply Cancel reply

      Your email address will not be published. Required fields are marked *

      Recipe Rating


      This site uses Akismet to reduce spam. Learn how your comment data is processed.

    1. Diane

      November 10, 2022 at 2:17 pm

      5 stars
      This is the 4th recipe I tried to make Artisian bread and was about to give up, then I gave your recipe a try and voila’! It came out just like yours! I am so impressed with your excellent directions! Been kneading bread for more years than I care to say so it was hard for me to not knead the flour in but it worked! Thank you so much for your step by step instructions. Wonderful taste and will definitely be making it many times more. Thank you! 🙂

      Reply
      • Chef Dennis Littley

        November 10, 2022 at 2:51 pm

        Thank you for taking the time to let me know my recipe worked for you. It has become my go-to bread recipe. It did take quite a few years and unsatisfactory loaves to get there, but I’m happy the results and comments like yours make it all worthwhile.

        I hope you find more recipes on my blog to try!

        Reply
    2. Biff

      March 15, 2022 at 5:19 pm

      5 stars
      Thanks Dennis! You Sir, have made a bread baker out of me!

      Your recipe is my first attempt at baking bread ever and it was stumbling on your blog that convinced me to give baking a try in the first place… and it came out great! (by my standards). Especially, considering I misread the recipe the first time and only put in 2 tsp of sugar instead of 2 Tbsp. I did correct that on my second loaf and it did rise a decent amount more in the 14 hours I gave it.

      Even my French, country-side raised wife, who is very particular about her bread, said it was “not bad”. Despite her assertion that adding sugar to bread is akin to sacrilege (you should’ve seen the face she made). Now, I will see if more practice baking this recipe will win her over enough for her to say she actually likes it. Then, it will be on to the French mother-in-law test!

      The only real criticism my wife had (apart from the usual ones I get whenever I am in the kitchen), was that it was a little dense. And so, I have a question about that.

      Currently, I am using a Bob’s Red Mill, Unbleached, Organic All-Purpose with 10%-12% protein. Would switching that up to a flour with a better defined protein content or tweaking the amounts of any of the other ingredients encourage a significant decrease in the sensation of denseness?

      Also, a bonus question, when doubling the ingredients of the recipe to make one larger loaf, does the cooking time stay the same?

      Thank You again Dennis! You have certainly helped me discover a new, tasty hobby and another great way to maintain domestic… ahem… bliss 😉

      Reply
      • Chef Dennis Littley

        March 15, 2022 at 5:41 pm

        Thanks for the great rating and the comment Biff. By no means does this bread measure up to French Countryside bread as isn’t needed. The tradeoff with this type of bread is while it’s easier to make it’s generally denser. The folding actually helped out a lot, before that it was really dense!

        was the water around 70 degrees, too hot can be a problem and too cold as well.
        was the dough sticky and wet when it came out of the mixer? Too much flour can cause it to be dense.
        was the yeast old? The only reason the sugar is in the bread is to help activate the yeast, if the yeast was old that could also be an issue.
        The flour shouldn’t be a problem, I use King Arthur which has 11.7% protein so the Bob’s Red Mill should be okay. Originally I was told you needed to use a lower protein flour for no-knead but I’ve always used whatever I had on hand which was mostly King Arthur.

        As for doubling and making a bigger loaf, I have never tried that, but as long as the loaf is longer and wider, it shouldn’t affect the cooking time too much, maybe 5-10 minutes longer. I always judge it by the color of the crust.
        Are you using a cloche, dutch oven or just a baking sheet? If you are using a baking sheet/ or stone try adding a pan of water into the oven before placing the bread in to add a little steam, this sometimes helps.

        hope this helps, and I hope you find more recipes on my blog to try!
        Dennis

        Reply
        • Biff

          March 17, 2022 at 12:08 pm

          5 stars
          Hi Dennis, Thanks for the quick and helpful reply!

          So, I am clearly a total noob. I looked on the yeast package and yes, it is old. Expired August 2019. I will not make that mistake again.

          The water temp I did check but it was more like 65-67 degrees. Next time I will see if I can bring that up a little.

          Dough was indeed quite sticky and wet in appearance so hopefully I have that dialed in, but I will continue to pay attention.

          I am currently looking into a cloche, but using a dutch oven for now. And I get what you are saying making a larger loaf by needing to keep it about the same height by making it wider and longer.

          I was actually thinking of doubling the loaf so as it cooked in our 6.5 qt dutch oven it would maybe meet the sides and then be forced to be a little loftier to make better toaster sized slices, but now I am second guessing that notion (may still try it though for a learning experience 🙂

          Also, I now realize this recipe can’t be everything thing to everyone. Thinking it could replace the bread my wife grew up with was maybe un tout petit peu unrealistic. However, I still hope to learn to make this recipe well enough for her to enjoy it, and then use that education to improve my bread baking enough to get good at making a traditional French countryside bread (this is where my wife says, “knock yourself out, mon cheri”). I am looking forward to the adventure. Thanks for helping me along my way.

          Tiramisu! That is the next of your recipes I want to try, but then something more savory perhaps. Tough choice though as you have so many I would like to try. Suffice it to say, I will be spending a good amount of time on your blog since you make your recipes seem so doable to such a kitchen novice like me.

          Cheers!

        • Kristi

          July 10, 2022 at 4:16 pm

          I am making this bread now. What do you do if you add too much water?

        • Chef Dennis Littley

          July 10, 2022 at 4:22 pm

          You could just add more flour and hope for the best, the recipe is a little forgiving. Just understand that the finished product might not be as good as it could have been.

    3. Clair

      January 17, 2022 at 7:35 pm

      Do you think there is a way to achieve a similar texture using more whole grain or even artisan flours, I have a few from “Janies Mill” that aren’t white flour, but wondering if a mix of all purpose and a whole red wheat (from Janies Mill” would be able to achieve similar holes/texture?

      Reply
      • Chef Dennis Littley

        January 17, 2022 at 7:46 pm

        it definitely is possible, but you’ll need to adjust the recipe to reflect the change in the amount of protein the flours you’re using contain. I use King Arthur which has a protein count of 11.7%. Any flour that you have at that percentage should technically work with this recipe. If its got a higher or lower protein count, the amount of water will need to be adjusted.

        Reply
    4. bibi

      January 12, 2022 at 10:59 am

      Can you use bread flour instead of all purpose flour, or half and half bread and all purpose flour?

      Reply
      • Chef Dennis Littley

        January 12, 2022 at 4:22 pm

        bread flour has a higher protein count than all-purpose and will affect the recipe. The bread is liable to come out dry and dense using bread flour.

        Reply
    5. Veronica Dare

      December 30, 2021 at 9:05 pm

      5 stars
      This is a GREAT recipe! No fail. I’m making a fourth loaf in 6 weeks. Everyone is impressed with the presentation and taste and I love that it is SO easy! Thank you!

      Reply
    6. Aileen

      December 25, 2021 at 9:03 am

      5 stars
      I did it !! Thanks for all the tips and explanations- I added the sugar and my bread wasn’t sweet, and I sprayed the dough with water and it was fabulously crusty! Yay! My only problem was that my dough did not roll into a nice rectangle like yours did… it kept bouncing back into place instead of staying stretched out..? Not sure why? But I folded it the best I could and it came out delish! It didn’t take long to bake and I let it rest for 30 minutes on a rack on top of the stove and when I served it, it was still warm ! It has a really good flavor- thanks Chef Dennis

      Reply
      • Chef Dennis Littley

        December 25, 2021 at 9:07 am

        It’s a learning process. I’ve been making that bread for a long time, so I probably make it look easier than it is. But now that you’ve found the joy of making your own bread, I’m sure it will get easier! Warm bread is a wonderful thing!

        Reply
        • Jane

          February 05, 2022 at 8:41 am

          Great recipe!! I’m trying to split dough in half, baking in 2 quart Dutch ovens. It’s working okay. Is it hindering the quality of the bread using the 2 quart size? Should baking time be less? Thank you!

    7. Linda

      December 23, 2021 at 1:34 pm

      Hi Chef Dennis
      Love your thorough instructions. Would quick rise instant yeast still work in the same proportions?

      Reply
      • Chef Dennis Littley

        December 24, 2021 at 3:27 pm

        instant yeast will work, you’ll get a faster rise and it can be added directly into the liquids.

        Reply
    8. Natalie

      December 13, 2021 at 5:46 am

      5 stars
      Great recipe. The bread turned out perfect. Thanks for sharing this recipe and all the tips and instructions which were super easy to follow.

      Reply
    9. Leslie

      December 11, 2021 at 4:58 pm

      5 stars
      There is just nothing better than homemade baked bread! You have no doubt perfected this recipe, it was amazing!

      Reply
    10. Stine Mari

      December 11, 2021 at 3:19 am

      5 stars
      I loved your FAQs! It helped my bread come out perfectly crusty the way I love it!

      Reply
    11. Amy Liu Dong

      December 10, 2021 at 9:56 pm

      5 stars
      This was so easy to make and delicious.
      Everyone loved it. Thank you!

      Reply
    12. Jere Cassidy

      December 09, 2021 at 5:16 pm

      5 stars
      Thanks for much for the low-down on this bread, and the reasons to use sugar. I love the folding method you use and it makes sense. I am personally done with sourdough and going back to just yeast. I need a dutch oven like you have.

      Reply
    13. Mariah

      December 09, 2021 at 10:47 am

      5 stars
      Hi Dennis! I’ve made this recipe twice now. The first time I added sugar, but I’m super sensitive to sugar and it tasted sweet to me. Since yeast can activate with the sugar/carbohydrates present in flour, I omitted the sugar the second time and it rose just fine and tasted better (for me!). I also did 1/3 less recipe the second time, using 2 cups of flour instead of 3 for a smaller loaf. Just wanted to let you know that it turned out OK without sugar! It’s such a simple recipe, I love being able to just whip it together before I go to bed. I might tackle sourdough again sometime, but it was pretty labor-intensive. Will definitely be making this recipe often. Thank you!

      Reply
      • Chef Dennis Littley

        December 09, 2021 at 11:33 am

        hi Mariah

        I’m happy to hear the bread recipe worked for you and it was easily adaptable. You really don’t need the sugar it just helps get a faster rise.
        I’m with you on sourdough, I’d love to make it but don’t want to invest the time, especially when this bread is so good!

        Reply
    14. Judy Hovis

      October 17, 2021 at 2:54 pm

      Can I include add-ins like dried cranberries and chopped walnuts?

      Reply
      • Chef Dennis Littley

        October 18, 2021 at 9:35 am

        you sure can. You want to add them in before the folding process, before the final rise.

        Reply
      • Dee

        December 11, 2021 at 8:00 pm

        5 stars
        Great and easy to follow recipe, the bread came out delicious! Love your notes about the sugar and salt

        Reply
    15. Selma

      October 16, 2021 at 5:18 pm

      5 stars
      Chef Dennis, I used your Artisan Bread recipe today and it was a hit! I have been planning this day for weeks, today was our first cool day in South Texas. I made your bread for lunch with Broccoli and Cheese Soup in my Ninja Pressure Cooker. Your recipe was so easy to follow, and I loved the photos you provided. Since my Dutch Oven is a 5.2 quart size I made two loaves.

      Reply
    16. Charlie

      October 10, 2021 at 9:28 am

      Hello Dennis:
      I hope that you and yours are fine.

      I was wondering why you need sugar in bread.
      Also if you go sugarless, why does there have to be a substitute put in for it? Such as sugar twin, aspartame, etc.

      Thanks
      Charlie

      Reply
      • Mariah

        December 09, 2021 at 10:49 am

        Hi Charlie, I just made the recipe without sugar and it turned out great. I don’t prefer sugar in my bread. Try it! 🙂

        Reply
    17. Angela

      April 08, 2021 at 4:32 pm

      Hi Chef Dennis!
      Like half the world, I’ve been utilizing this pandemic home time to improve on my baking, and artisan bread has been my Achilles heel. Much to my aggravation, I have been unable to create those amazing holes inside the bread. It always comes out very dense. Flavorful, but heavy. I stumbled on your website and this recipe for your minimum-knead artisan bread and I am very intrigued however I have some questions about timing.
      Everything that I’ve researched and subsequently put into practice is to let the bread rise for a minimum of 24 hours up to a week (depending on the recipe) in the refrigerator.
      Yet your recipe says to put on the counter for 12-14 hours. I am assuming that the addition of the sugar speeds up the process – hence the shorter rise cycle (none of the other recipes I’ve used included sugar). However with a 12-14 hour cycle, I can’t figure out when to start it so I’m not baking at 2 in the morning or some other ungodly or inconvenient time. Can I put this dough in the refrigerator to rise for 24 hours so I can start it after work on day one and bake it after work on day 2?
      Many thanks in advance for your time and advice!

      Reply
      • Chef Dennis Littley

        April 08, 2021 at 5:12 pm

        Thats the method I use to use for making bread but was never really happy with the results. After watching a video on sourdough I decided to try a new method for making bread combining the slow rise method with the folding of the dough.
        I would make the dough sometime in the afternoon or early evening and then bake the bread the bread the next day. I tried refrigerating the dough and it didn’t do well.
        Try this method and if it doesn’t provide a better loaf of bread you can always go back to the old techniques. This is the only way I make bread anymore and after a few loaves it becomes automatic and takes no time at all.

        Reply
    18. Colleen

      December 28, 2020 at 4:01 pm

      I’ll be making this recipe this week and I’m wondering if I double it, do I need to simply double the amount of each ingredient. I’ve made no-knead breads for years and I’m very excited to try your version with sugar. Thank you for being so thorough in your directions!

      Reply
      • Chef Dennis Littley

        December 28, 2020 at 4:51 pm

        yes, just double the amount of each ingredient. I’m very happy with the results this dough makes. There is a little folding of the dough but its still basically no knead

        Reply
        • Colleen

          January 08, 2021 at 11:07 am

          Update:
          I made this recipe for my family for NYE dinner and it has now become their new favorite. It was a double size loaf that I baked in my large size EH Tagine. My advice, break away from no knead and try this. You won’t be disappointed.

    19. Mazy Walczak

      November 21, 2020 at 7:59 pm

      5 stars
      The bread is wonderful and SO easy! Relatively fool proof of you follow the instructions. Eventually I experimented a little and added a whole packet of instant yeast. Additionally I also added about 1/2 cup of my sourdough starter. The result was a bread that was truly irresistible; full of lovely air pockets and impossible to quit eating! I cook mine in a fast iron skillet with parchment paper but no lid. Thanks much for the wonderful recipe!

      Reply
      • Chef Dennis Littley

        November 21, 2020 at 8:26 pm

        I’m happy to hear that you’ve been enjoying making bread Mazy. It is extremely easy to make. I’m also happy to hear you’ve been experimenting with the recipe, thats when you really start having fun cooking!

        Reply
        • Camille

          July 10, 2021 at 10:40 am

          5 stars
          I made this yesterday, and it was a success!! May I ask, after the first rise of the dough, do I add the whole 1/2 cup of flour or gradual? And do I knead it by hand?or just mix it in the dough? I wanted my bread to have more air pockets.

        • Chef Dennis Littley

          July 10, 2021 at 10:57 am

          add the flour in a little at a time, just enough so the dough isn’t sticky. The initial kneading can be by hand or machine, I use a mixer to get the first blending. I knead the little big for the second rise by hand. Getting more air pockets in this type of bread isn’t always possible, that comes from the interaction of the yeast. You need the area you are proofing the dough in to not be too warm so the rise is a slower process. That’s why I use less yeast and let the first rise go for at least 12 hours. The second rise should be slow also, again not in a hot area.
          Stretching and folding the dough can also help create more bubbles, which is why I added that part to my artisan bread recipe.

          Hope that helps and the more you make this bread the more you’ll find ways to adjust it.

        • Jane

          November 13, 2021 at 7:38 am

          5 stars
          Hi! Thank you for sharing your recipe! It’s been very good. Just checking in to be sure… should the bread be covered for the 2nd rise? Thanks again!

      • Charlie

        October 10, 2021 at 9:34 am

        Mazy:
        You used this recipe, added a whole pkg. of yeast without changing the other ingredient measurements, except to add a 1/2 cup of sourdough starter?
        Do I have this right?

        Reply
    20. Elizabeth Kelley

      November 17, 2020 at 3:28 pm

      What size of Dutch oven do I need? They come in sizes from 3 qt. To 8 qts!

      Reply
      • Chef Dennis Littley

        November 17, 2020 at 3:53 pm

        to make one loaf out of the dough in the recipe you would need a 7 qt dutch oven. If you only have a 5 qt, you can easily cut the recipe by 1/3.

        Reply
    « Older Comments
    Newer Comments »

    Primary Sidebar


    My name is Dennis Littley or "Chef Dennis" as I'm known both at work and across the blogosphere. As a classically trained chef with 40+ years of experience in the kitchen, I share my time-tested recipes, knowledge, and chef tips to help you create easy-to-make restaurant-quality meals in your home kitchen.

    More about me →

    • Facebook
    • Instagram
    • Pinterest
    • Twitter
    • YouTube

    Fan Favorites

    • loaf of homemade artisan bread on a wooden cutting board
      Almost No-Knead Artisan Bread Recipe
    • 2 Maryland crab cakes on a white plate
      Baked Maryland Crab Cakes Recipe
    • chicken parm with pasta on a white plate
      Chicken Parmesan Recipe
    • seasoned crispy chicken legs on a foil wrapped tray
      Best Baked Chicken Legs {Drumsticks}
    • side view of slice of bee sting cake being taken out of full cake
      German Bee Sting Cake (Bienenstich) Recipe
    • Tiramisu with a fork on a white plate
      Best Tiramisu Recipe {step by step}
    • overhead view of barbecued half racks of baby back ribs on a white platter
      Easy Oven Baked Baby Back Ribs
    • overhead view of veal parm and linguine on a white plate
      Restaurant Style Veal Parm Recipe

    Featured In

    logos of all the places chef dennis has been featured

    Popular Posts

    • crispy seasoned chicken leg quarters on a white platter
      Best Baked Chicken Leg Quarters
    • cropped-Gunniess-Beef-Stew-13.jpg
      Authentic Guinness Beef Stew Recipe
    • overhead shot of baked crab imperial on a white plate with sauteed greens and roasted potatoes
      Maryland Style Jumbo Lump Crab Imperial
    • close up of half a chicken salad sandwich on a white plate
      Best Chicken Salad – Deli Style
    • oysters rockefeller with a slice of lemon on a bed of rock salt on a white platter
      How to Make Restaurant Style Oysters Rockefeller
    • sliced dry rub roasted brisket with cilantro and tomatoes on on a white platter
      Easy Oven Baked Beef Brisket Recipe
    • rack of pork with end cut off
      Oven Roasted Rack of Pork {Pork Rib Roast}
    • sliced meatloaf with the rest of meatloaf on a white platter
      Best Meatloaf Recipe

    Footer

    ↑ back to top

    INFO

    • Privacy Policy
    • Disclosure Policy
    • Cookie Policy
    • Accessibility Policy

    SUBSCRIBE

    Sign Up Today and start getting my easy-to-make restaurant-style recipes!

    CONTACT

    • About
    • Contact
    © 2009-2023 · Ask Chef Dennis ·

    Proud Member of:
    Mediavine Publisher Network
    1.3K shares
    • 592