I’ve been making no-knead homemade artisan bread for the last 15 years, and it’s always been good but never quite what I hoped it would be. It just wasn’t quite right.
Of course, it was still delicious, and we enjoyed the homemade bread, but it always left me thinking it could be better.
Audio Player
I’ve experimented with different quantities of yeast and salt. I’ve added sugar, honey, and other types of flour to the recipe in my quest for the perfect no-knead bread recipe.
One day, I was watching a sourdough bread video. It was way too much work for a loaf of bread, but the technique used to knead the dough intrigued me. So, I thought I would try that method with my much easier-to-make no-knead bread recipe.
And it was amazing! The results finally yielded the bread I’ve been hoping to make for the last 15 years. It does require a small amount of kneading, but it’s pretty darn easy to make.
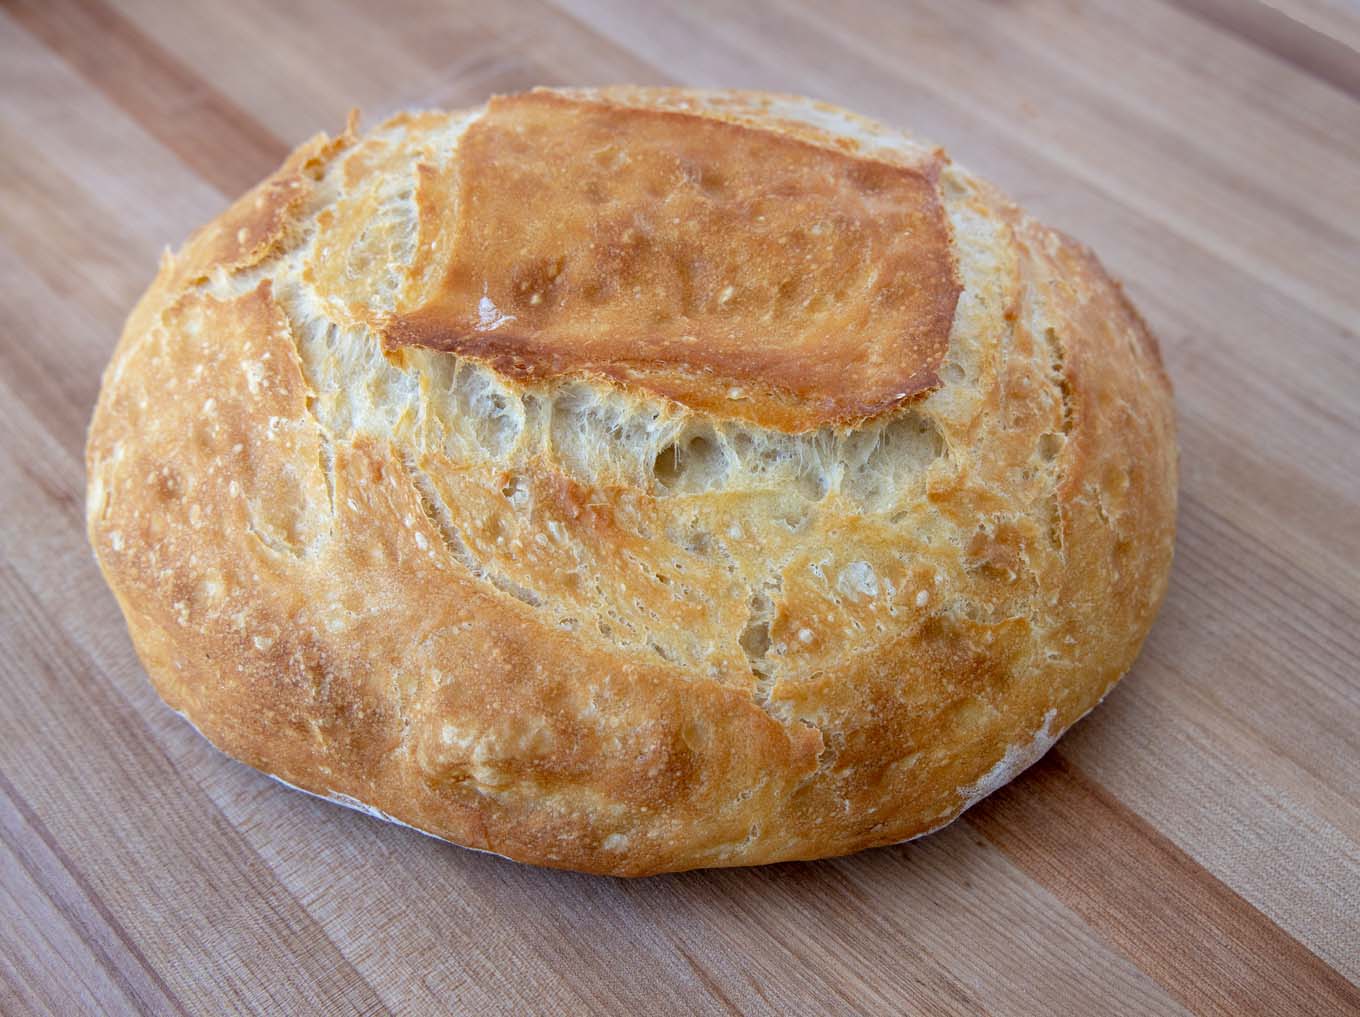
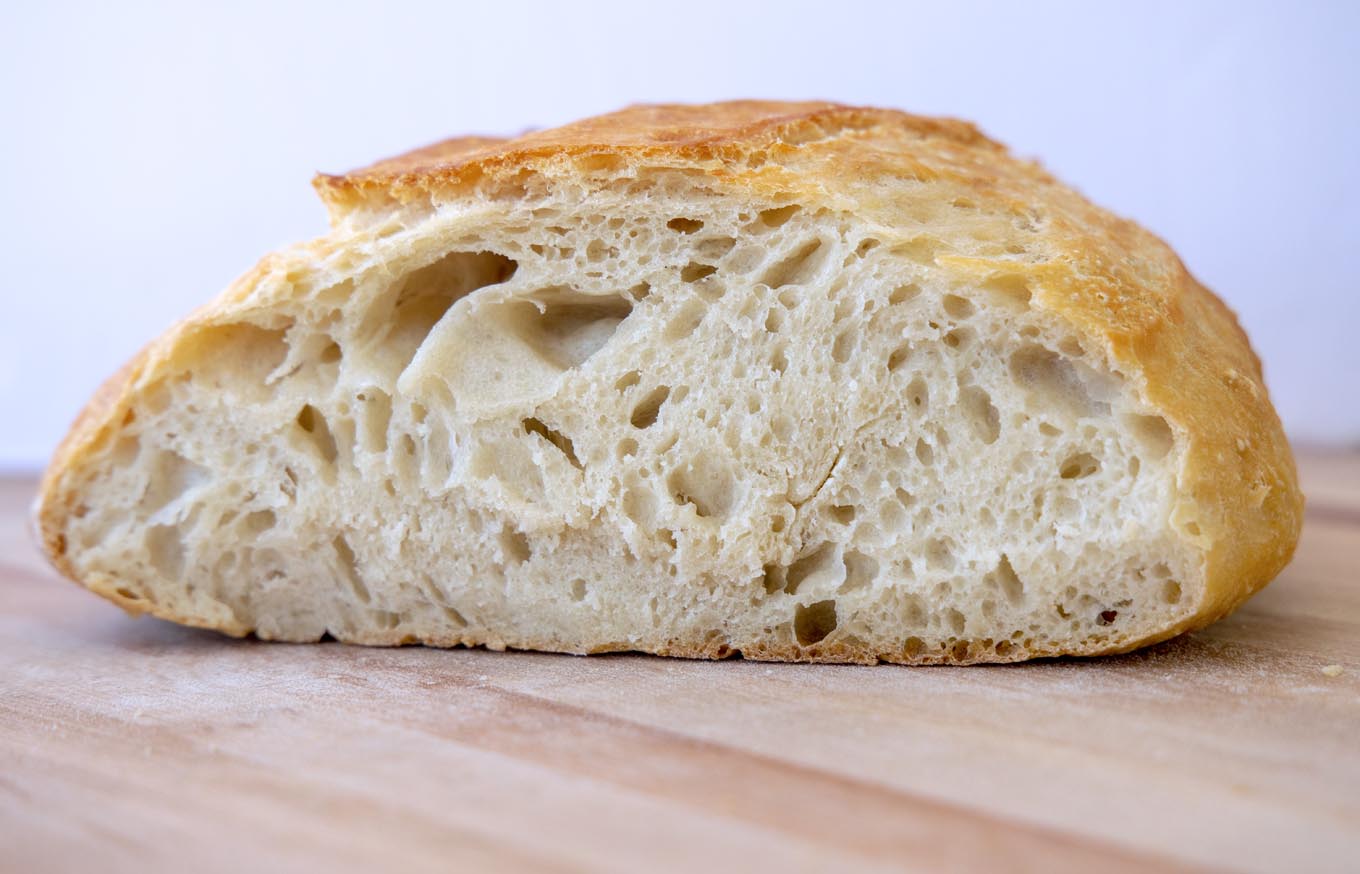
See all those little air holes? That’s what I’ve been missing in my no-knead bread all these years! It has a nice crisp crust, a lighter texture, and a wonderful flavor.
If you like making breads, be sure to also try my focaccia bread recipe.
Ingredients to make Artisan Bread?
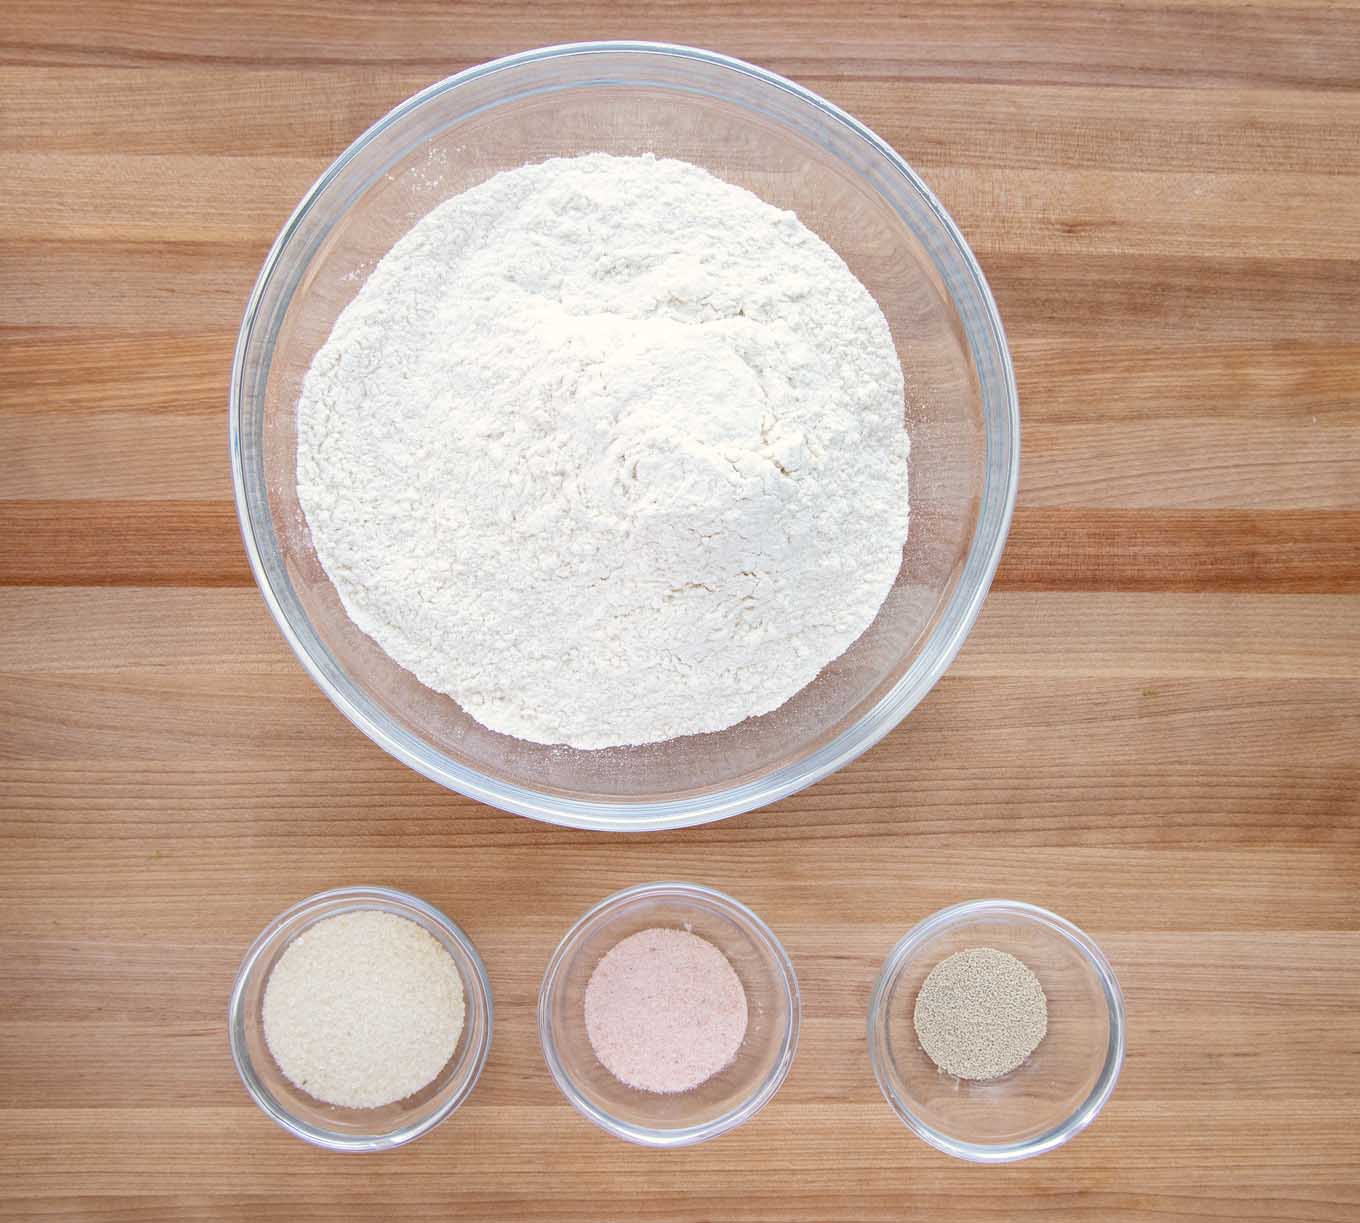
It’s a very short list of ingredients to make this perfect loaf of homemade artisan bread. All-purpose flour, sea salt, yeast, and sugar are the only ingredients you need.
I use Sherpa Pink Himalayan Salt in my kitchen. The other products I use are King Arthur Flour, Active Dry Yeast and Natural Cane Sugar.
Why do I need sugar in my Bread Recipe?
That’s a good question and one I had pondered until I spoke with a master baker about what each ingredient did to make the end result in the bread I wanted.
Sugar has quite a few jobs and provides substantial improvements to yeast bread. It’s not an essential ingredient, but it helps make a better loaf of bread.
- Sugar provides an additional source of food for the yeast. The yeast converts this food to carbon dioxide and alcohol
- Sugar (like salt) enhances the flavor of the bread
- Sugar helps give the crust that golden color we love
- Sugar improves the crumb texture of the bread
- Sugar helps retain moisture in bread and slows down the formation of gluten strands, which helps keep the bread fresher longer
Will sugar make the bread sweet?
That’s a great question, and the answer is no. We are not using enough sugar to make this sweet bread. You won’t even notice it’s in the bread.
Why do I need salt in my homemade bread?
- Salt regulates the rate of yeast activity. It provides a slow and steady rise, which is even more crucial in this semi-no-knead bread. The slower rise gives the yeast time to develop the characteristic bread flavors we love
- Salt also strengthens the gluten structure of bread dough. It keeps the trapped carbon dioxide bubbles from expanding too quickly
- Salt makes bread taste better
How to make Artisan Bread
The process is fairly simple. It only takes about 10 minutes to make the bread dough and set it up for the first rise.
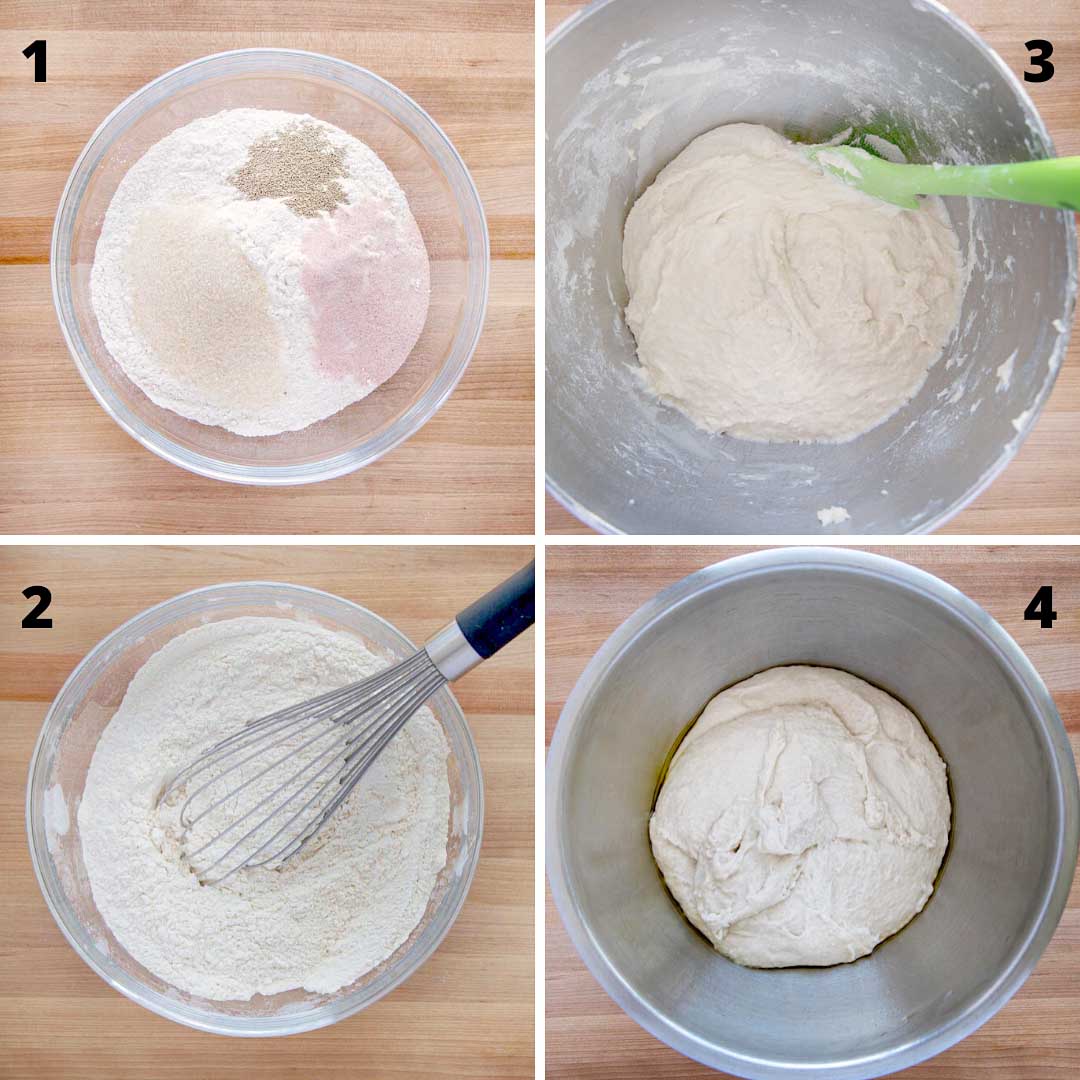
Following the recipe, add the salt, sugar, and yeast to the flour, whisking it all together to ensure equal distribution.
Then in a stand mixer (or by hand) add in the water. Depending upon the brand of flour you use, you may need a little less or a little more water. So start with about ¾’s of the water adding more if needed. The dough should be a little wet and sticky.
The last step is to place the bread dough in an oiled bowl and cover it with plastic wrap. Place the bowl on your counter away from drafts for the initial rise.
The rise time will be 12 -16 hours.
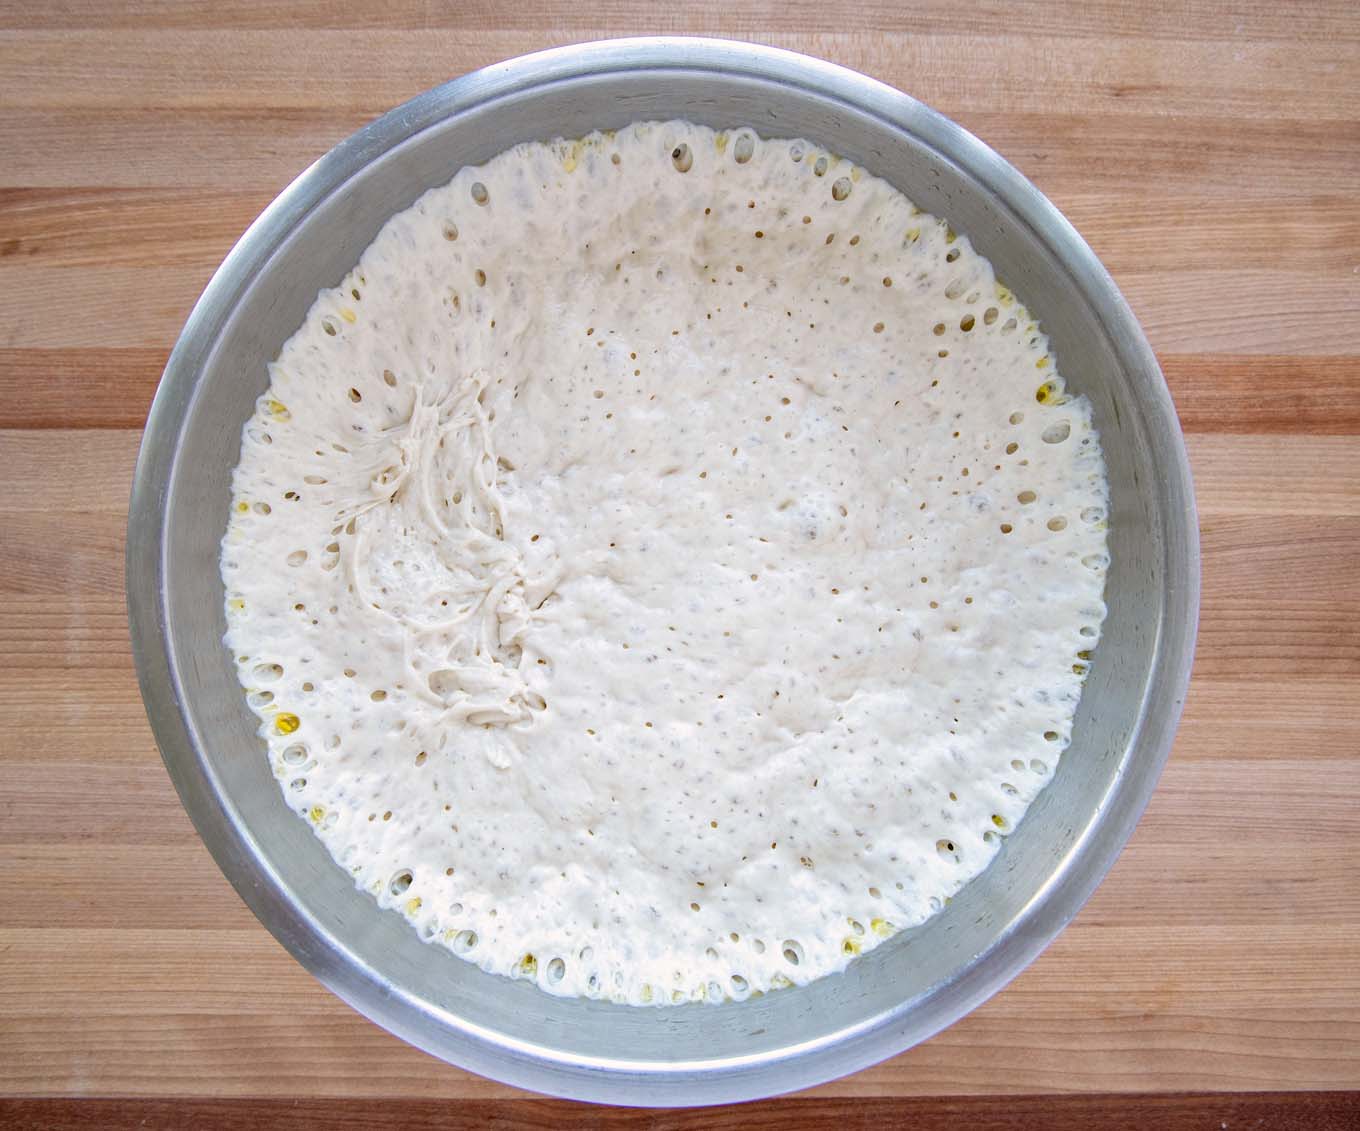
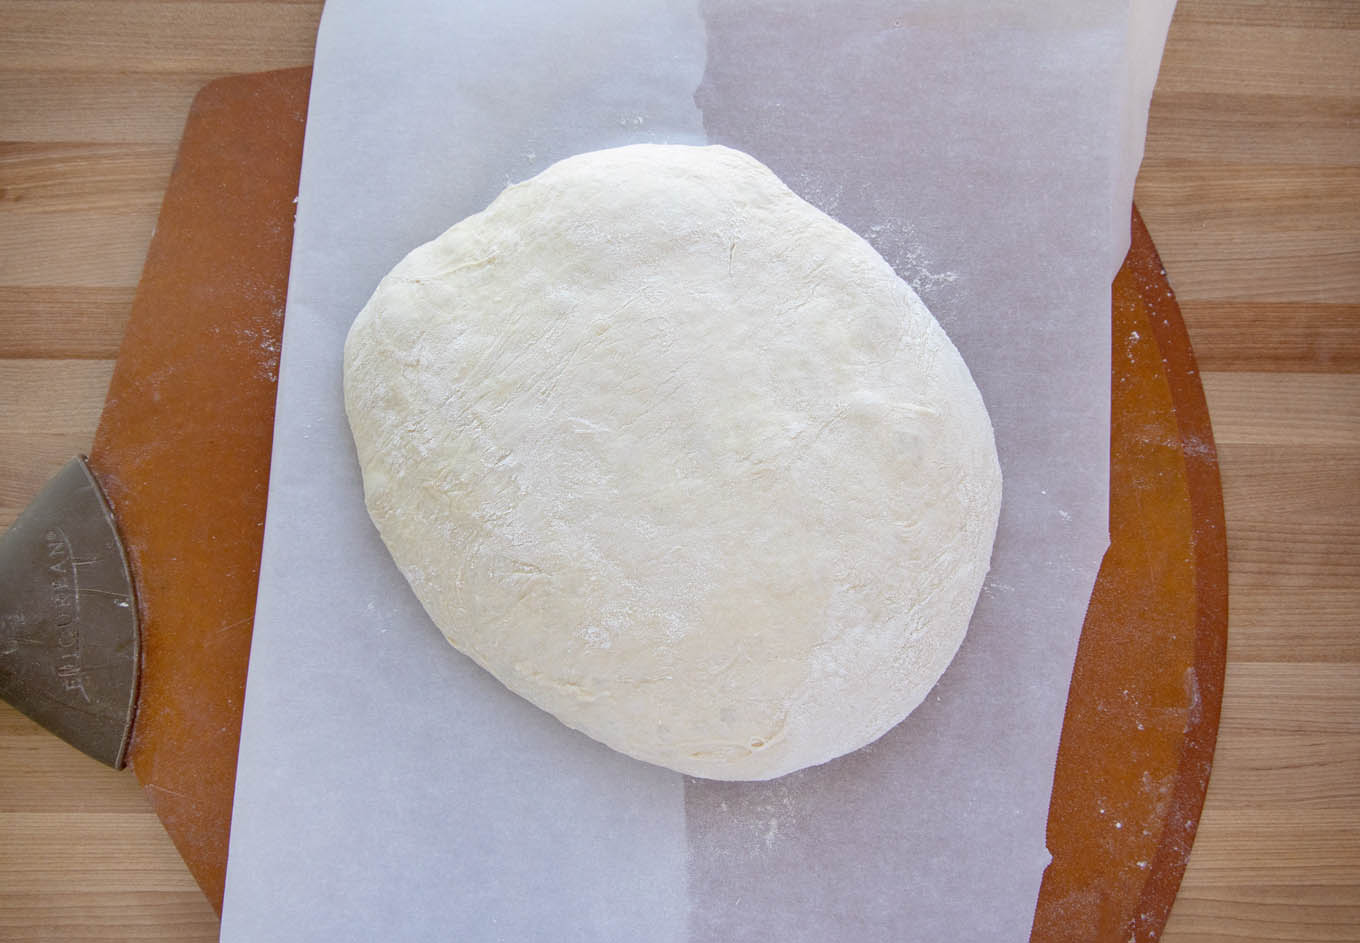
When the first rise is done, the bread dough should look like this. The dough may rise a little more than it falls a little. That’s normal; don’t worry.
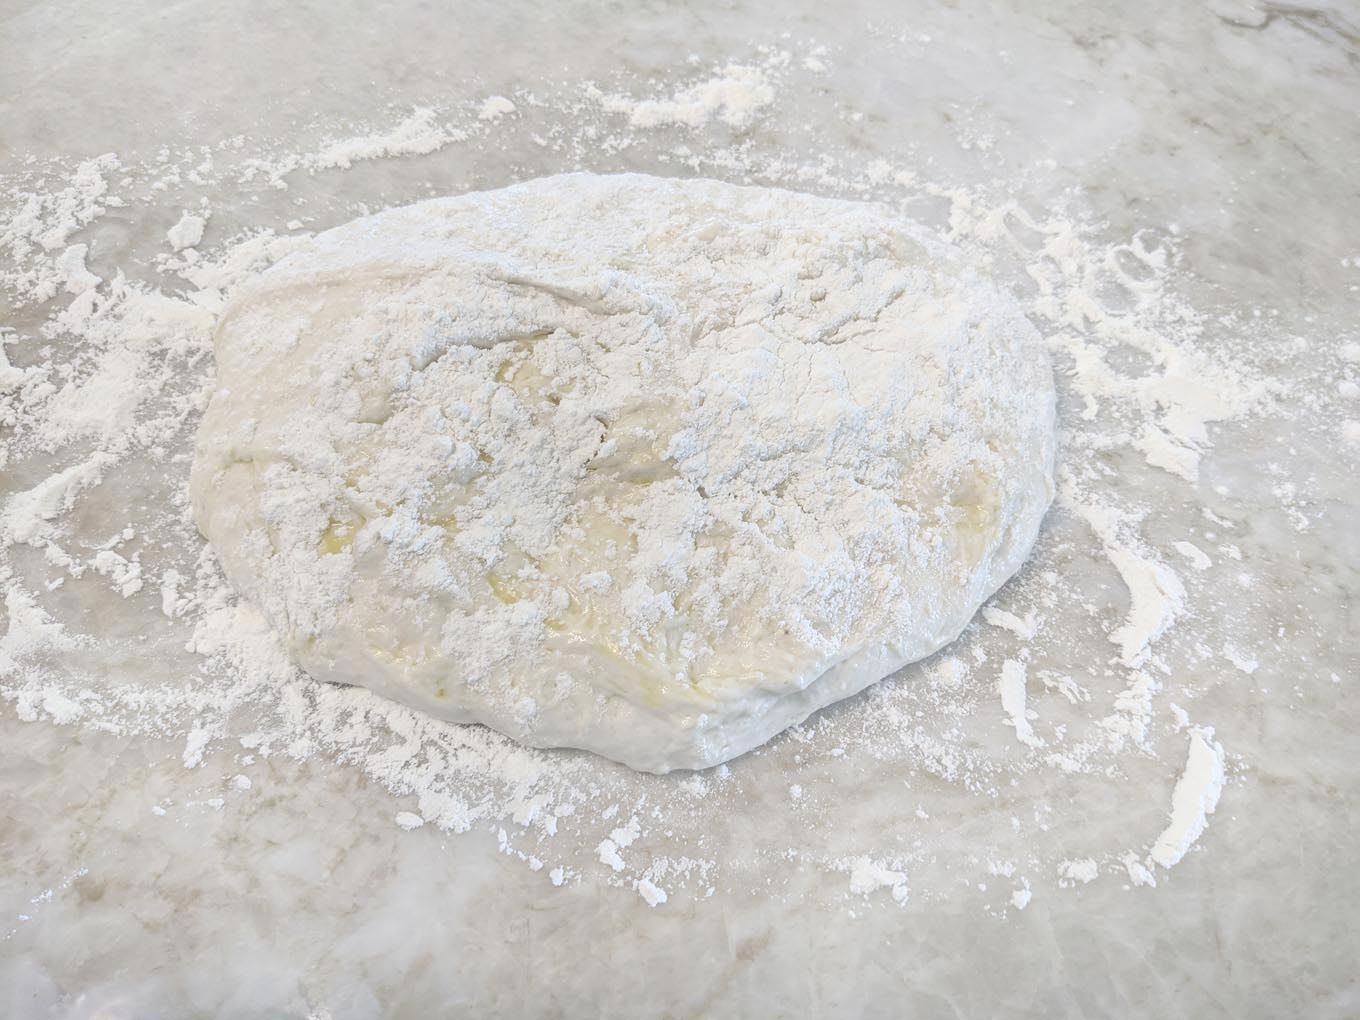
The first step is to lightly flour a countertop and place the bread dough on the floured area. At this point, you will begin adding additional flour until the dough is no longer wet and sticky.
You don’t want the dough completely dry, but it should be easy to work with when you’ve added enough flour. This should take you about 5 minutes.
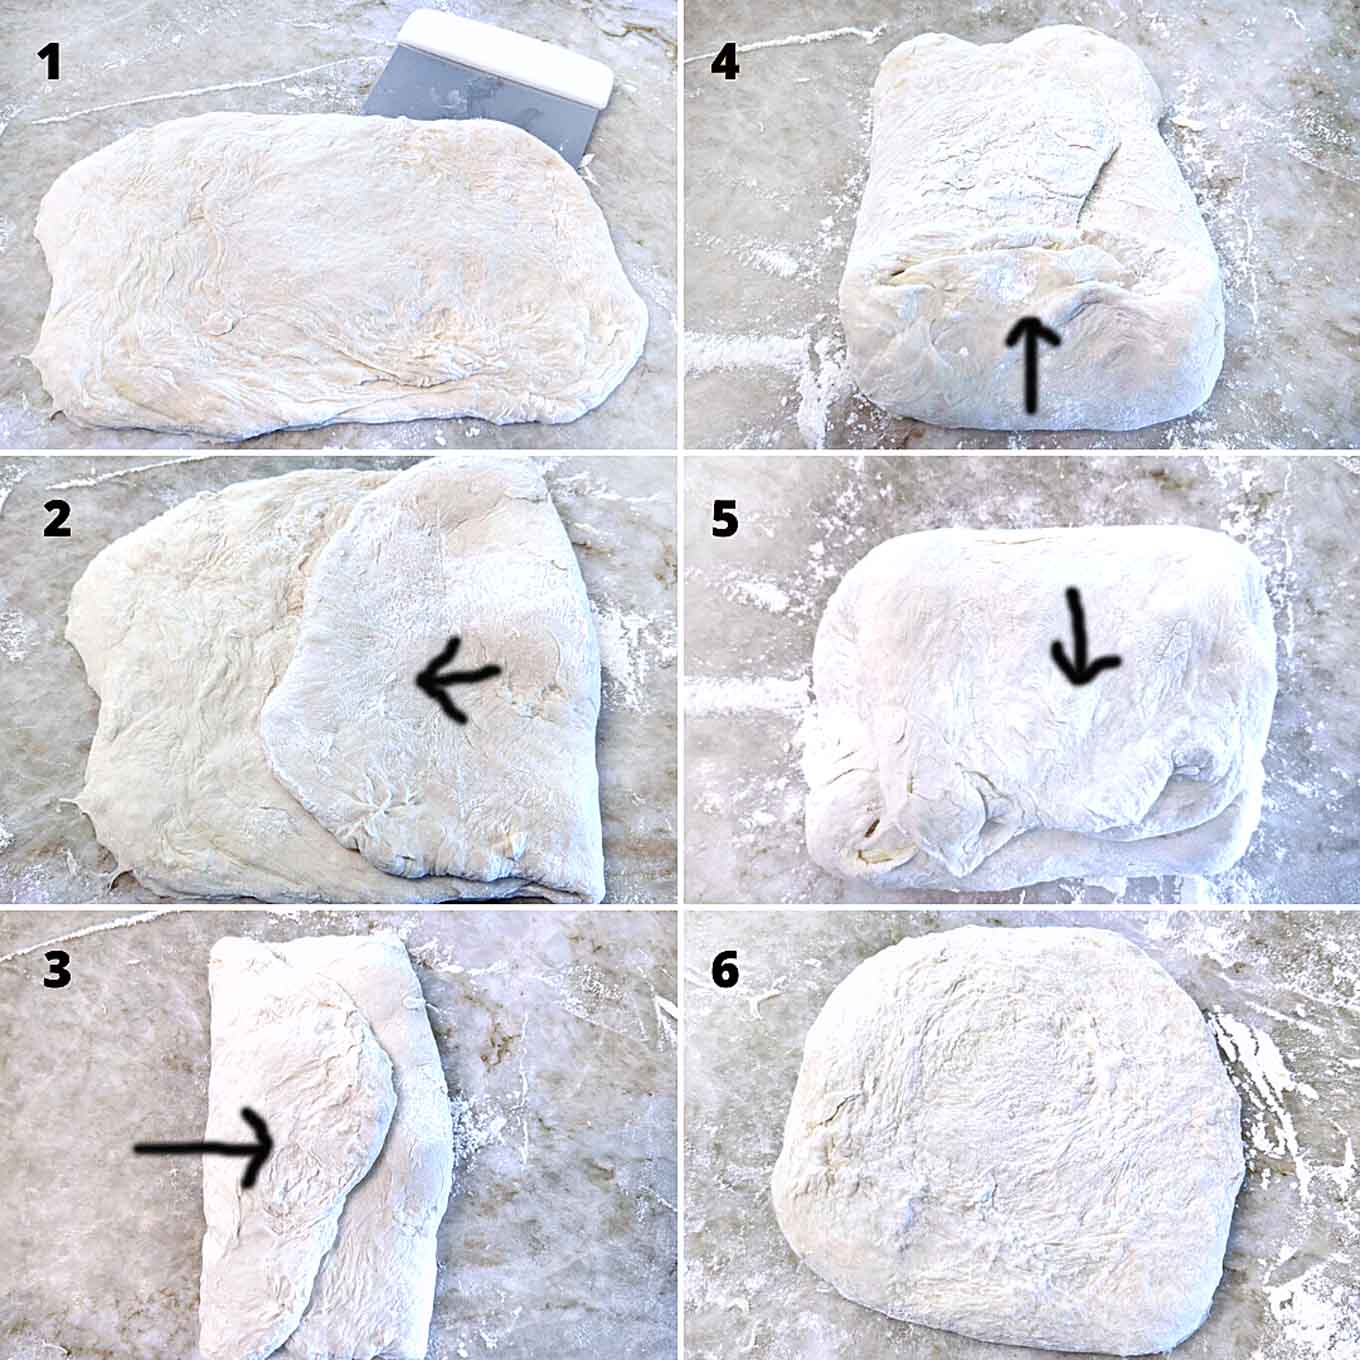
The next steps are the folding process that will give the dough the textures and appearance we want.
- On a floured surface flatten the dough out to make a rectangle
- Fold over ⅓ of the dough to the center (you’re folding the widest part first as shown in the pictures above)
- Fold over the other side of the rectangle overlapping the first fold of the dough
- Continue the folding process by folding the bottom ⅓ of the dough upwards toward the center of the little package you’ve made
- Now fold the top part of the dough down overlapping the fold you just made
- Turn the dough over (seam side down) and make a disc or oblong loaf, depending upon what shape of bread you want to make.
A Dough Scraper or cutter will make the process easier and help move the dough around without constantly touching it.
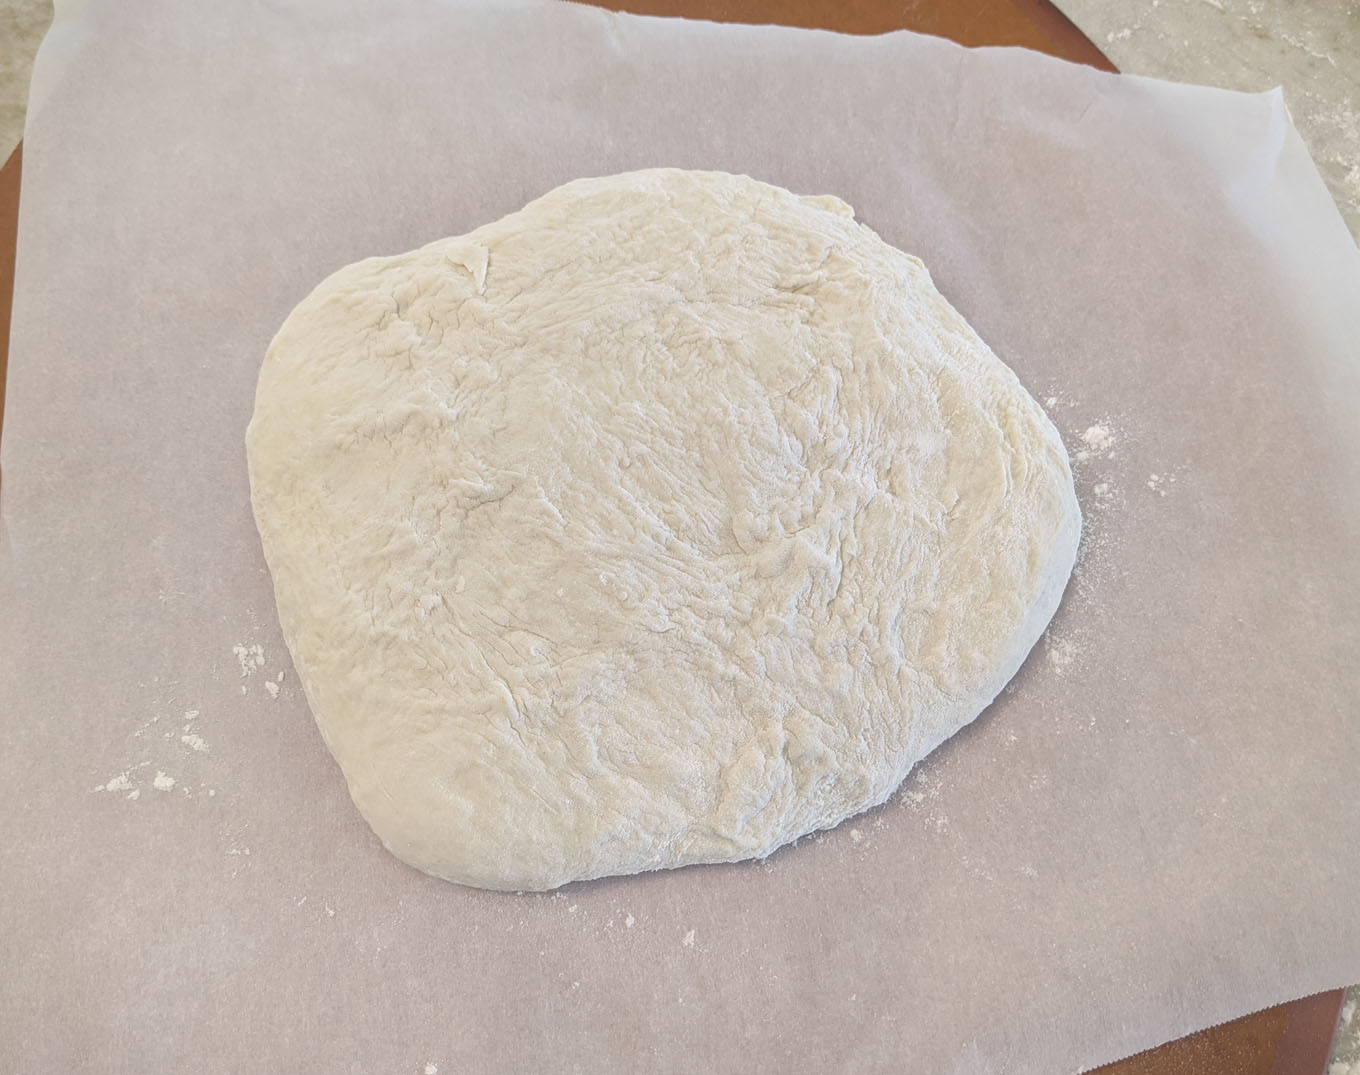
Place the finished dough on parchment paper (sprinkle cornmeal or flour on the parchment before placing the dough)
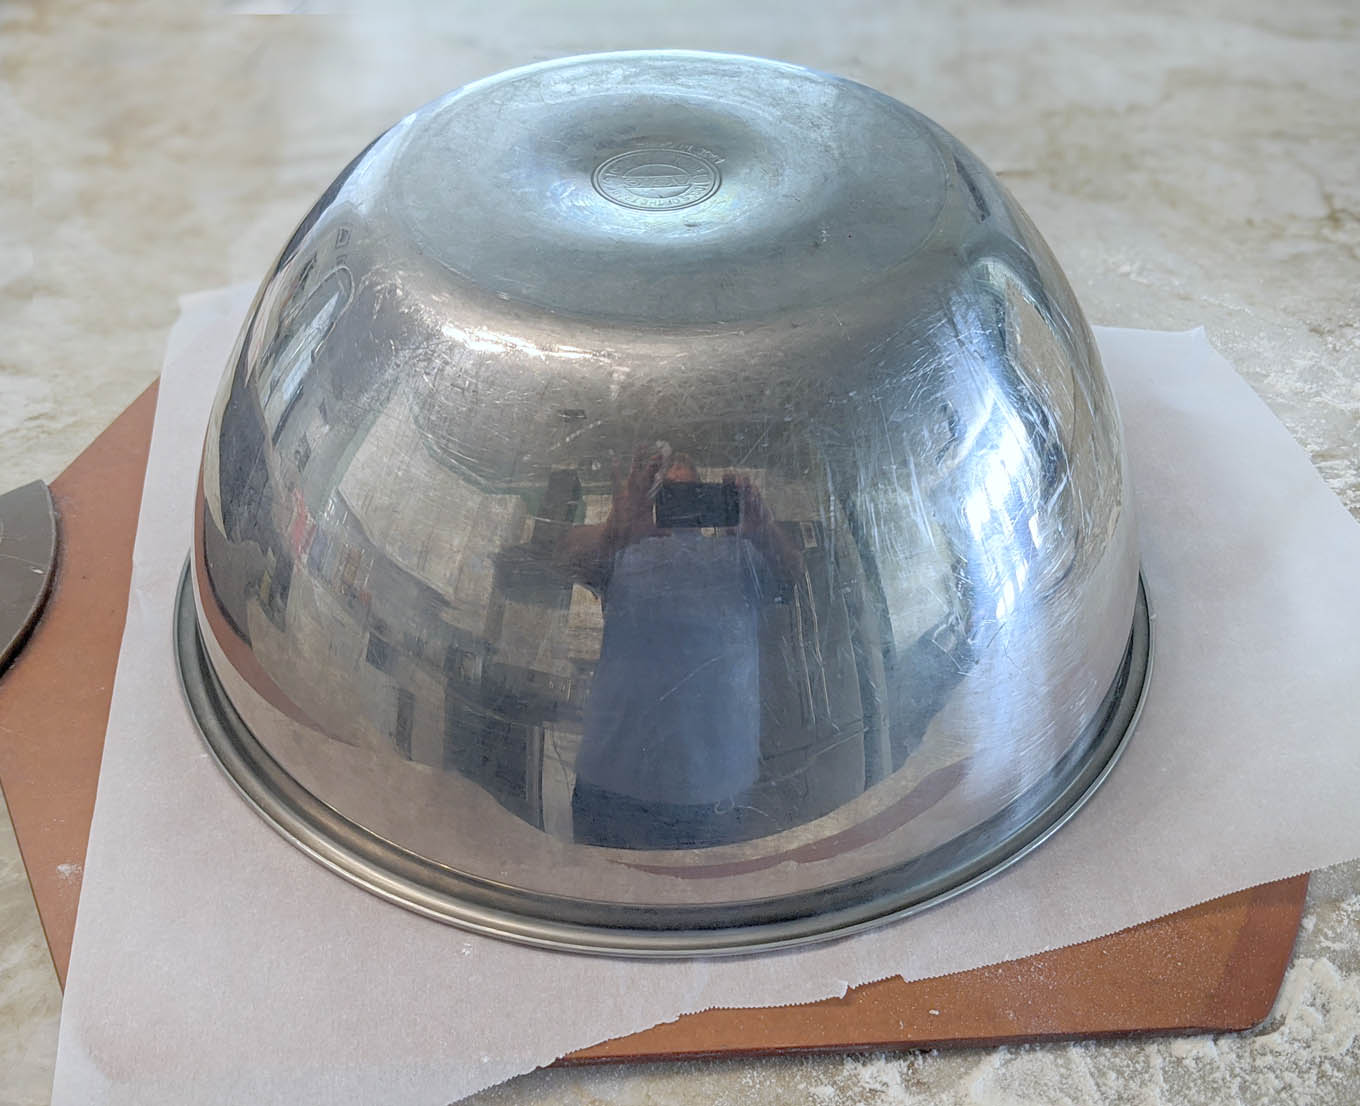
For the second rise, cover the dough with a bowl or damp tea towel. Preheat your oven to 450 degrees F. and place the dough on top of the stove.
The rise time will be 30-40 minutes for the second rise.
When the bread has finished rising, it should have a pillowy appearance and feel. When you shape the dough, don’t handle it any more than you have to.
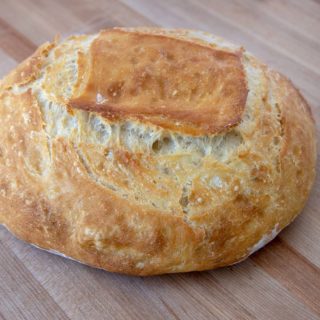
The next step is cutting a design (if you want to) on the top of the bread. I used one of my kitchen knives, but they never really make great cuts, so I ordered a Bread Lame and Scoring Tool from Amazon. You don’t really need this, but you know what they say about a boy and his toys.
The last step before placing the bread dough in the oven is to brush it with water. Water helps crisp up the outer crust of the bread, making it crusty, which I love.
- Brush with olive oil for a smooth chewy crust
- Dust the bread with flour for a rustic look and chewy crust
- Brush with melted butter for a softer crust and appearance
- Brush with egg to get a shiny brown crust
**If you want to add seeds to the bread, any of the wet methods will help the seeds stick to the bread.

I use an Emile Henry Cloche to bake my bread in. You can also use a Dutch oven for this Artisan Bread.
What size dutch oven should I use to bake this recipe?
To make one loaf from my recipe, you will need a 7 qt. dutch oven or bigger. If you have a 5 qt Dutch oven, you can reduce the recipe by one-third or make two loaves.
What if I don’t have a cloche or a Dutch oven?
If you don’t have a cloche or a Dutch oven, a heavy metal cake pan (round or oblong) will work. If you use a cake pan, you will do your final rise in the pan. The bread will come out a little darker because it won’t be covered.
Recipe FAQ
Bread that is mass-produced using large machines is referred to as Supermarket Bread. Artisan bread is usually made by hand using longer and more traditional processes.
My side-by-side tests showed that my folded no-knead bread had a rounder, more appealing flavor and had a better balance between acid and sweet than the loaves without folds.
The main reason your bread isn’t crusty is moisture, which comes from inside the bread. When cooling, you must give your bread enough room to breathe. Keep your bread on a cooling rack with enough space under it.
after my bread has cooled, I give it 7- 10 minutes and place it directly on the center rack in a 350-degree oven. This crisps the outside of the loaf nicely.
Yes, you can, but not using this recipe. Bread flour has a higher protein count which means the ingredients would have to be adjusted to accommodate using bread flour.
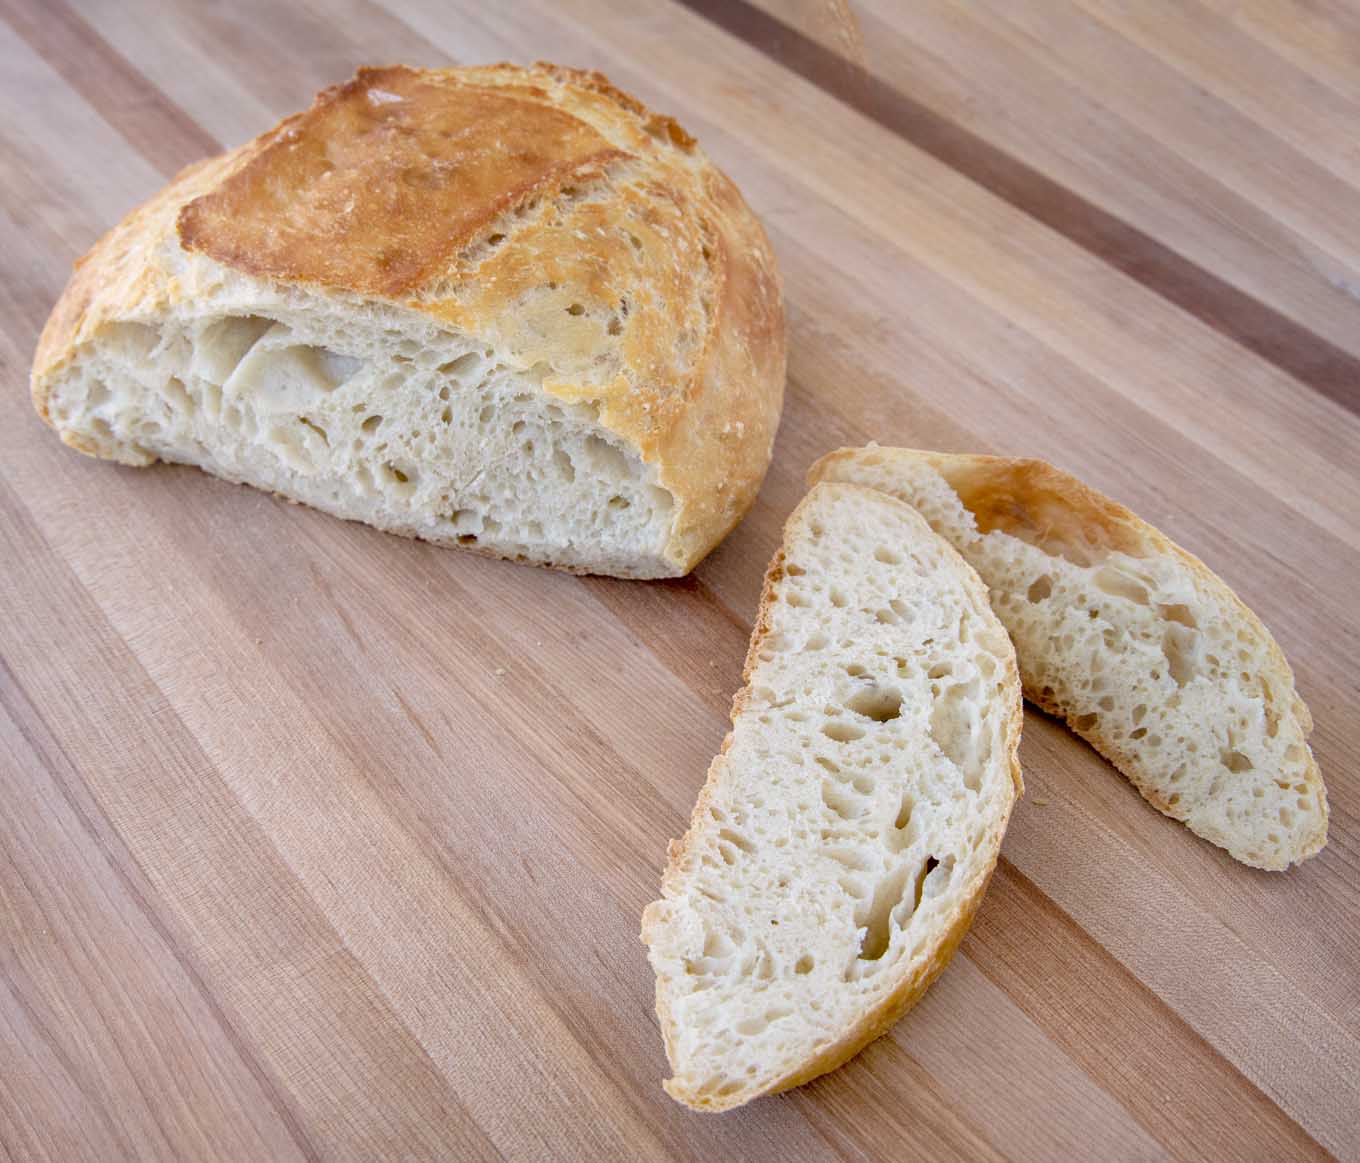
The finished bread is golden brown, crusty, and delicious. Once you get the hang of it, the process will only take minutes.
I keep a ziplock few bags of flour and other ingredients measured out ahead of time. That makes it super easy to make the bread after dinner so it’s ready to bake in the afternoon.
More recipes you’ll love!


Artisan Bread – Easy Homemade Recipe
Equipment
- cloche or ductch oven
Ingredients
Bread Dough
- 3 cups all-purpose flour
- 2 tablespoon sugar *see notes
- 1½ teaspoon salt
- ½ teaspoon dry active yeast
- 1½ cup water room temperature
Proof and Bake
- 1 teaspoon olive oil
- ½ cup flour to finish dough and use on countertop
- water to brush the bread with to brush the bread with
Instructions
Bread Dough
- Mix all the dry ingredients together. Use a whisk to make sure they are mixed well. Place into the bowl of your stand mixer set up with the dough hook.**you can also mix this by hand using a wooden spoon or your hands.
- Add the water and stir into the dry ingredients until a dough forms. It should start to pull away from the bowl. The dough will look wet and sticky.
- Place the dough in a large bowl that has been lightly oiled. Cover the bowl with plastic wrap and place the bowl in a warm part of your kitchen away from any drafts.
- Allow the dough to rise for at least 12 hours up to a maximum of 16 hours. 12-14 hours is the sweet spot. Bubbles wil form in the dough and it may drop a bit after rising.
Proof and Bake
- Lightly flour the countertop and dump out the bread dough on the floured surface.
- Add flour into the dough as you work the dough around. This will take about 5 minutes. Keep adding flour until the dough isn't sticky. Form the dough into a ball.
- On a floured surface, flatten the dough out to make a rectangle.
- Fold over ⅓ of the dough to the center (you're folding the widest part first as shown in the pictures). Fold over the other side of the rectangle overlapping the first fold of the dough.
- Continue the folding process by folding the bottom ⅓ of the dough upwards towards the center of the little package you've made.
- Fold the top part of the dough down overlapping the fold you just made.
- Turn the dough over (seam side down) and make a disc or oblong loaf depending upon what shape bread you want to make.
- Place the finished dough on parchment paper (sprinkle cornmeal or flour on the parchment before placing the dough)
- Cover the dough with a bowl or damp tea towel for the second rise.
- Preheat the oven to 450 degrees F and place the empty cloche or dutch oven in the oven on the middle rack to preheat along with the oven.
- Place the covered dough on top of the stove to finish rising for 30 – 40 minutes.
- When the dough has fully risen, using a very sharp knife cut a design into the top of the bread. Make deep cuts.Brush the entire bread dough with water.
- Very Carefully remove the cloche (or dutch oven) from the oven (close the oven door).
- Place the parchment paper with the dough onto the cloche, (or inside the dutch oven) cover with the lid and place back into the oven.It's okay to bake the bread on parchment paper.
- Bake the bread for 30 minutes at 450 degrees F.
- After the 30 minutes have passed remove the lid from the cloche or dutch oven, leaving the bread in the oven.Turn off the oven.
- Allow the bread to stay in the oven for about 10 minutes (less if it looks like it's getting too dark). This will finish the baking process, crisping up the outside of the crust bread adding more color to the crust.Dark Bread is okay, it looks more rustic!
- Let the bread rest for at least an hour before cutting. Cutting the bread too soon will release the steam (water) and toughen the bread.
Video
Notes
Why do I need sugar in my Bread Recipe?
That’s a good question and one I had pondered until I spoke with a master baker about what each ingredient did to make the end result in the bread I wanted. Sugar has quite a few jobs and provides substantial improvements to yeast bread. It’s not an essential ingredient but it helps make a better loaf of bread.- Sugar provides an additional source of food for the yeast. The yeast converts this food to carbon dioxide and alcohol
- Sugar (like salt) enhances the flavor of the bread
- Sugar helps give the crust that golden color we love
- Sugar improves the crumb texture of the bread
- Sugar helps retain moisture in bread and slows down the formation of gluten strands, which helps keep the bread fresher longer
Will sugar make the bread sweet?
That’s a great question and the answer is no. We are not using enough sugar to make this a sweet bread. You won’t even notice it’s in the bread. *The Sugar can be left out of the recipe. I use sugar because of all the reasons listed above. But the bread recipe will still work without it.Why do I need salt in my homemade bread?
- Salt regulates the rate of yeast activity. It provides a slow and steady rise which is even more crucial in this semi no-knead bread. The slower rise gives the yeast time to develop the characteristic bread flavors we love
- Salt also strengthens the gluten structure of bread dough. It keeps the trapped carbon dioxide bubbles to expand too quickly
- Salt makes bread taste better
How to cook the bread on a cookie sheet
Preheat the oven to 450°F. Set one rack in the bottom of the oven and one rack in the middle of the oven. Place a metal cake pan in the bottom of the oven (you will add water to this later)Prepare a sheet pan by dusting it with cornmeal or use parchment paper.
Place the dough on the prepared cookie sheet for the final rise.
Follow the recipe for the rest of the dough preparation.
Place the sheet pan on the middle rack and pour one cup of warm water into the cake pan on the bottom rack.
Bake for 30 minutes or until the outside of the bread has a nice golden color.
Allow the bread to rest on a wire rack until completely cool.
Jennifer says
Hi ~ Looking forward to making this bread. Is the bottom really hard? I’m trying to find a recipe that is not so hard to chew.
Chef Dennis Littley says
It’s not that hard and it does soften up as it sits.
Judy says
Wow! The flavor of this bread is amazing. It’s not ‘yeasty’ tasting like other breads I’ve made. Thank you for the detailed instructions, and for sharing your knowledge. This recipe will be in my ‘keeper’ file! Delicious 😋!!! Love your blog, Chef. Thank you!!!!
Chef Dennis Littley says
Thank you Judy, your comment made my day! I’m glad you enjoyed my bread recipe.
Helen Lo Sasso says
To make Artisin Bread: I do not understand number 11, “place on top of stove”. Do you mean place in oven? Love your recipes and instructions.
Thank you
Helen Lo Sasso
Chef Dennis Littley says
11. Place the covered dough on top of the stove to finish rising for 30 – 40 minutes. It’s the final rise. Place it on the stove top, because its warm there.
Jeff says
Chef Dennis, my sister lives in northwestern Colorado at about 8000ft elevation. Does she need to make any adjustments to the recipe to allow for it?
Margot says
I really like your recipes! Thank you! I do have one bread question though. I have 2 unglazed pieces of earthen ware
– one long and one round – they were advertised years ago as bread pans. They don’t have covers, though! Can I make bread using these as is, or should l preheat them, or use them for the final rise? add water to the oven? maybe place a tinfoil cover until the last 10 minutes? I really would love to use them as they were my dad’s. He used them to make bread, but not sure how he used them? Thanks for any help! 👍😋
Chef Dennis Littley says
If you don’t have a cloche I would cook them uncovered on one of your pieces of earthen ware. I would preheat it in the oven and slide the bread dough on it when ready to cook. You can place a pan of water in the oven during the oven preheating, its important for the early stages of the process, when baking the loaf uncovered. Foil should not be necessary.
Margot says
Thank you (a little late) for your advice. I have not tried it yet, but as time spent indoors increases, l plan to do some serious baking! 😉😄
Kirk says
Absolutely the best.!! Thank you
Chef Dennis Littley says
You’re welcome! Happy to hear you enjoyed the bread.
STEPHANIE says
How big should the Dutch oven or cloche be?
Chef Dennis Littley says
I used an Emil Henry cloche that was about 12 inches. My Dutch oven is 7.5 quarts.
Jeff says
First loaf was a winner and the 2nd loaf just came out of the oven! Thank you again! What’s your thoughts on doubling the ingredients and making one very large loaf! What changes would I have to make?
Jeff says
@chefdennis I just completed the 1st step of making the dough and I’m excited! The dutch oven I’ll use is a ceramic lined cast iron pot with lid and was wondering what your thoughts were on that and you mention corn meal or flour and I have both, was wondering your preference and why!?
Chef Dennis Littley says
there is no real reason to use flour or cornmeal, I like the look of cornmeal under the bread but like how flour makes the top of the loaf look. Your Dutch oven should work great, I was given the cloche which is why I used it for my bread, but I’ve been meaning to try it in my Dutch oven.
Jeff says
Thanks! I was thinking that Lodge dutch oven would do the trick. I have cooked indoors and grilled and smoked outdoors for years. was always a little afraid of baking. When the pandemic created $4 to $5 for a decent loaf of bread, I turned to the internet and started baking bread and cinnamon rolls and cookies, cobblers and a favorite persimmon pudding! It’s awesome chefs like you that lend us your experience and knowledge to help us save money and eat well too!
It’s in the oven now I’ll report back later! Have a great weekend!
Colette says
Hey I appreciate you getting back to me so quickly ! I had complete success with round 2. While my 1st loaf wasn’t a complete disaster, it turned out very hard and pretty tasteless. Kind of like a huge hockey puck you needed to literally saw through 🤣 Per your instructions I added barely enough flour to shape and fold but I added a very liberal dose of salt and a Sicilian spice blend before I did the actual fold. I shaped into a loaf this time and used a French/Italian loaf pan to do the 2nd proof and bake and used the cookie sheet baking method. What a difference it made ! The crust has just the crunch i was looking for and the inside was pillowy soft but still had a good chew. The added salt and spices really made a world of difference in the flavor. Thanks for a bread recipe that was a success and for the help I needed to make it so.
Colette says
I’m having an issue with adding the flour after the first rise and whether you knead at this point to incorporate it ? My dough took on probably close to 2 cups which I did not expect and then of course 30 minutes was not enough baking time and never really browned and weighed a ton ! It’s cooling now but I don’t expect good results. I also used my heavy metal cuisinart pot and wonder if that was an issue ? I started another dough and hope you can help with these issues.
Chef Dennis Littley says
You added too much flour when you were working the dough for the second rise. You should have added about a half a cup at most. Rolling the dough in
the floured surface should pretty much be enough to make the dough the right consistency. I don’t know why your dough needed that much flour unless you used too much water.
Gillian says
Can you bake the bread without any pans at all, except for a cookie sheet? If so, do I need to adjust the baking time and/or temperature?
Chef Dennis Littley says
Preheat the oven to 450°F. Set one rack in the bottom of the oven and one rack in the middle of the oven. Place a metal cake pan in the bottom of the oven (you will add water to this later)
Prepare a sheet pan by dusting with cornmeal or use parchment paper.
Place the dough on the prepared cookie sheet for the final rise.
Follow the recipe for the rest of the dough preparation.
PLace the sheet pan on the middle rack and pour one cup of warm water into the cake pan on the bottom rack.
Bake for 30 minutes or until the outside of the bread has a nice golden color.
Allow to rest on a wire rack until cool.
Gillian says
Ooo! I was so close; I almost added the water to a pan in the bottom rack (I’ve seen it done by other bakers) but didn’t “just in case”; just brushed the top as you directed. It still tastes great and the crust is nice, but next time I’ll do that as well. Definitely making this again, and thank you for the quick reply!
AB says
You mentioned olive oil above but I can’t see where it’s used in the recipe
Chef Dennis Littley says
That would be in step #3. Lightly oil the bowl the dough is going into.
Marjorie J says
I like to use the dough cycle on my bread machine, then form, proof and bake. I’m using the artisan bread dough cycle for this, which is about 5 hours. Is the resting time still 12-16 hours after the cycle?
Chef Dennis Littley says
I would say no, I would think 4 -5 hours for the final rise would be sufficient. although I’ve never used a bread machine. The other issue is this is a no-knead bread recipe, and your bread machine has an artisan bread cycle, which I don’t think is the same as a no-knead artisan. This is a wetter dough, which as it sits and rises gets to the right consistency. So I’m not sure if my recipe would work in your bread machine, I could be wrong and if you try it please let me know.
Jovita says
What happens if I wait longer than 16 hours to start to bake it?
Chef Dennis Littley says
If you wait to long it will overferment and fall. If you can’t make it right away, refrigerate the dough until you have time to let it do the second rise.