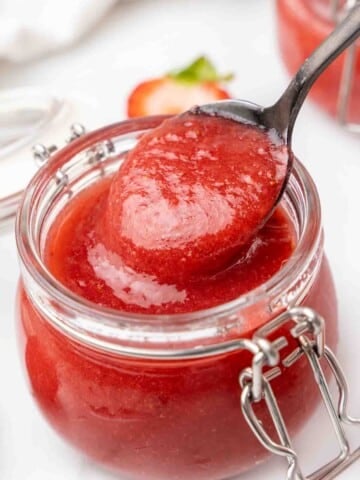
This easy strawberry jam recipe is sweet, sticky, and bursting with fresh strawberry flavor that tastes like pure sunshine spooned straight from the jar.
Our homemade strawberry jam is cheaper than store-bought jam and tastes better. It’s the kind of homemade jam that makes a plain piece of toast feel like it came from the brunch menu.
Strawberry jam began as a clever way to stretch the short but glorious strawberry season. But somewhere along the way, it quietly claimed its crown as the jam of jams.
It’s a staple in school lunch sandwiches, a fixture on diner counters, and can be found at hotel breakfasts from coast to coast. It’s the one you reach for without thinking, and chances are, it’s sitting in your kitchen right now.
The steps are simple and forgiving, even if it’s your first time making homemade strawberry jam.
You don’t need any special equipment, either. You just need a pot, a spoon, and a stove that can hold a steady simmer.
If you’re ready to spread the love, my Traditional Irish Soda Bread is hearty enough to hold up to a thick layer of jam. And my Almost No-Knead Artisan Bread practically begs for a dollop of something sweet to melt into its warm, crumbly edges.
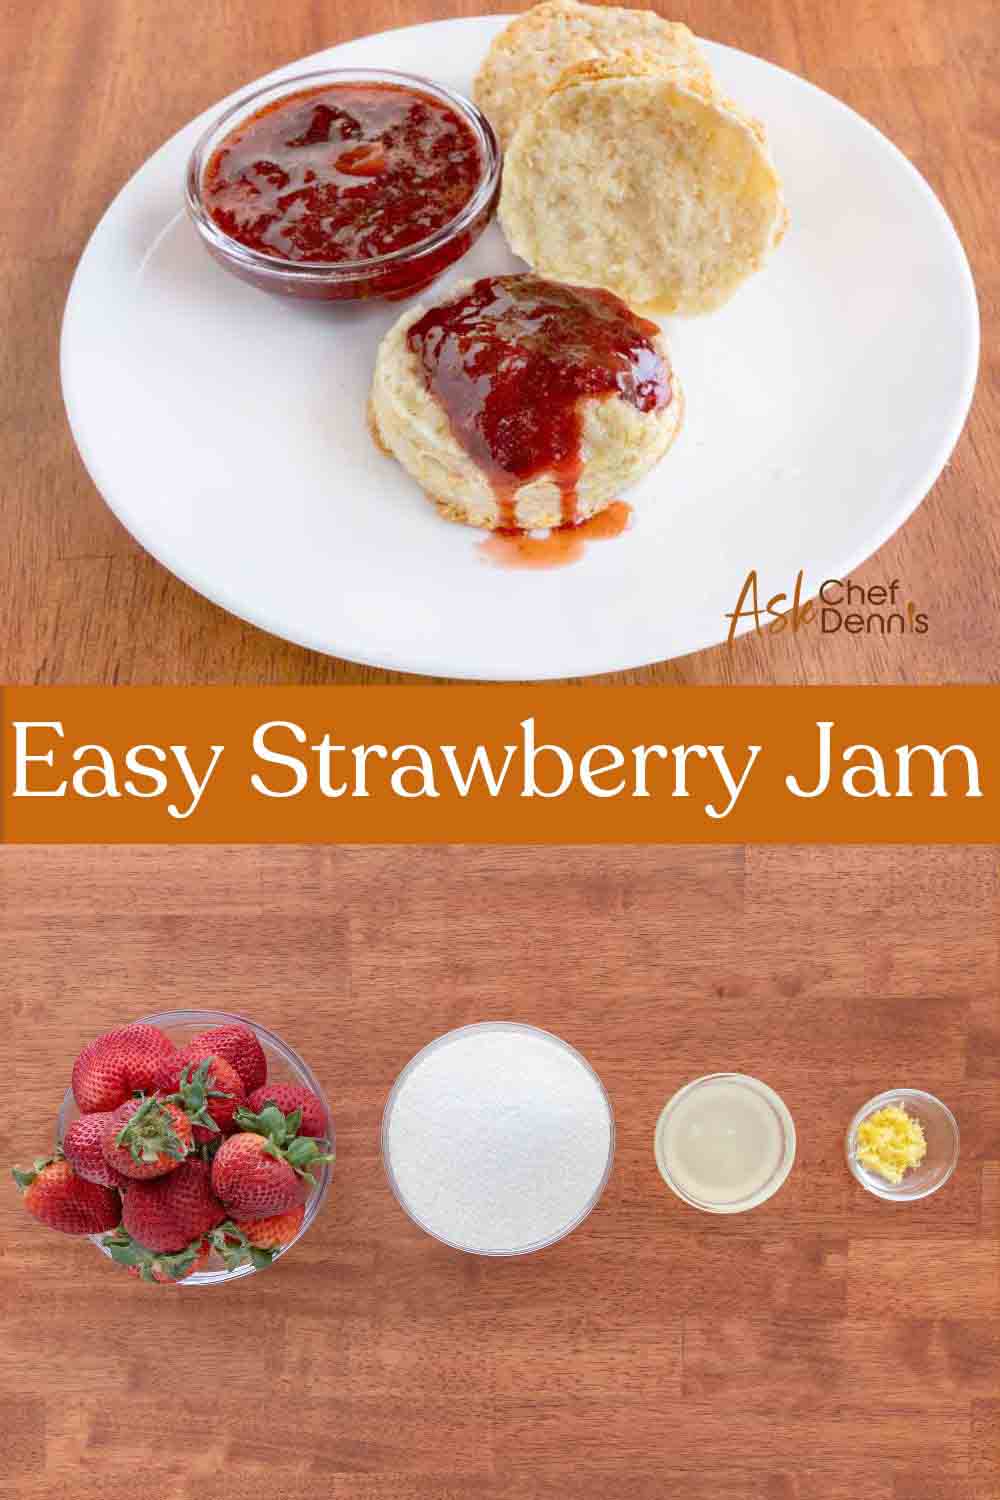
Ingredients For Strawberry Jam

Let’s start by gathering the necessary ingredients to prepare our easy strawberry jam recipe. Culinary professionals refer to this as mise en Place, which means “everything in its Place.”
Setting up your ingredients not only helps speed up the cooking process but also ensures you have all the necessary ingredients on hand to make the recipe.
Can I Change Up the Recipe?
We made the recipe with fresh strawberries, but you can use frozen strawberries if you have them on hand. You don’t need to thaw them first, but you will need to cook the mixture a little longer to let the extra liquid evaporate.
If your berries are super ripe, you can reduce the amount of sugar slightly. Just keep in mind that sugar helps the jam set properly and extends its shelf life, which means that reducing the sugar too much can leave you with a runny jam that spoils faster.
For a softer citrus note, you can swap the lemon zest for orange zest. Or leave it out entirely if you prefer a more straightforward strawberry flavor.
A tiny pinch of salt can help balance the sweetness and bring out more of the fruit’s natural flavor without making the jam taste salty.
How to Make Strawberry Jam
Follow along with my simple step-by-step instructions to learn how to make strawberry jam in your home kitchen.
Before you begin, place a small plate and a tablespoon in the freezer. This will help you test the jam set later.
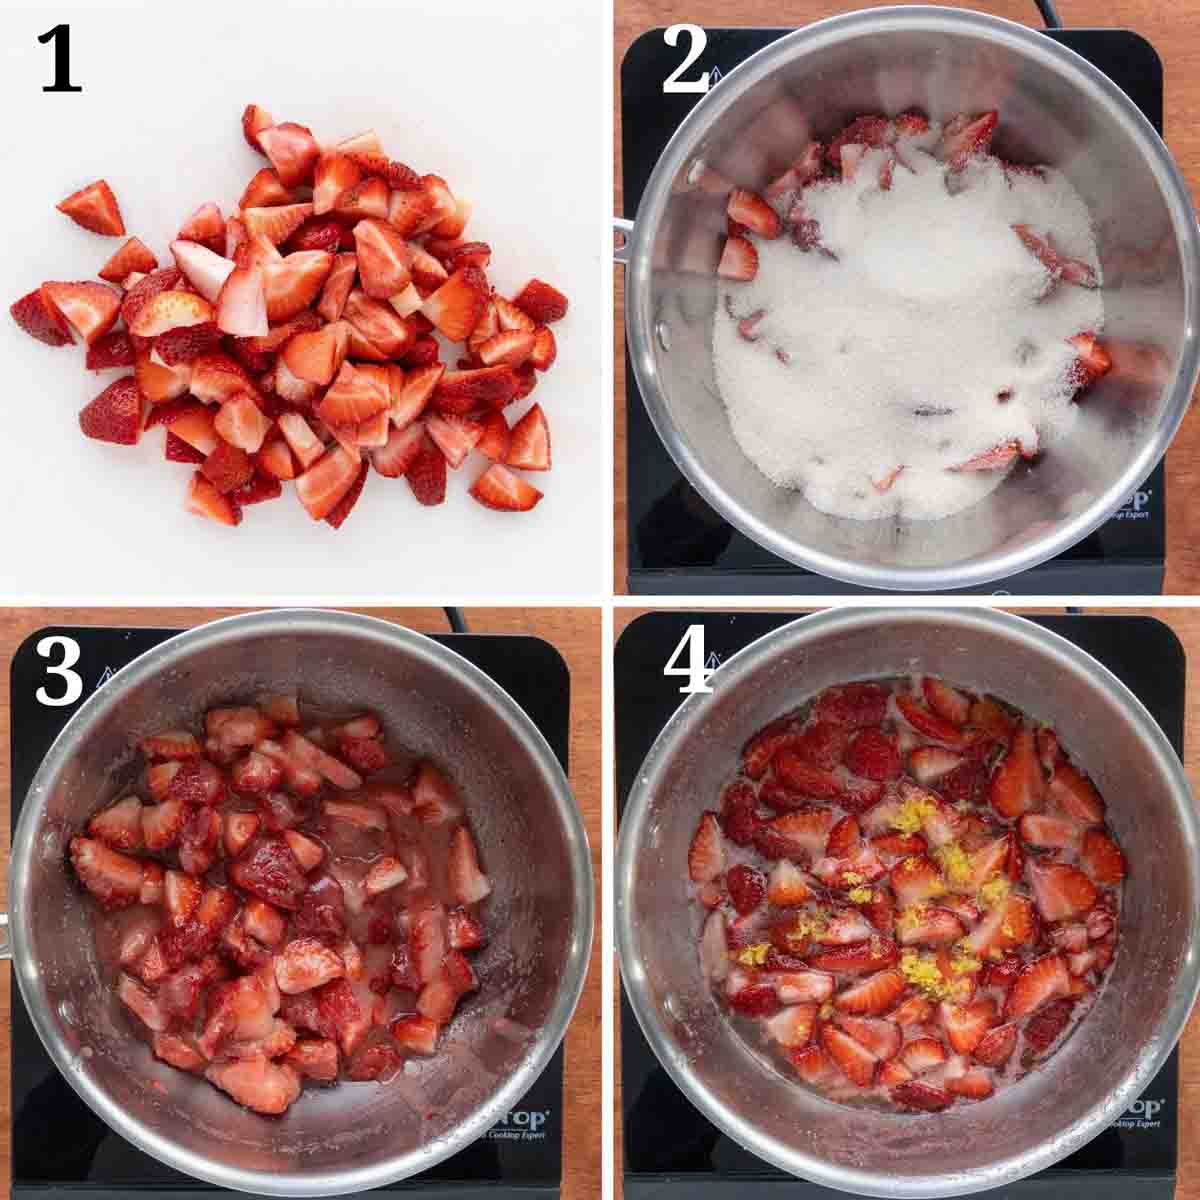
- Rinse the strawberries and remove the tops.
- Then slice them into small pieces for even cooking.
- Add the strawberries and granulated sugar to a large pot set over medium heat.
- Stir the strawberry mixture well to combine the fruit and sugar. Heat for about 5 minutes, stirring occasionally, until the mixture begins to bubble.
- Add the lemon juice and lemon zest, then stir to fully incorporate the citrus flavor. Continue heating until the strawberry jam reaches a light boil, stirring often to avoid sticking.
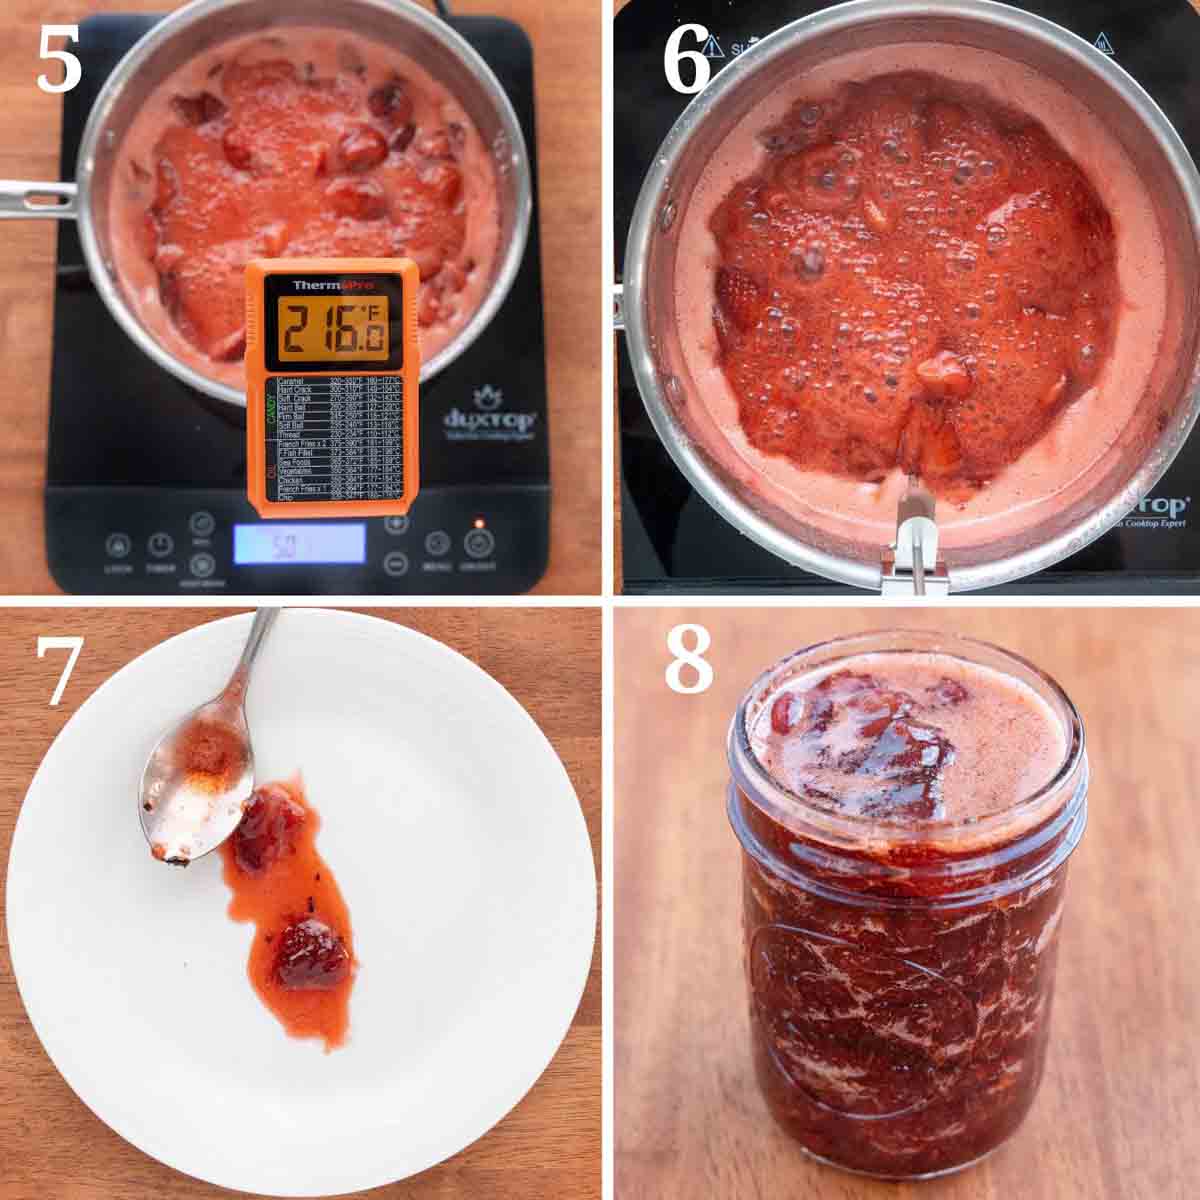
- Use a candy thermometer to monitor the temperature, aiming for a proper set at 220°F.
- Once it hits 220°F, reduce to low heat and cook another 7 – 10 minutes until a thick jam forms.
- Remove the chilled plate and spoon from the freezer to test the jam set using the frozen plate method.
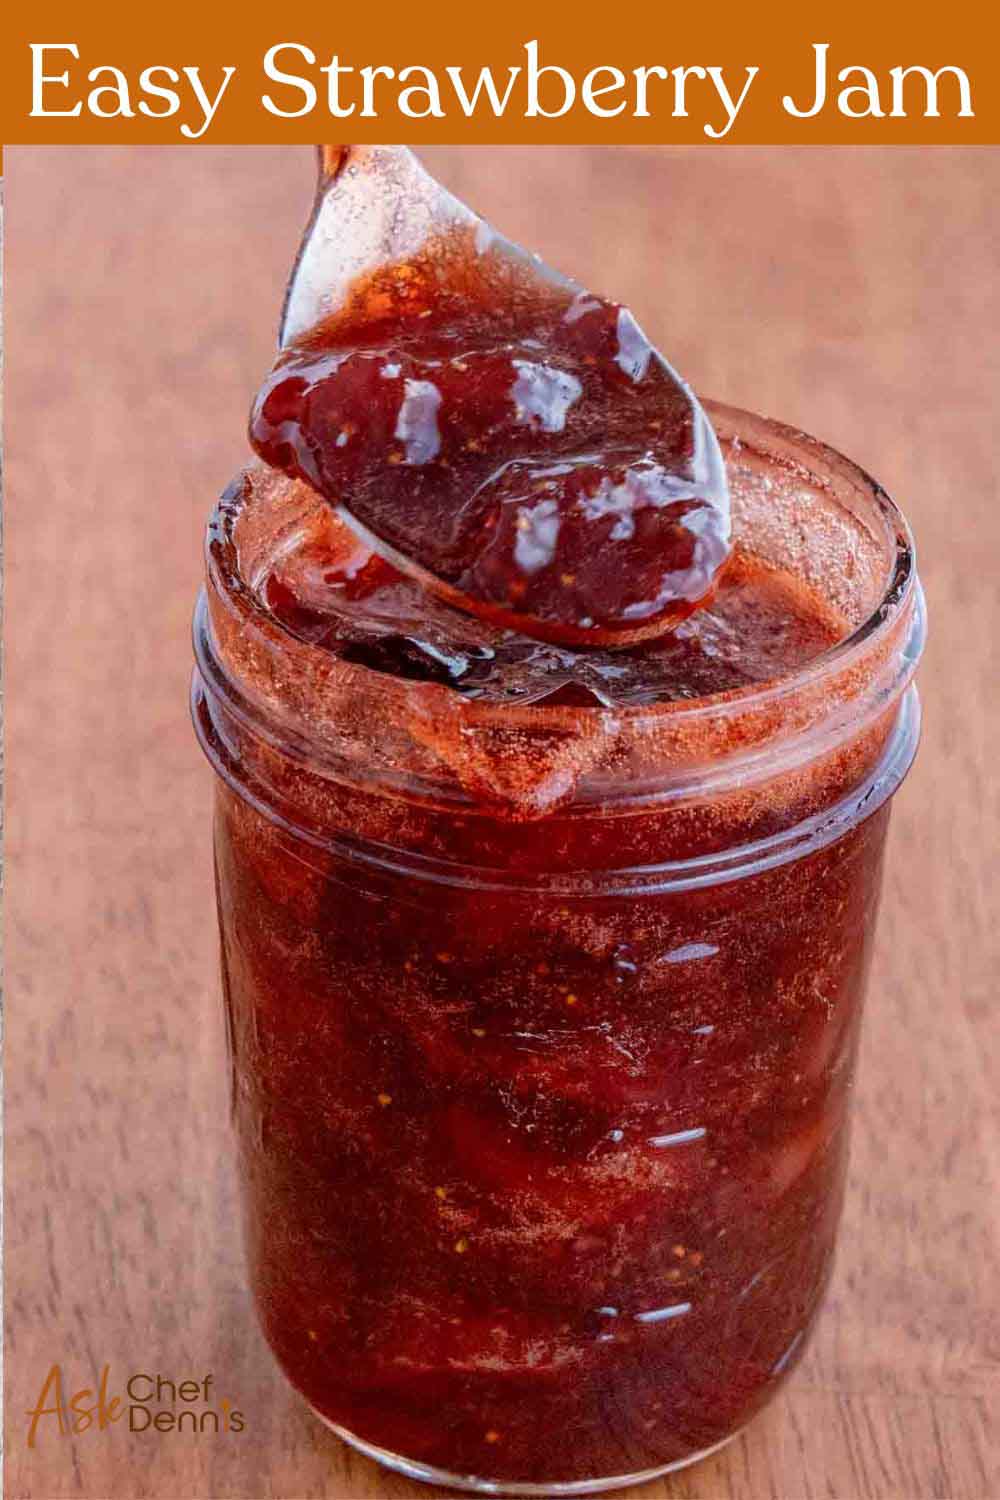
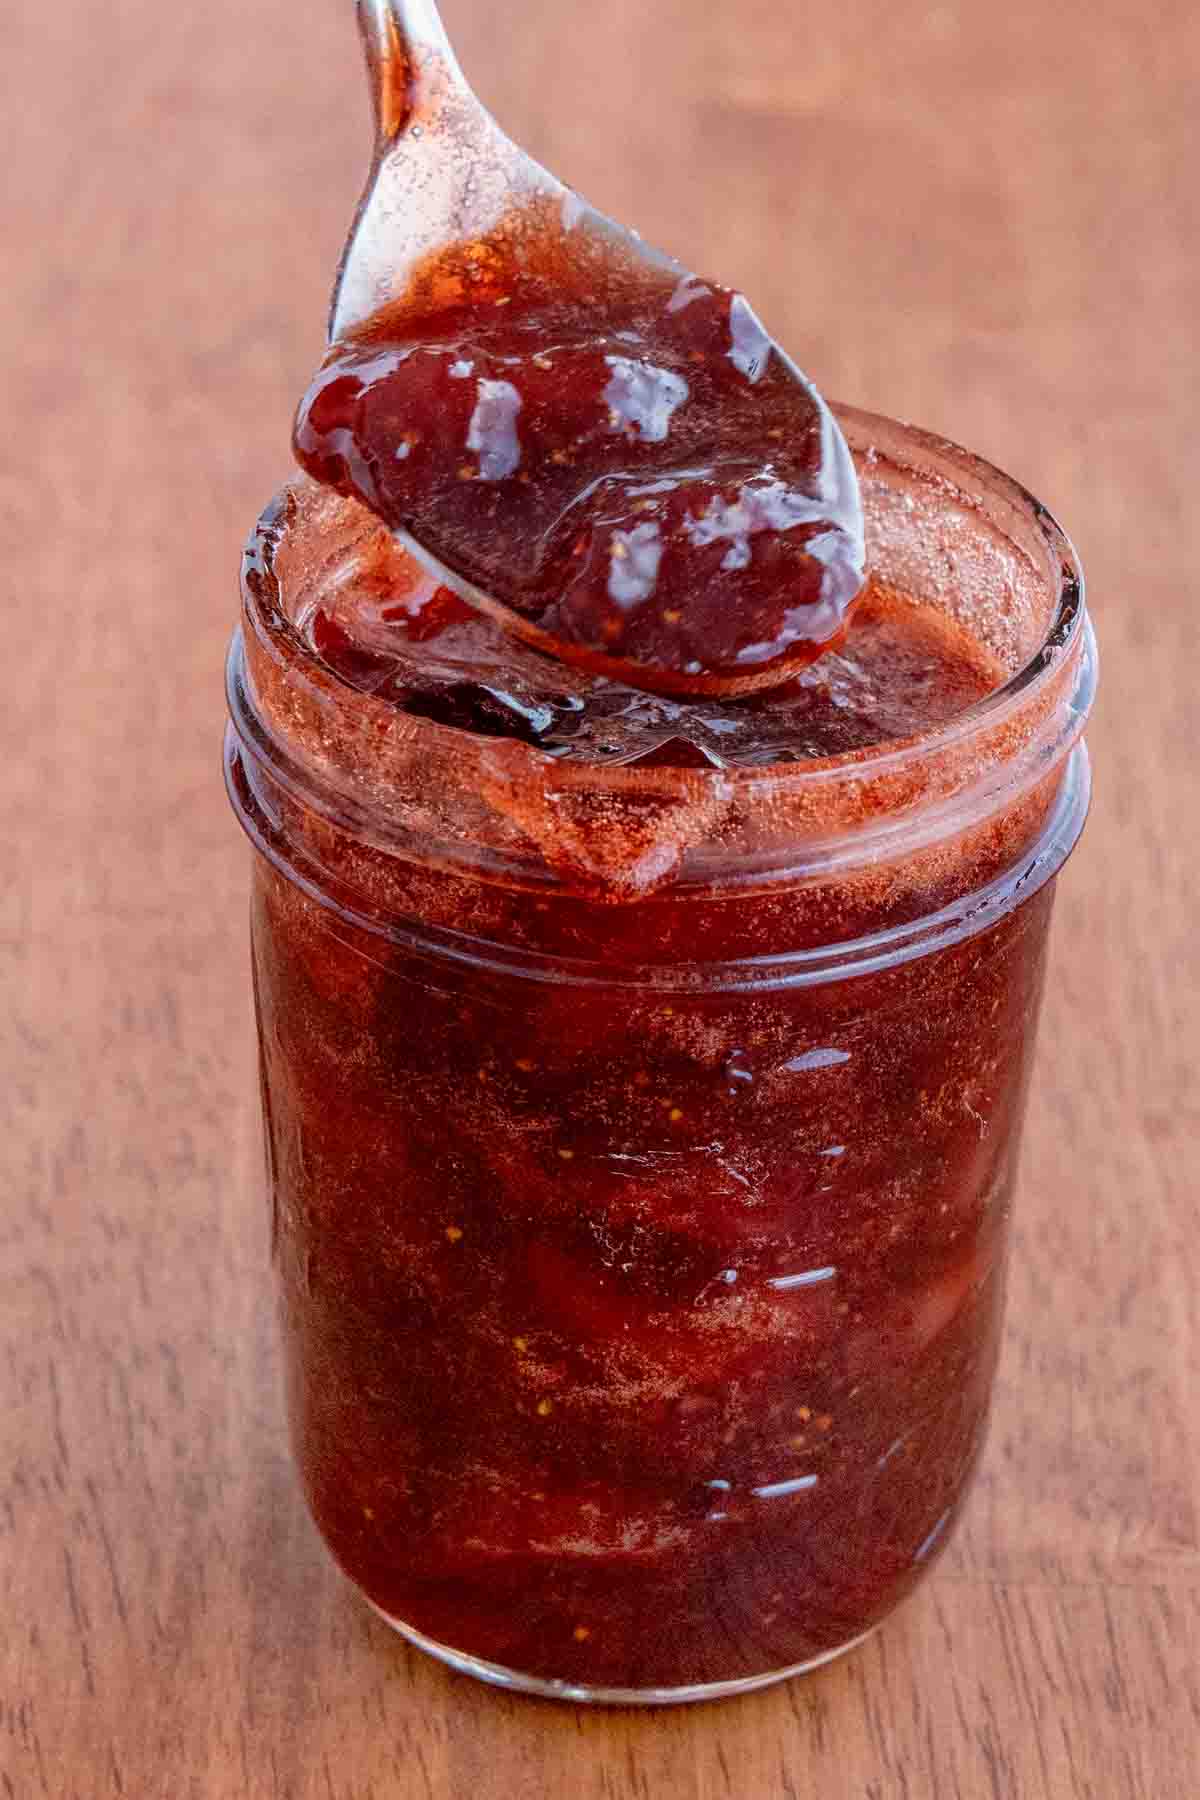
Spoon a little jam onto the frozen plate, swipe it, and check for wrinkles to ensure it’s set. - When ready, pour the hot jam into a clean jar (or mason jar) and allow it to cool to room temperature.
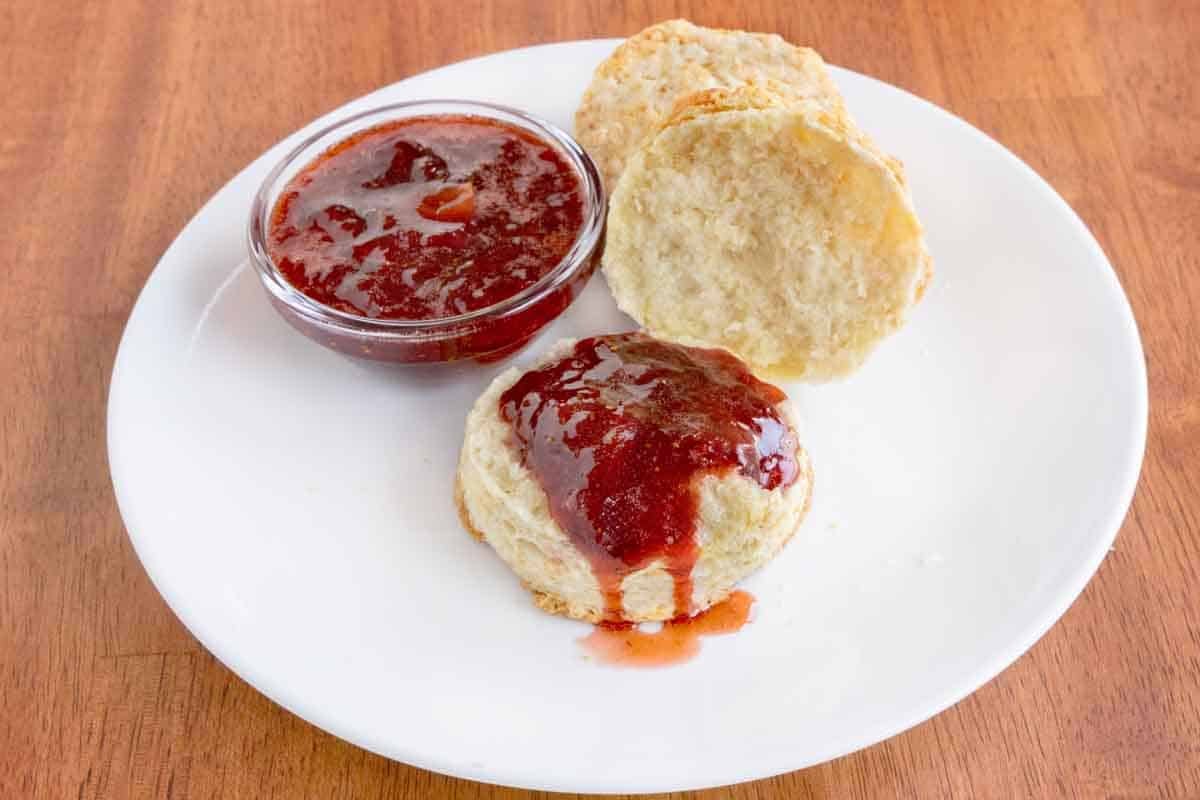
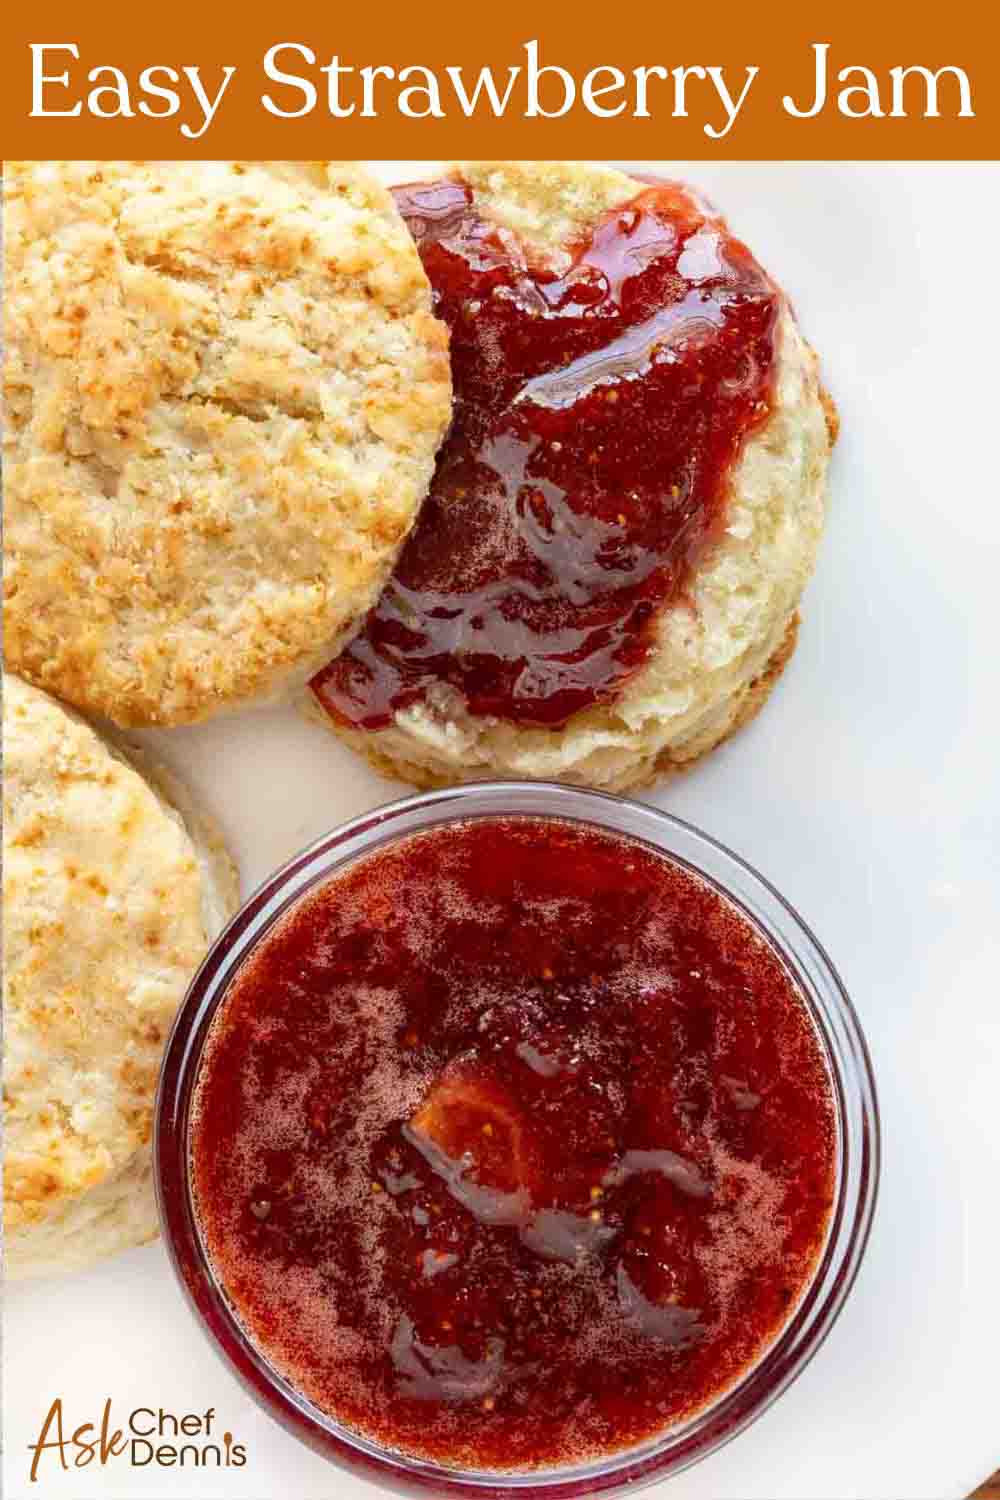
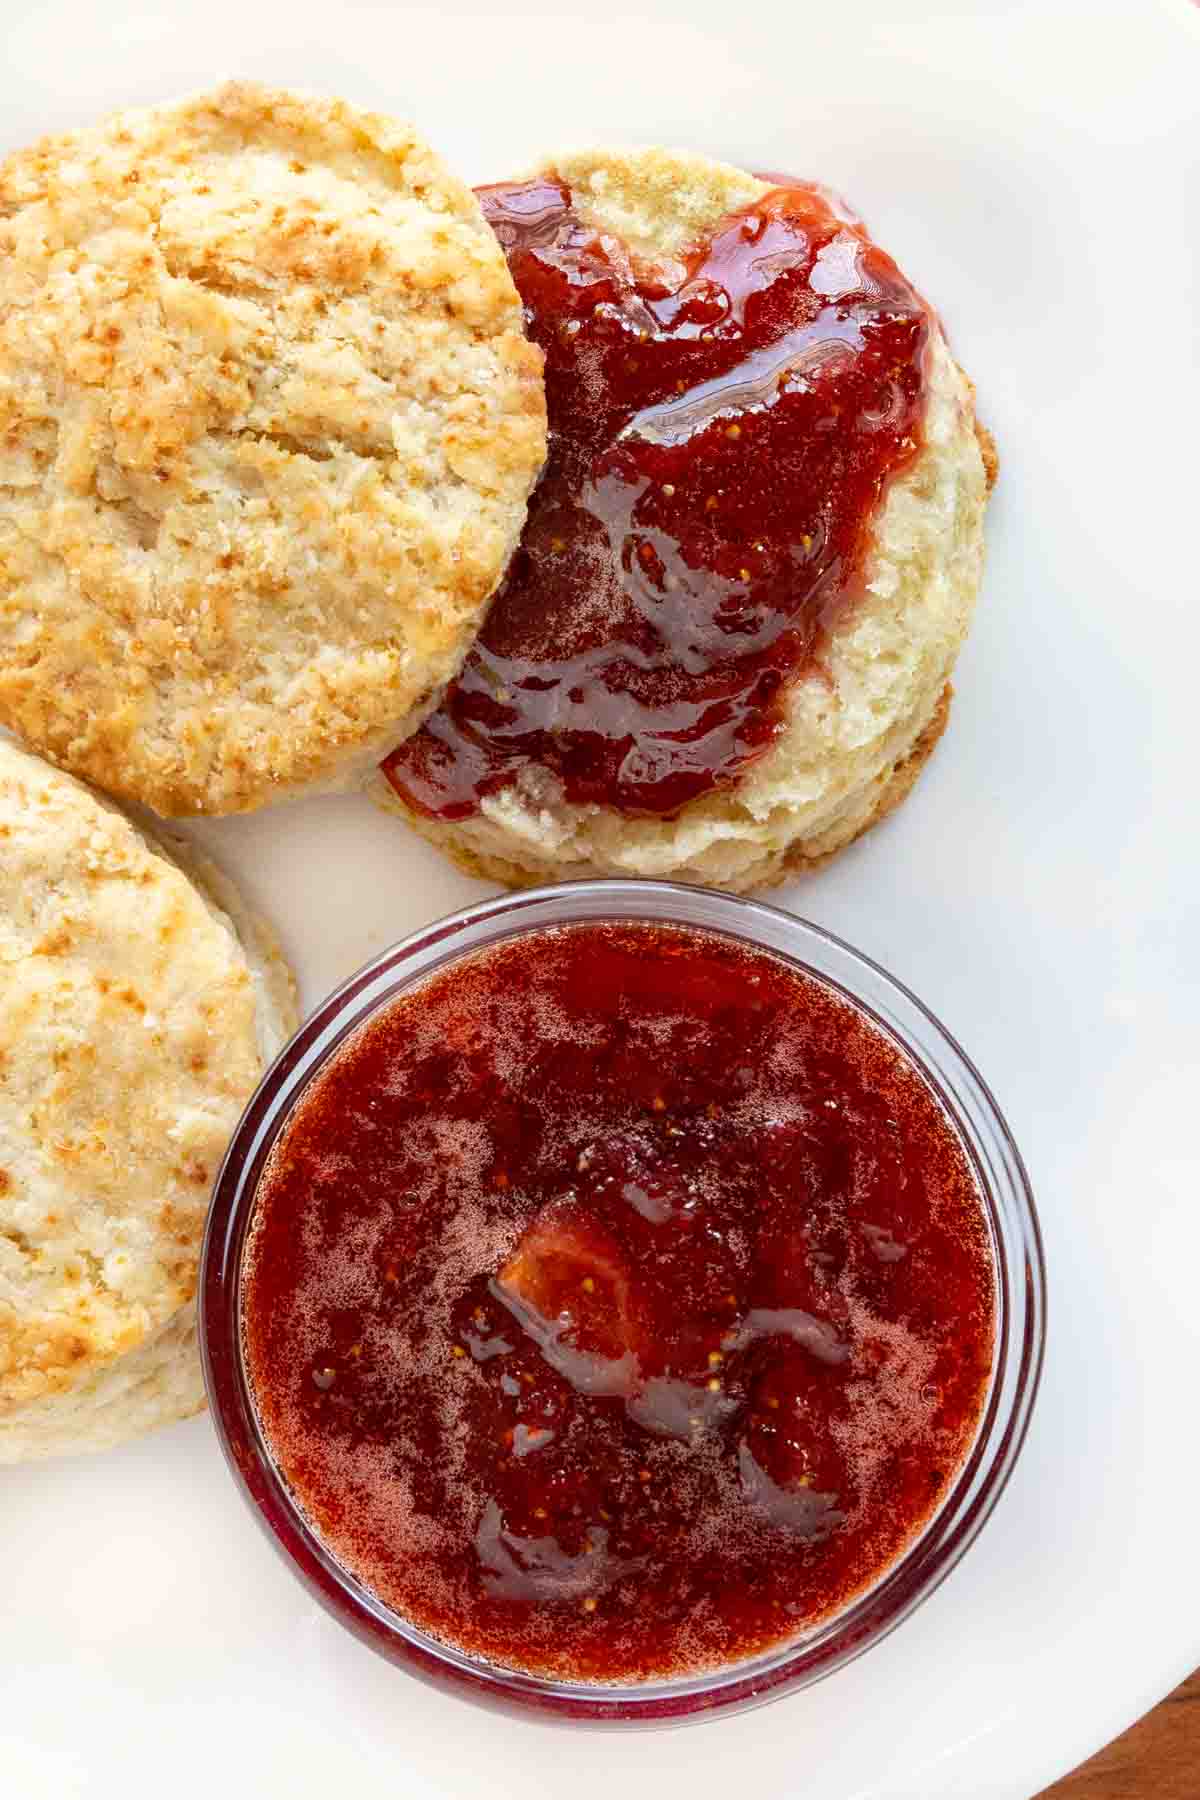
This is the kind of strawberry jam that will find its way onto everything that can use a smear of delicious strawberry flavor, from croissants to pancakes to a swirl through a show-stopping cheesecake.
One taste and your store-bought jar might just “fall” out of the fridge!
Once your fresh strawberry jam cools, spoon it into an airtight container or clean jar. If freezing, leave a little space at the top of the jar.
It’ll keep for two weeks in the fridge, or up to three months in the freezer without any loss of flavor.
If you’re canning, make sure you’re working with hot jars that are properly sterilized and sealed.
Recipe FAQs
Yes, a large enough pot can make a bigger batch of strawberry jam. Just be sure to stir often to prevent the sides of the pot from burning.
No additional pectin is needed. Our recipe relies on the fruit’s natural pectin and a proper full boil to thicken.
Foam forms as air gets whipped into the jam while it’s boiling, and it’s totally normal. Some people prefer to skim the foam for a clearer, smoother finish, but it won’t affect the flavor or set.
More Recipes You’ll Love!


Easy Strawberry Jam Recipe
Ingredients
- 3 cups fresh strawberries
- 1 cup granulated sugar
- ¼ cup lemon juice
- 1 teaspoon lemon zest
Instructions
- Place a small plate and a tablespoon in the freezer.
- Rinse the strawberries. Slice the tops of the strawberries, then slice them into small pieces.
- Add the strawberries and the sugar to a saucepan over medium heat.
- Stir the mixture together to combine.
- Heat for about 5 minutes, stirring occasionally, until it begins to bubble.
- Add the lemon juice and lemon zest to the fruit mixture, stirring to combine thoroughly.
- Continue to heat the mixture until it reaches a light boil.Use a candy thermometer to monitor the temperature, stirring regularly to prevent burning or sticking to the bottom of the pan.
- When the mixture reaches 220°F, reduce the heat to low and continue cooking until the jelly begins to thicken (7-10 minutes).
- Remove the plate and spoon from the freezer. Use the spoon to scoop a spoonful of the jam. Swipe it over the plate and let it cool to test the consistency of the jam.
- Once the desired consistency is achieved, pour the jam into a clean jar and let it cool completely before storing in the refrigerator.
- A quick jam like this will last for 10-14 days in the fridge and up to 3 months in the freezer.
Therese says
what size jar do I need. I am not canning. I am making and using right away!
Chef Dennis Littley says
A 12 ounce jar should be big enough.
Guy says
I will try this for sure!
Thank you, Chef
G