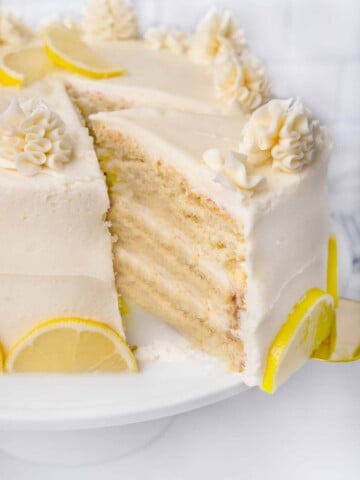
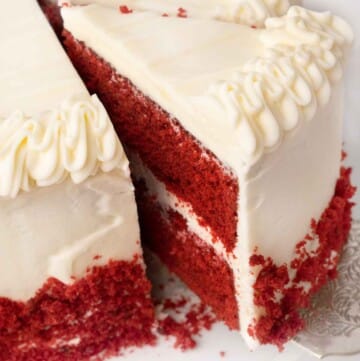
I have to say this is the best red velvet cake recipe I’ve ever had. Moist and tender with a velvety soft crumb, this buttery layer cake with a cream cheese frosting is the Queen of Cakes.
Audio Player
A Traditional Red Velvet cake gets its name because of the cake’s beautiful crimson color. But that’s not the only reason. Red Velvet Cake also earned its name because of its incredible velvety texture.
Red Velvet Cake truly is the Queen of Southern Cakes. And don’t get fooled into thinking it’s just a chocolate cake dyed red, it’s so much more. The chocolaty flavor of natural cocoa blended with tangy buttermilk and white vinegar causes a chemical reaction that works its magic during the baking of this Southern classic.
My from-scratch Red Velvet Cake recipe is not hard to make, and it’s so much better than baking a boxed cake version of this delicious cake. You’ll never get the velvety crumb that makes this cake so distinctive from a boxed cake mix. Just follow my step-by-step instructions, and your family will be calling you the new Cake Boss.
This cake is perfect for Valentine’s day and other special occasions, but I like to make it just to spoil my friends and family. You can use this recipe to make amazing red velvet cupcakes too.
Ingredients
Gather the ingredients to prepare our recipe. Culinary professionals call this the “Mise en Place,” which means “everything in its Place.”
Setting up your ingredients not only helps speed up the cooking process but also ensures you have all the necessary ingredients on hand to make the recipe.
How to Make Red Velvet Cake
Follow along with my easy instructions to see how to make red velvet cake in your own kitchen.
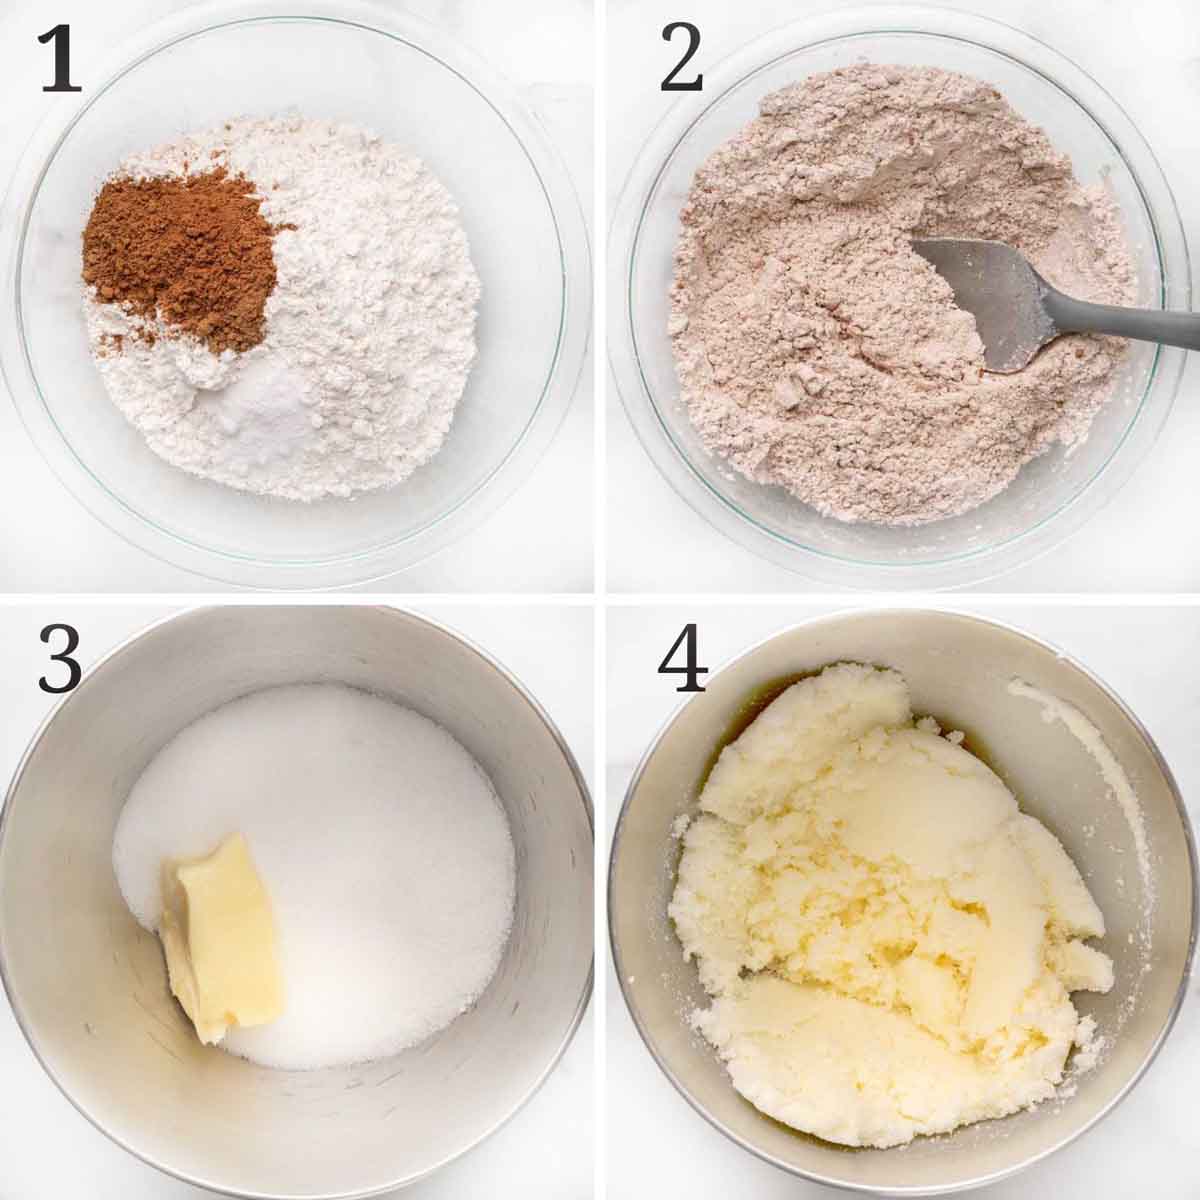
- Add the cake flour, cocoa powder, baking soda, and salt to a large bowl.
- Whisk the dry ingredients together until well blended. Set aside until needed.
- Add the butter and sugar to the bowl of a stand mixer fitted with a paddle attachment (or a handheld mixer with beater bars),
- Whip the butter and sugar together on medium speed until well combined (about 1 minute). *Scrape down the sides and bottom of the bowl with a rubber spatula a few times during the process.
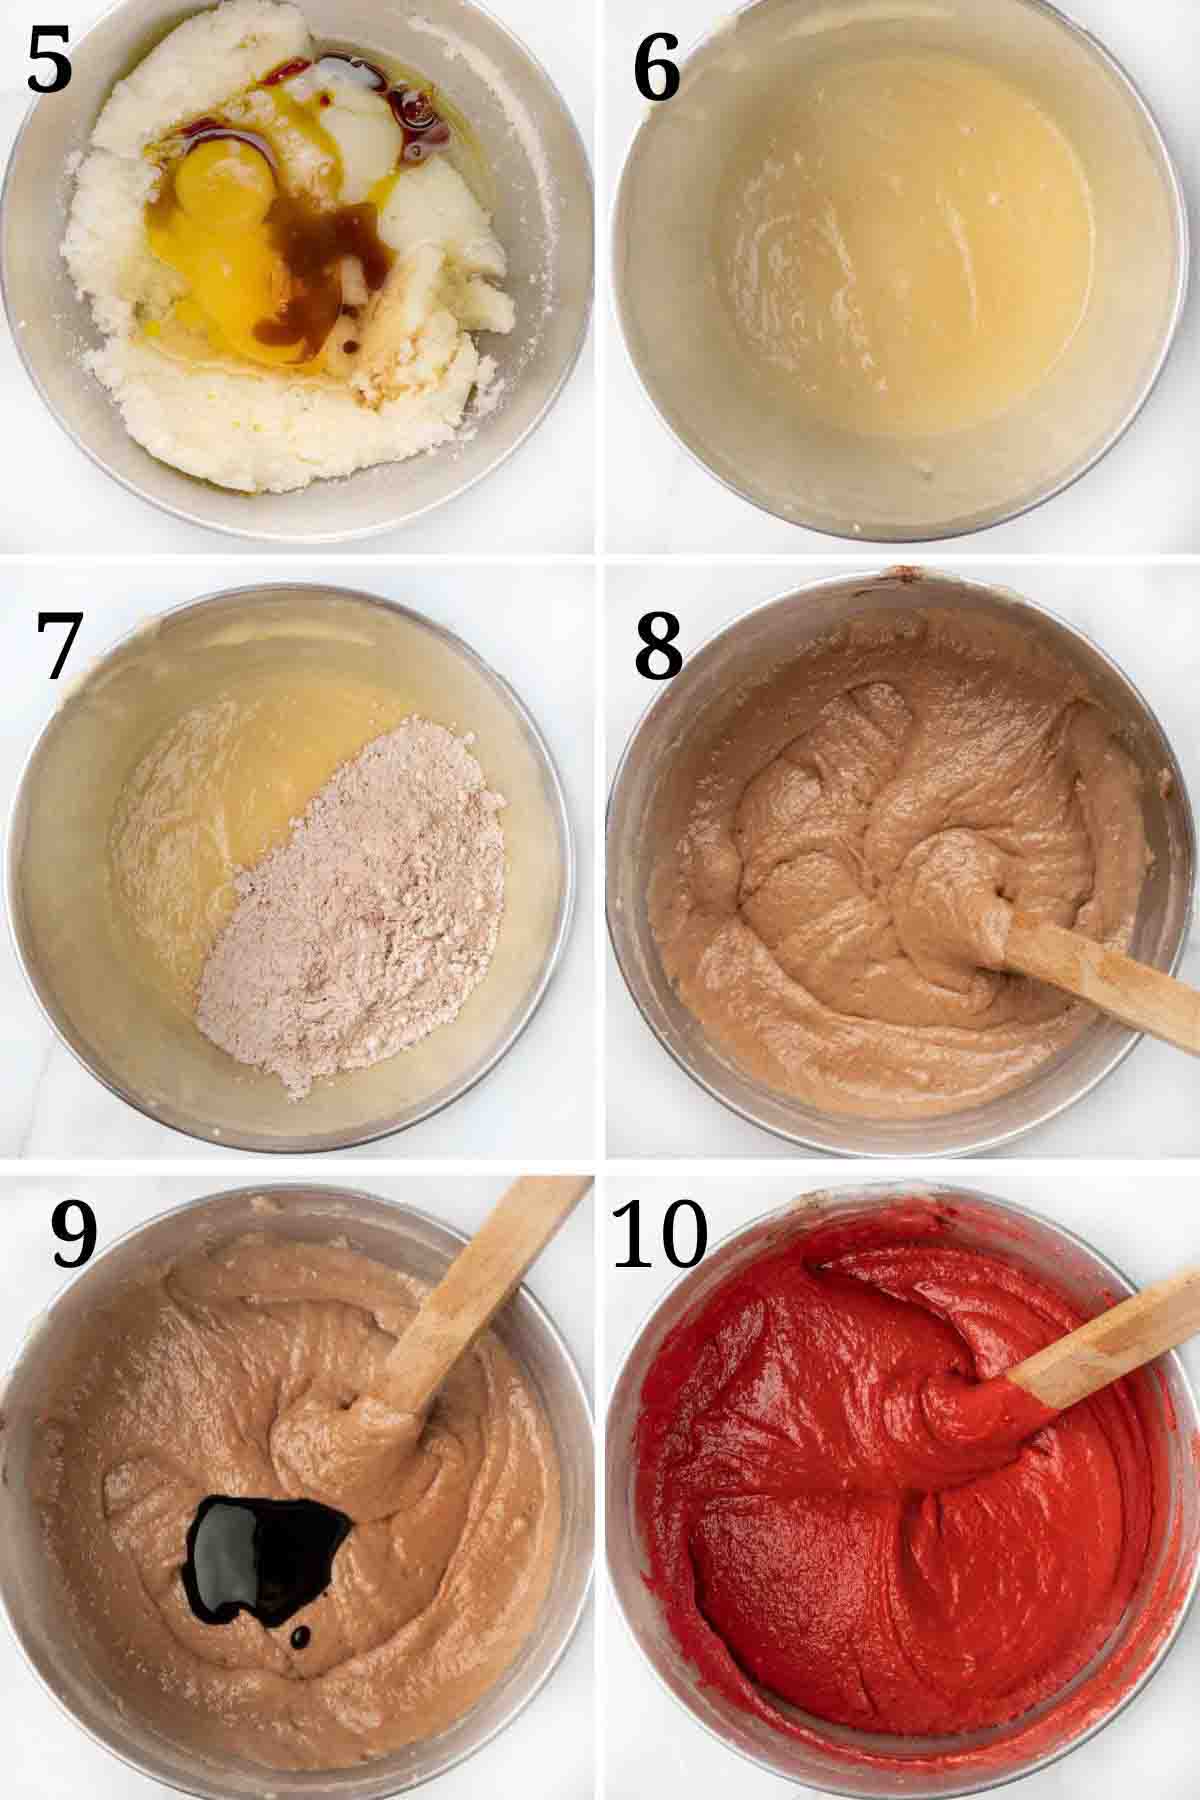
- Add the oil, egg yolks, vanilla extract, and vinegar to the butter-sugar mixture. *Save the egg whites for later.
- Beat the mixture at high speed for 2 minutes.
- With the mixer on low speed, add the flour mixture in 3 additions, alternating with the buttermilk between each addition.
- Whip until just mixed together. Do not overmix.
- Add the red food coloring to the cake batter.
- Mix the color in until just combined (1-2 tablespoons of gel, depending upon the color you want.)
You can find red gel food coloring at most grocery stores. You can use liquid red food coloring if that is not available.
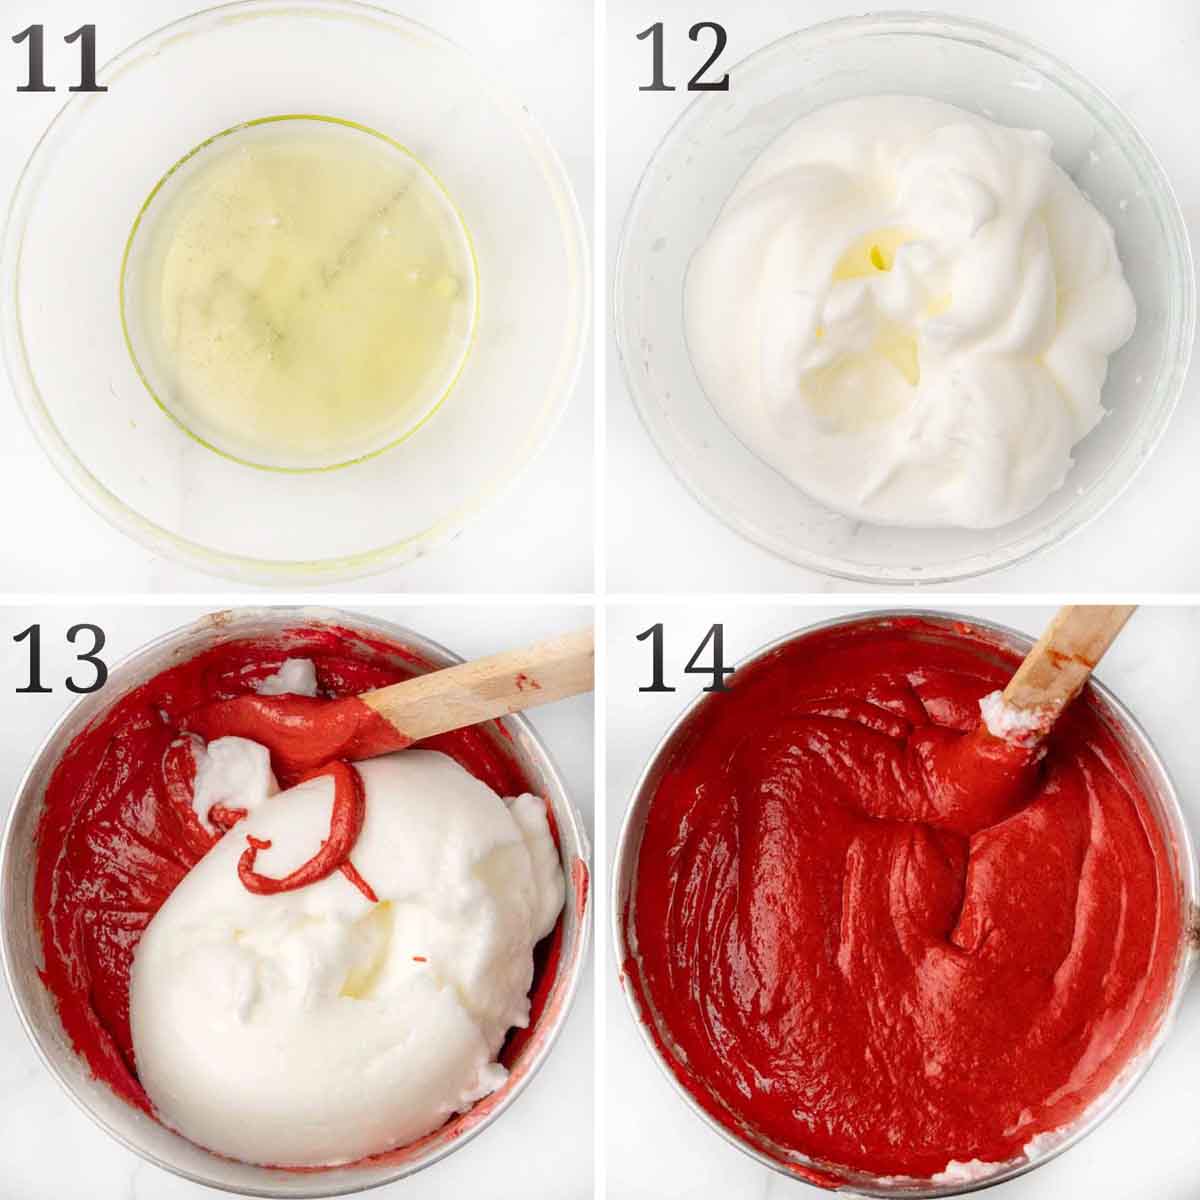
- Add the egg whites to a clean large bowl.
- Using an electric mixer, beat the egg whites on high speed until fluffy peaks form (about 3 minutes).
- Add the whipped egg whites to the cake batter.
- Gently fold the whipped egg whites into the cake batter. *The batter will have a silky and thick appearance.
How to Bake
- Preheat the oven to 350°F.
- Grease two 9-inch cake pans and line them with parchment rounds. Grease the parchment paper.*Parchment paper will give you a quick and easy release from the pans.
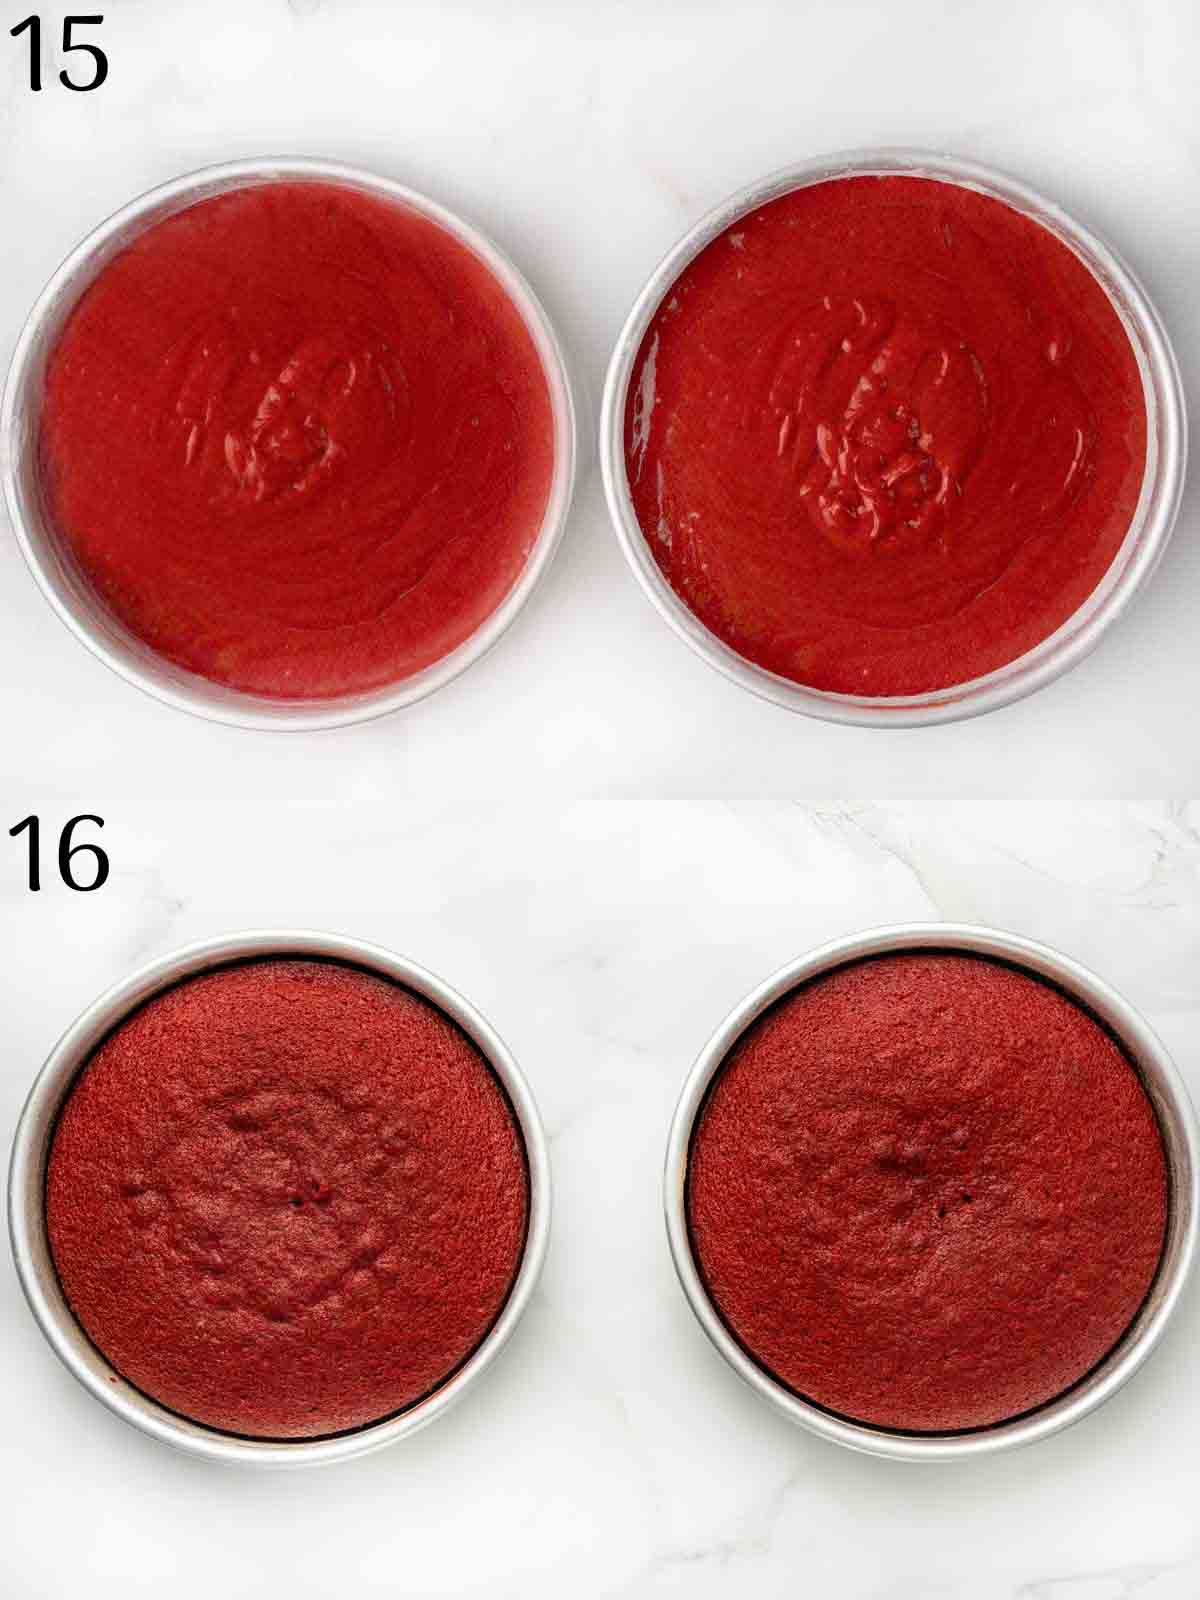
- Divide the cake batter between the prepared cake pans.
- Place the cake pans on the center rack of the preheated oven and bake for 30-35 minutes or until the tops of the cakes spring back when gently touched and a toothpick inserted in the center comes out clean. *Watch the baking time if you overbake the cakes, they will be dry,
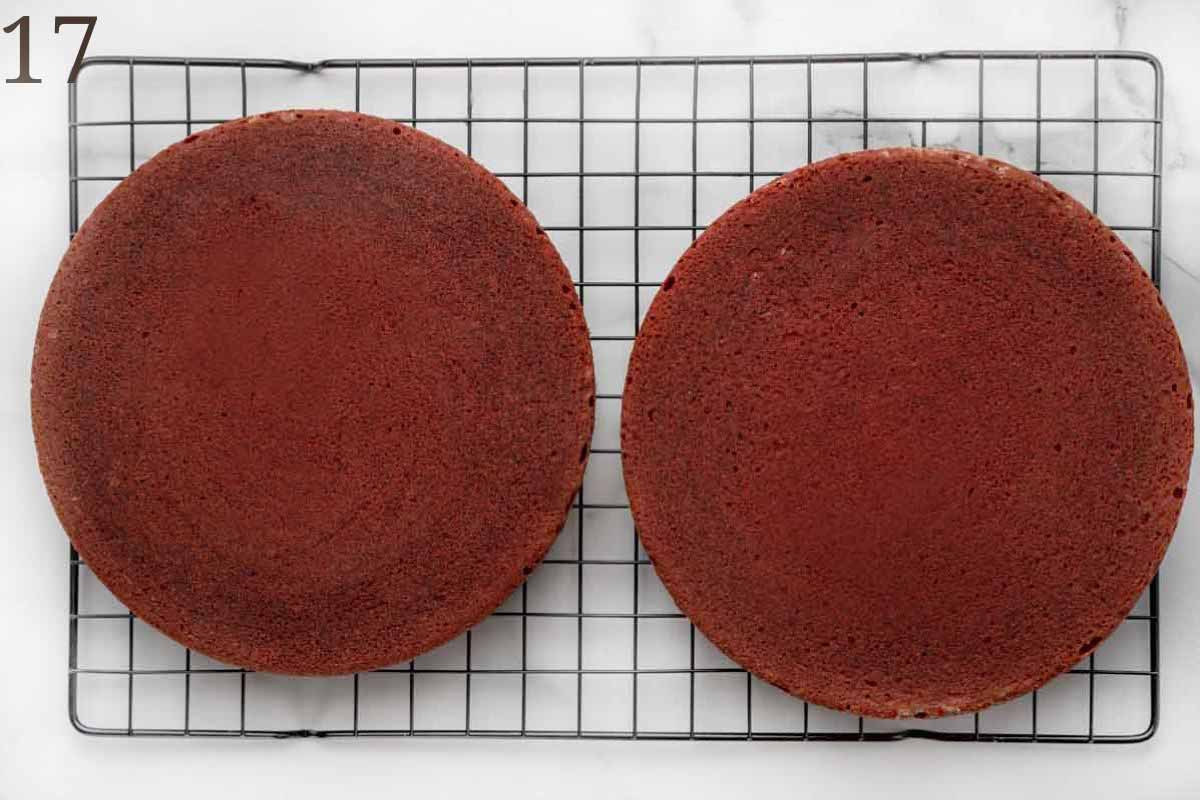
Remove the red velvet cakes from the oven and set the pans on a wire rack to cool completely.
*Let the cakes cool completely before assembling.
How to make cream cheese frosting
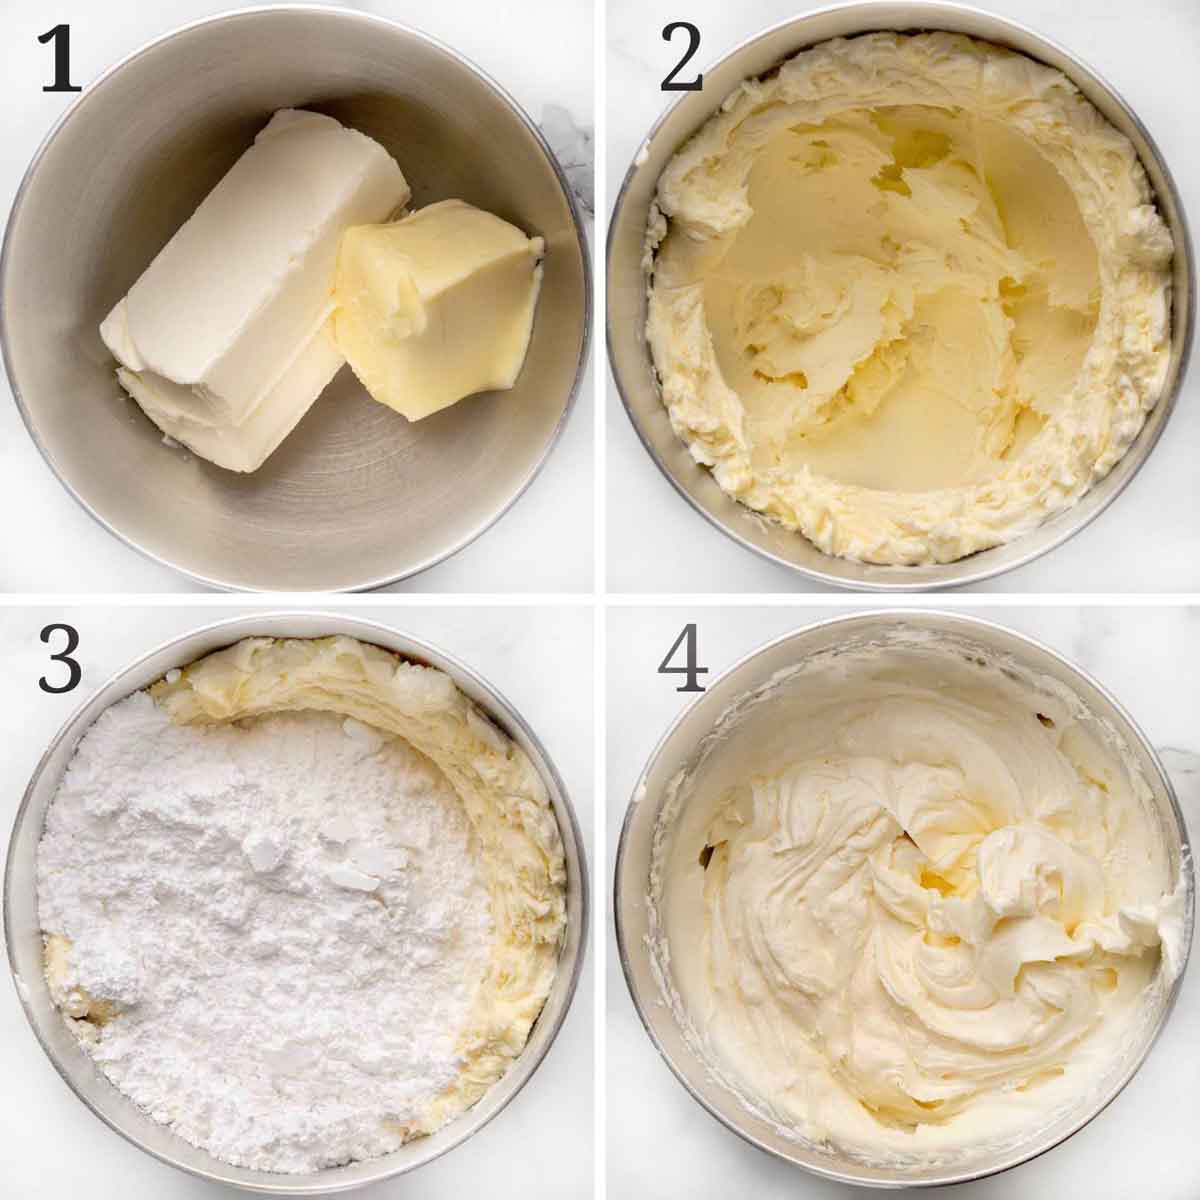
- Add the room-temperature cream cheese and butter to a large mixing bowl.
- Using a stand mixer fitted with a paddle attachment (or a handheld mixer with beater bars) beat the cream cheese and butter together on medium-high speed until smooth (about 2 minutes). *The butter and cream cheese should be softened just enough to work with, don’t let the butter get too soft.
- Add the powdered sugar, vanilla extract, and salt to the cream cheese mixture.
- Mix on low speed for 30 -45 seconds, then scrape down the sides and bottom of the bowl with a rubber spatula. Continue to whip the mixture on high speed for about 3 minutes until completely combined and creamy. *If the frosting is too thin or runny, add additional confectioners sugar ¼ cup at a time until you achieve the desired consistency.
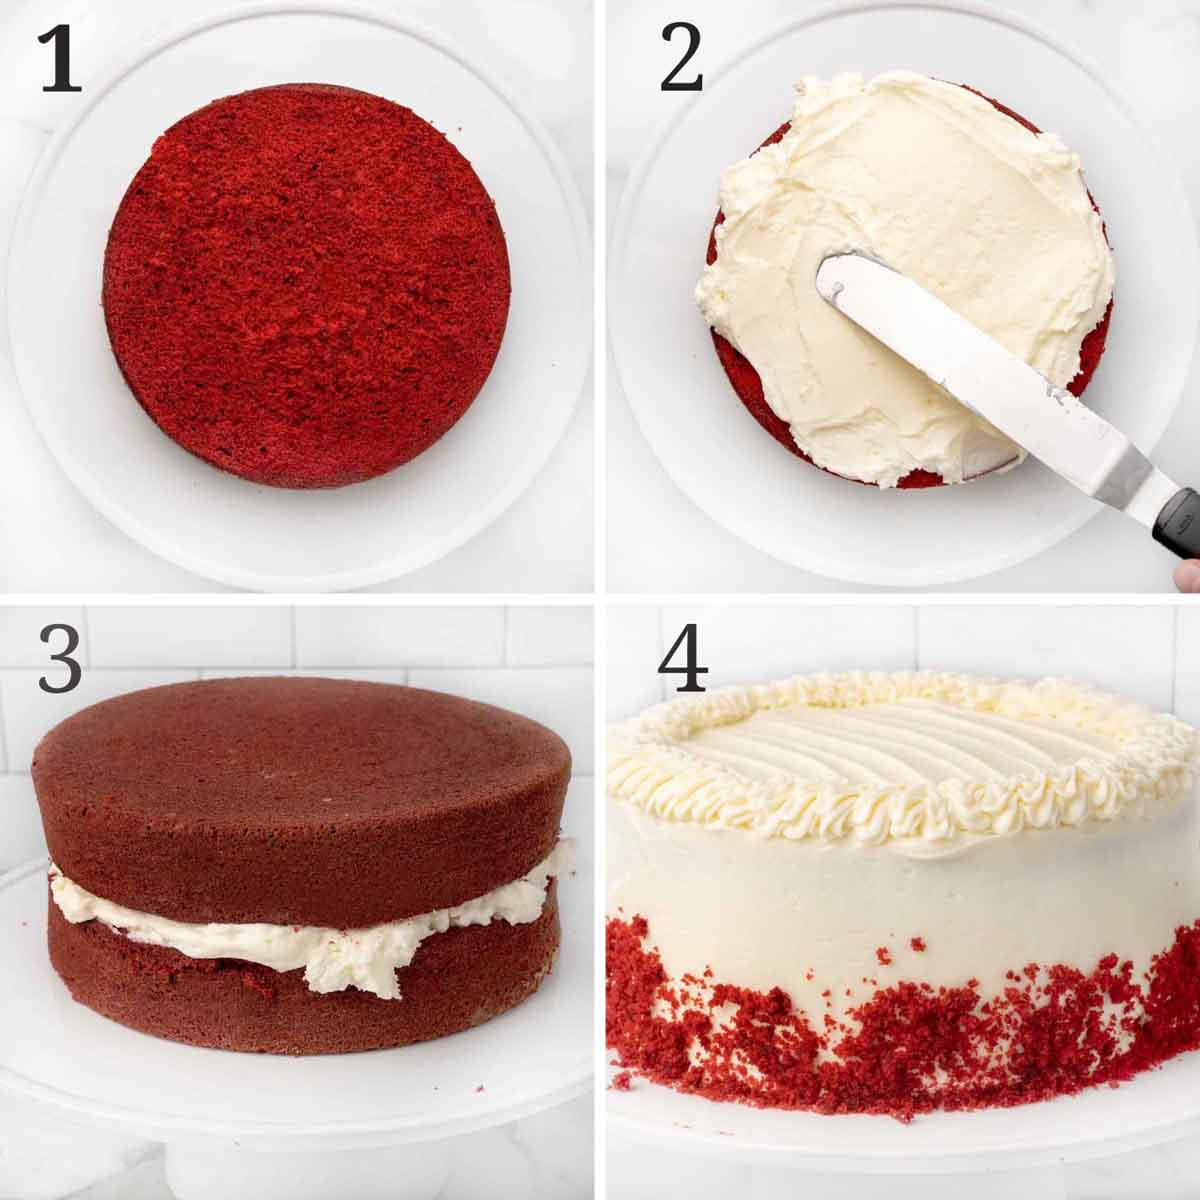
- Using a large serrated knife, slice a thin layer off the tops of the cakes to create a flat surface. Then place one cake layer on a cake stand or serving plate.
- Cover the top of the layer with frosting. Use a frosting spatula to create an even layer.
- Place the second layer on top of the frosted first layer.
- Add a layer of frosting to the top of the cake and spread the remaining frosting on the sides of the red velvet cake.
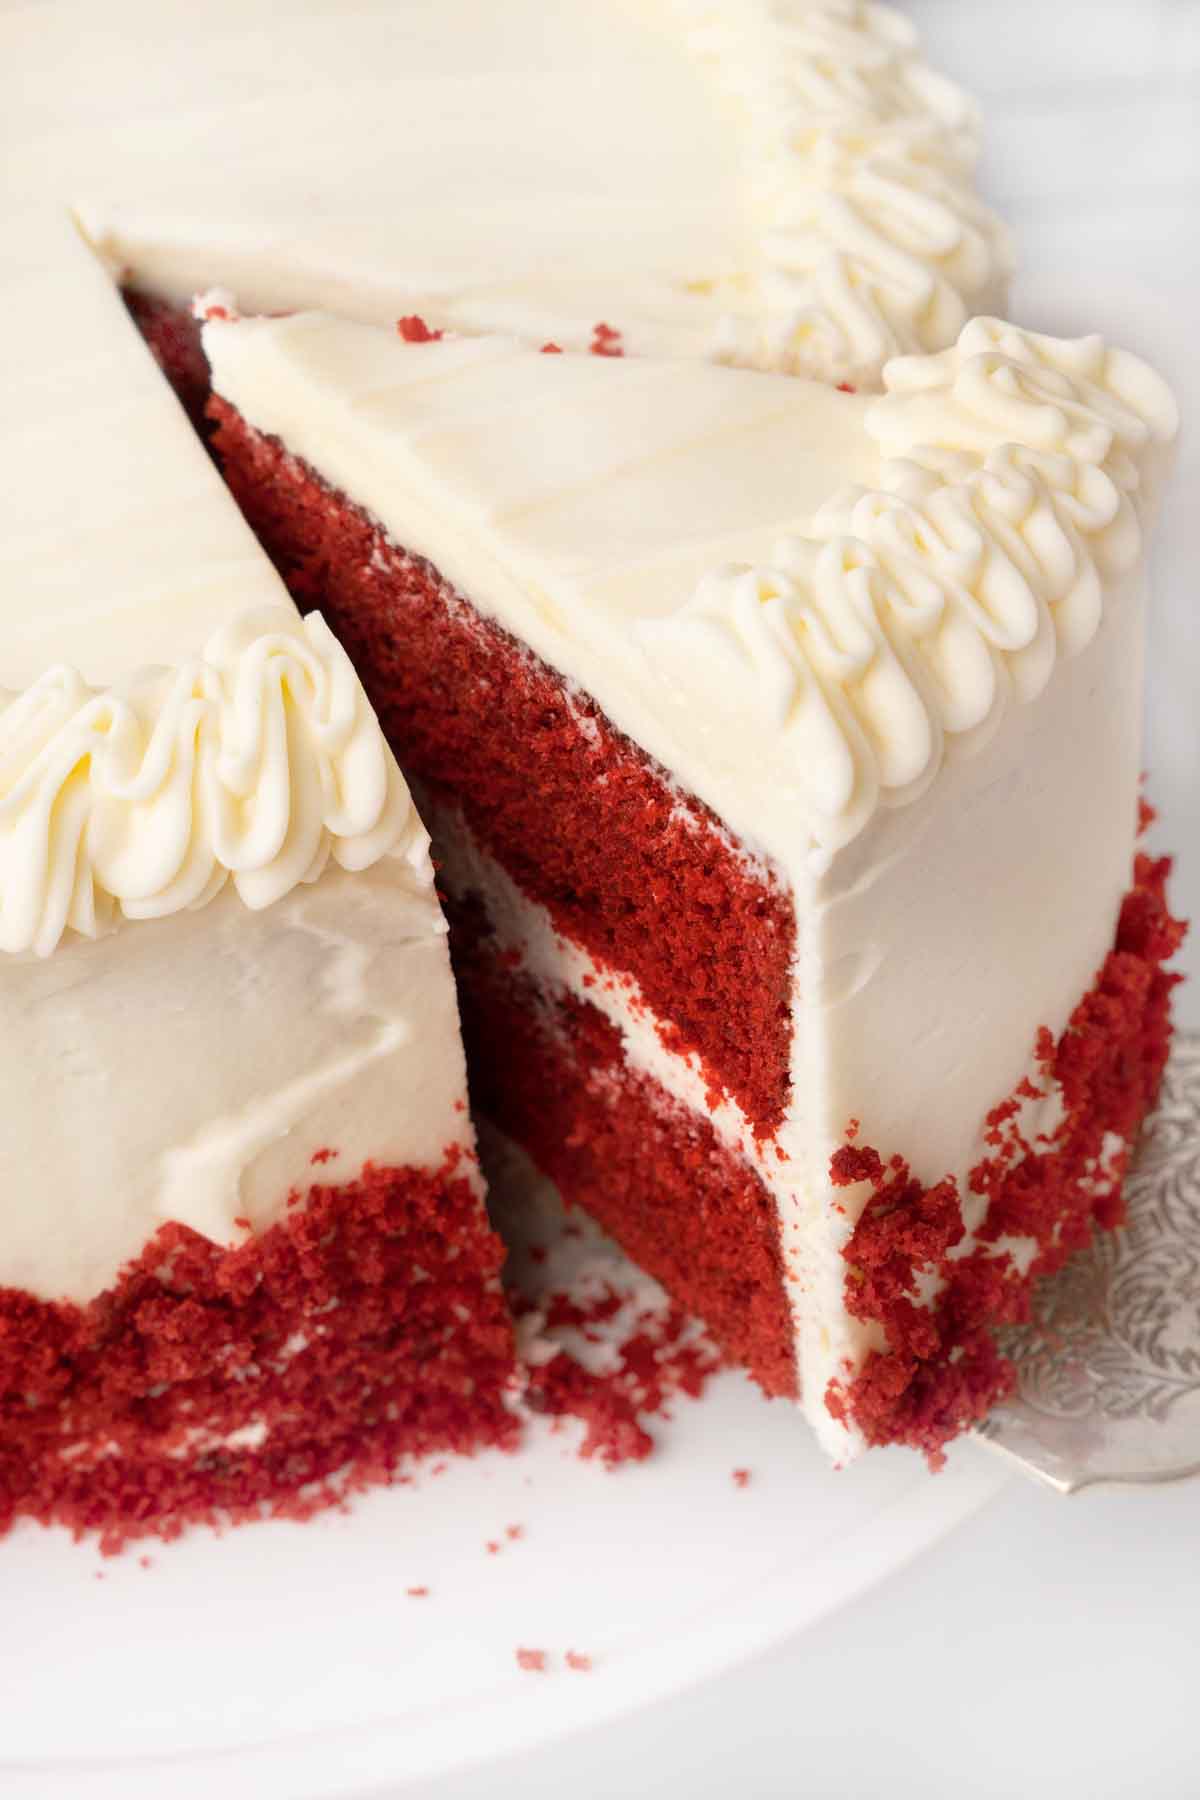
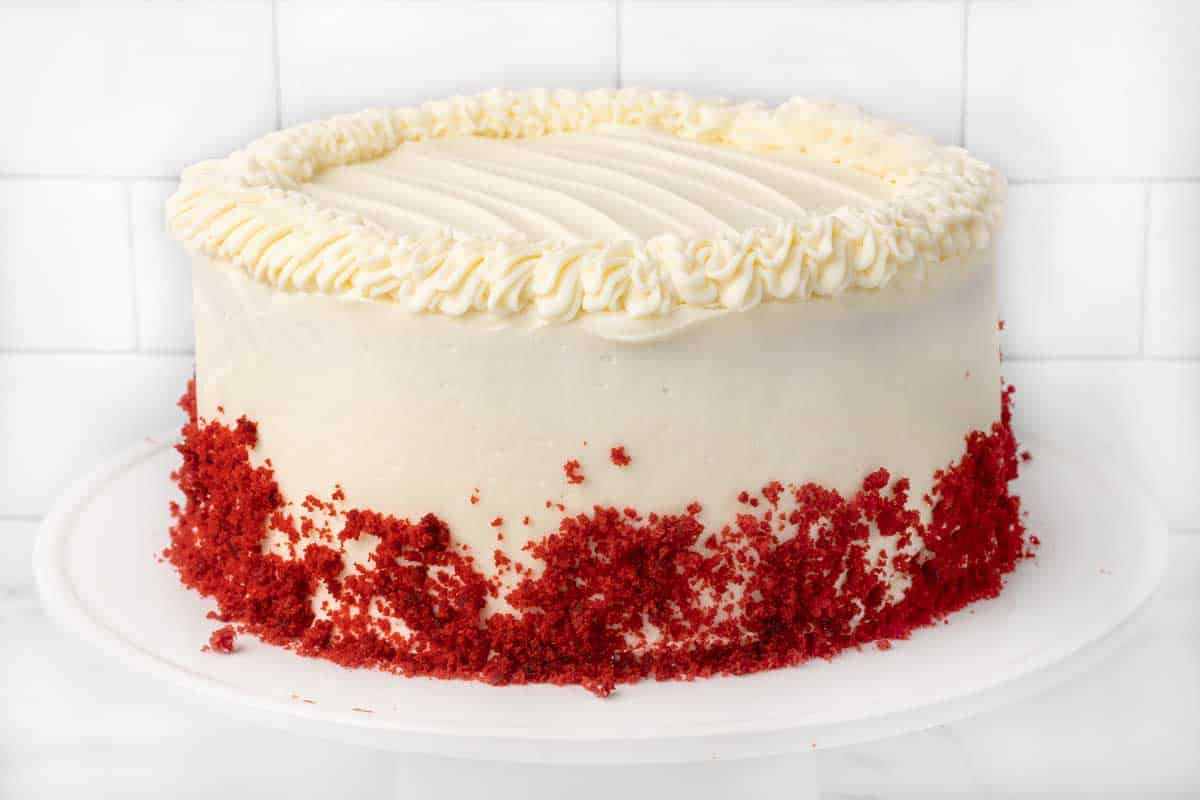
Depending on your decorating skills, pipe a decorative edging on the top of the cake. Crumble the tops of the cake layers you cut off and use them to dust the bottom third of the cake.
- It’s important to refrigerate the cake for at least one hour before slicing. This will allow the cake to set up so that the cake will hold its shape. This makes slicing this beautiful cake easier.
- Cover the leftover cake and store it in the refrigerator for up to five days. *Let the cake come to room temperature before serving.

Wouldn’t you love to sit down to a slice of this amazingly delicious Red Velvet Cake? I know after one bite, this cake will become one of your favorites that you’ll be making time and time again.
Recipe FAQs
Technically you could call it a chocolate cake because it’s made using cocoa powder as one of the main ingredients. But a red velvet cake is not a chocolate cake. Although the cocoa powder is an ingredient, there is not as much cocoa as a traditional chocolate cake recipe would contain. The cocoa is used to enhance the flavor and chemically react with the other ingredients to create the velvety texture of this Southern classic.
The red food coloring is what adds a deep scarlet hue to the cake, but the red color is also due to the chemical reaction that happens when the cocoa, buttermilk, and white vinegar are combined.
Red velvet cake has a milk chocolate flavor that has a little bit of a tart edge. The combined ingredients create a complex flavor profile that is a delicious flavor all its own. Think of a moist vanilla cake with a hint of chocolate that is pushed forward with the tartness of the buttermilk. Add in the cream cheese frosting, and it’s a combination of flavors you won’t soon forget.
More Cake Recipes You’ll Love!

Red Velvet Cake Recipe
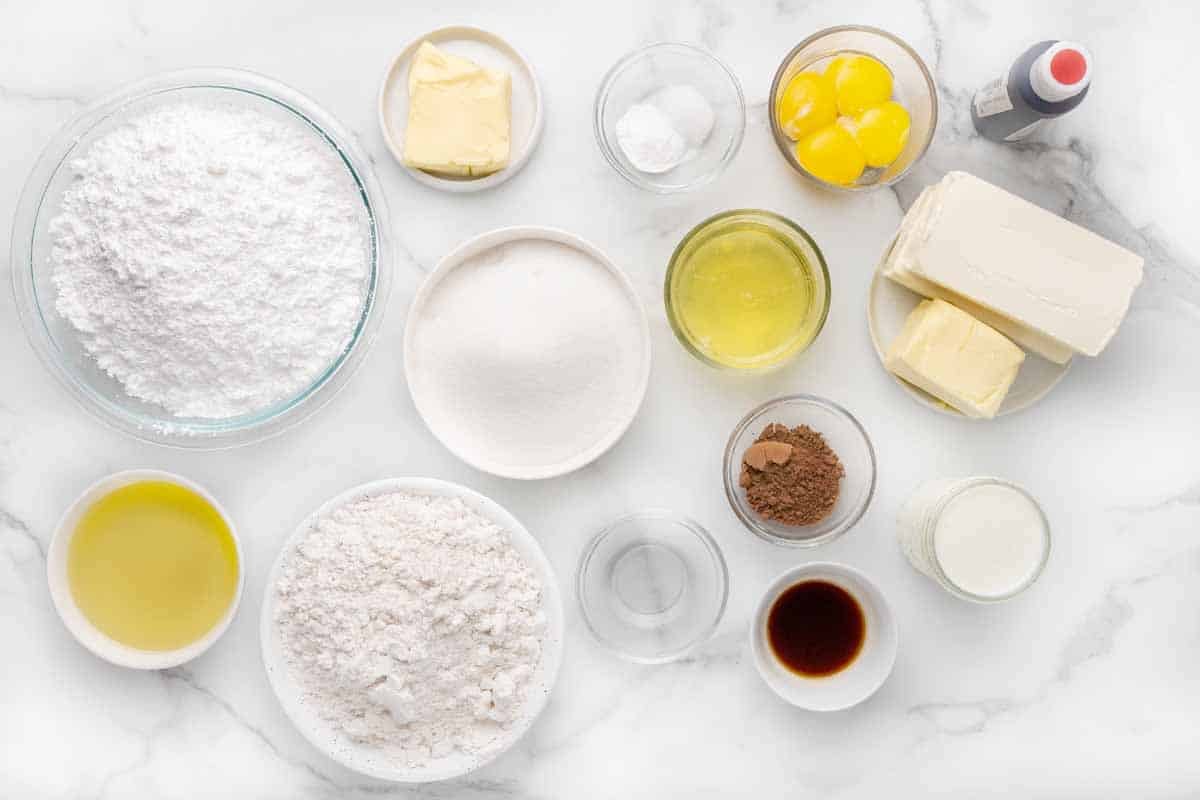
Ingredients
- 3 cups cake flour spoon flour into cup and level with knife
- 2 tablespoon cocoa powder
- 1 teaspoon baking soda
- ½ teaspoon salt
- ½ cup unsalted butter room temperature (1 stick)-should be softened but not too soft.
- 2 cups granulated sugar
- 1 cup vegetable oil
- 4 large eggs room temperature and separated
- 1 tablespoon vanilla extract
- 1 teaspoon distilled white vinegar
- 1 tablespoon red food coloring more or less depending upon the desired color. I used a gel but, liquid will work.
- 1 cup buttermilk room temperature
Cream Cheese Frosting
- 16 ounces cream cheese room temperature
- 6 oz unsalted butter room temperature (1 ½ sticks) should be softened but not too soft.
- 5 ½ cups confectioners’ sugar
- 1 teaspoon vanilla extract
Instructions
- Preheat the oven to 350°F.
- Grease two 9-inch cake pans and line them with parchment rounds. Grease the parchment paper. *Parchment paper will give you a quick and easy release from the pans.
Cake
- Add the flour, cocoa powder, baking soda, and salt to a large mixing bowl and whisk the ingredients together until well blended. Set aside until needed.
- Using a stand mixer fitted with a paddle attachment (or a handheld mixer with beater bars), whip the butter and sugar together on medium-high speed until well combined (about 1 minute). *Scrape down the sides and bottom of the bowl with a rubber spatula a few times during the process.
- Add the oil, egg yolks, vanilla extract, and vinegar to the butter-sugar mixture and beat on high speed for 2 minutes. Save the egg whites for later.
- With the mixer on low speed, add the dry ingredients in 3 additions alternating with the buttermilk between each dry addition.
- Add the red food coloring until just combined (1-2 tablespoons of gel, depending up on the color you want.)
- In a clean bowl using an electric mixer, beat the egg whites on high speed until fluffy peaks form (about 3 minutes).
- Gently fold the whipped egg whites into the cake batter.The batter will have a silky and thick appearance.
- Divide the cake batter between the prepared cake pans.
- Place the cake pans on the center rack of the preheated oven and bake for 30-35 minutes or until the tops of the cakes spring back when gently touched and a toothpick inserted in the center comes out clean. *Be careful not to overbake the cakes so they don't dry out.
- Remove the cakes from the oven and set the pans on a wire rack to cool completely. *Let the cakes cool completely before assembling.
Frosting
- Add the room-temperature cream cheese and butter to a large mixing bowl.Using a stand mixer fitted with a paddle attachment (or a handheld mixer with beater bars), beat the cream cheese and butter together on medium-high speed until smooth (about 2 minutes).*The butter and cream cheese should be softened just enough to work with, don't let the butter get too soft.
- Add the confectioner's sugar, vanilla extract, and salt to the cream cheese mixture and mix on low speed for 30 -45 seconds. Scrape down the sides and bottom of the bowl with a rubber spatula.
- Continue to whip the mixture on high speed for about 3 minutes until completely combined and creamy.*If the frosting is too thin or runny, add additional confectioners sugar ¼ cup at a time until you achieve the desired consistency.
Assembly
- Using a large serrated knife, slice a thin layer off the tops of the cakes to create a flat surface.
- Place 1 cake layer on your cake stand or serving plate.
- Cover the top of the layer with frosting. Use a frosting spatula to create an even layer.
- Place the second layer on top of the frosted first layer. Top the second layer with frosting spreading the remaining frosting on the sides of the cake.
- Refrigerate the cake for at least one hour before slicing. This will allow the cake to set up so the cake to hold its shape. This will make it easier to slice this beautiful cake.
- Cover the leftover cake and store it in the refrigerator for up to five days. *Let the cake come to room temperature before serving.
donna hromadka says
I’m wondering if you know how long to bake this recipe in a mini-muffin pan?
Chef Dennis Littley says
They should take about 15 minutes.
Gail says
Hi Dennis
Thanks for the recipe, i wanted to know if this recipe can be baked in a sheet pan.
Thank you.
Chef Dennis Littley says
It can, you’ll just have to adjust the cooking time.