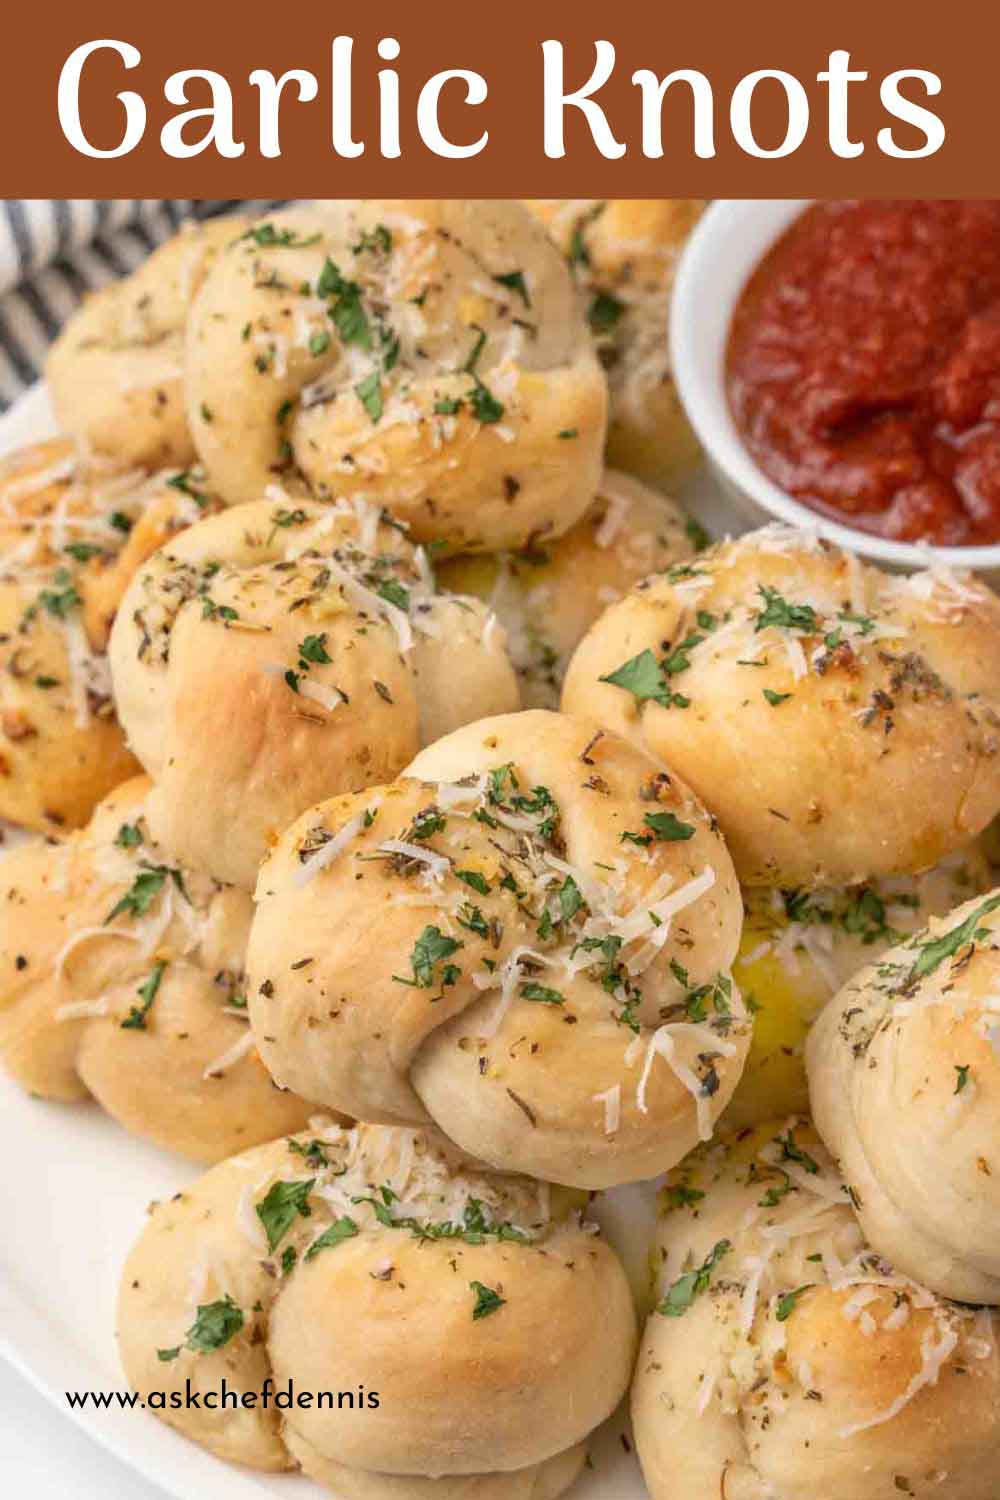
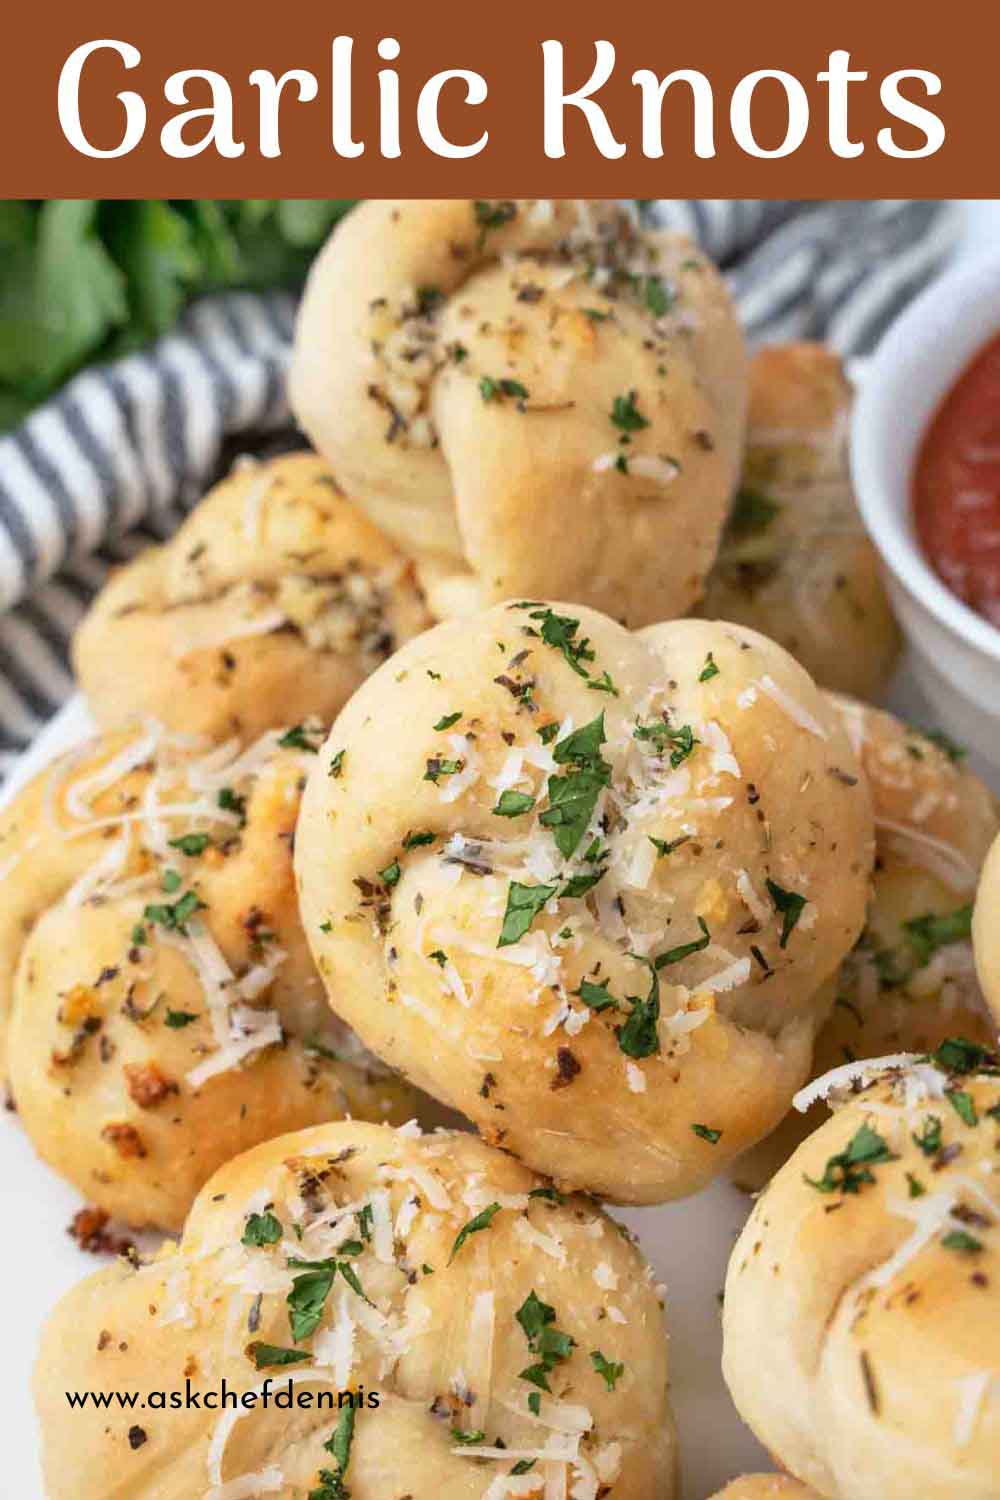
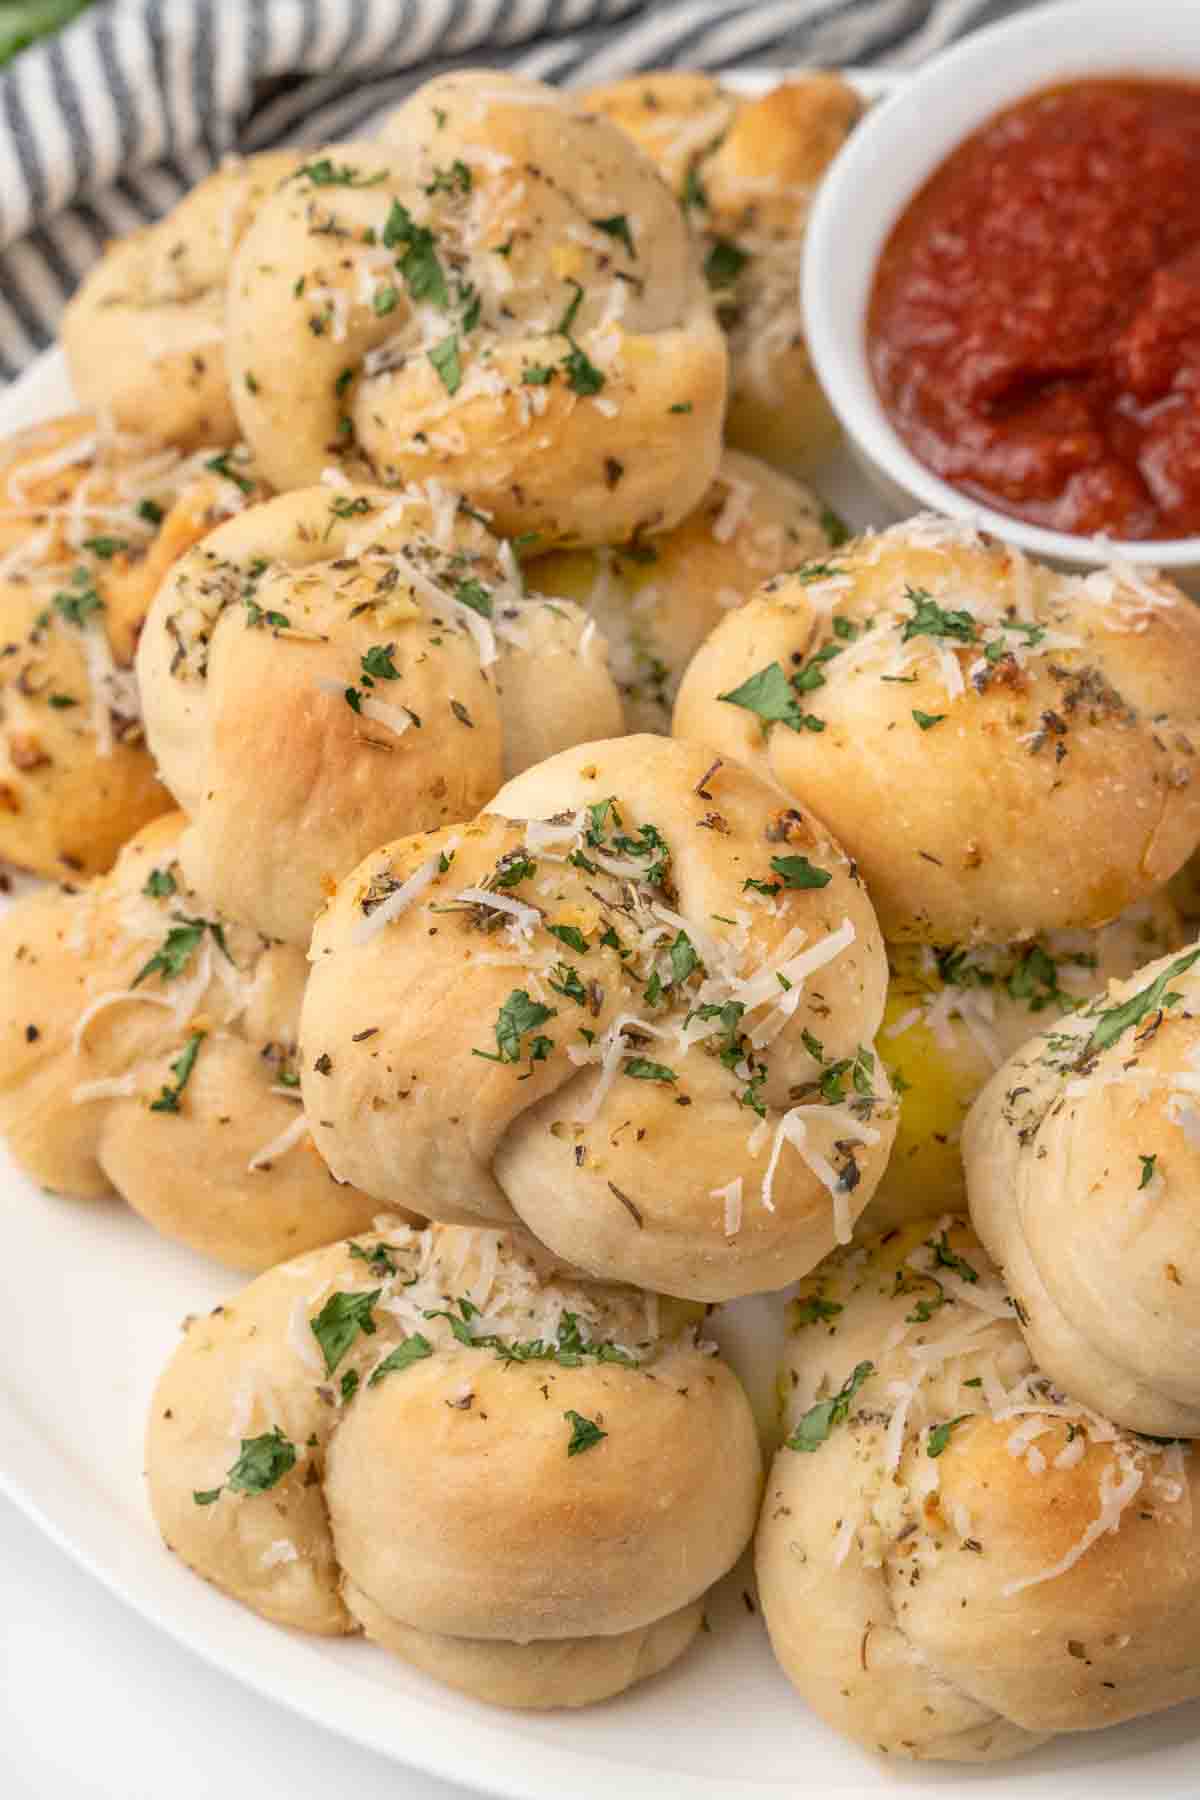
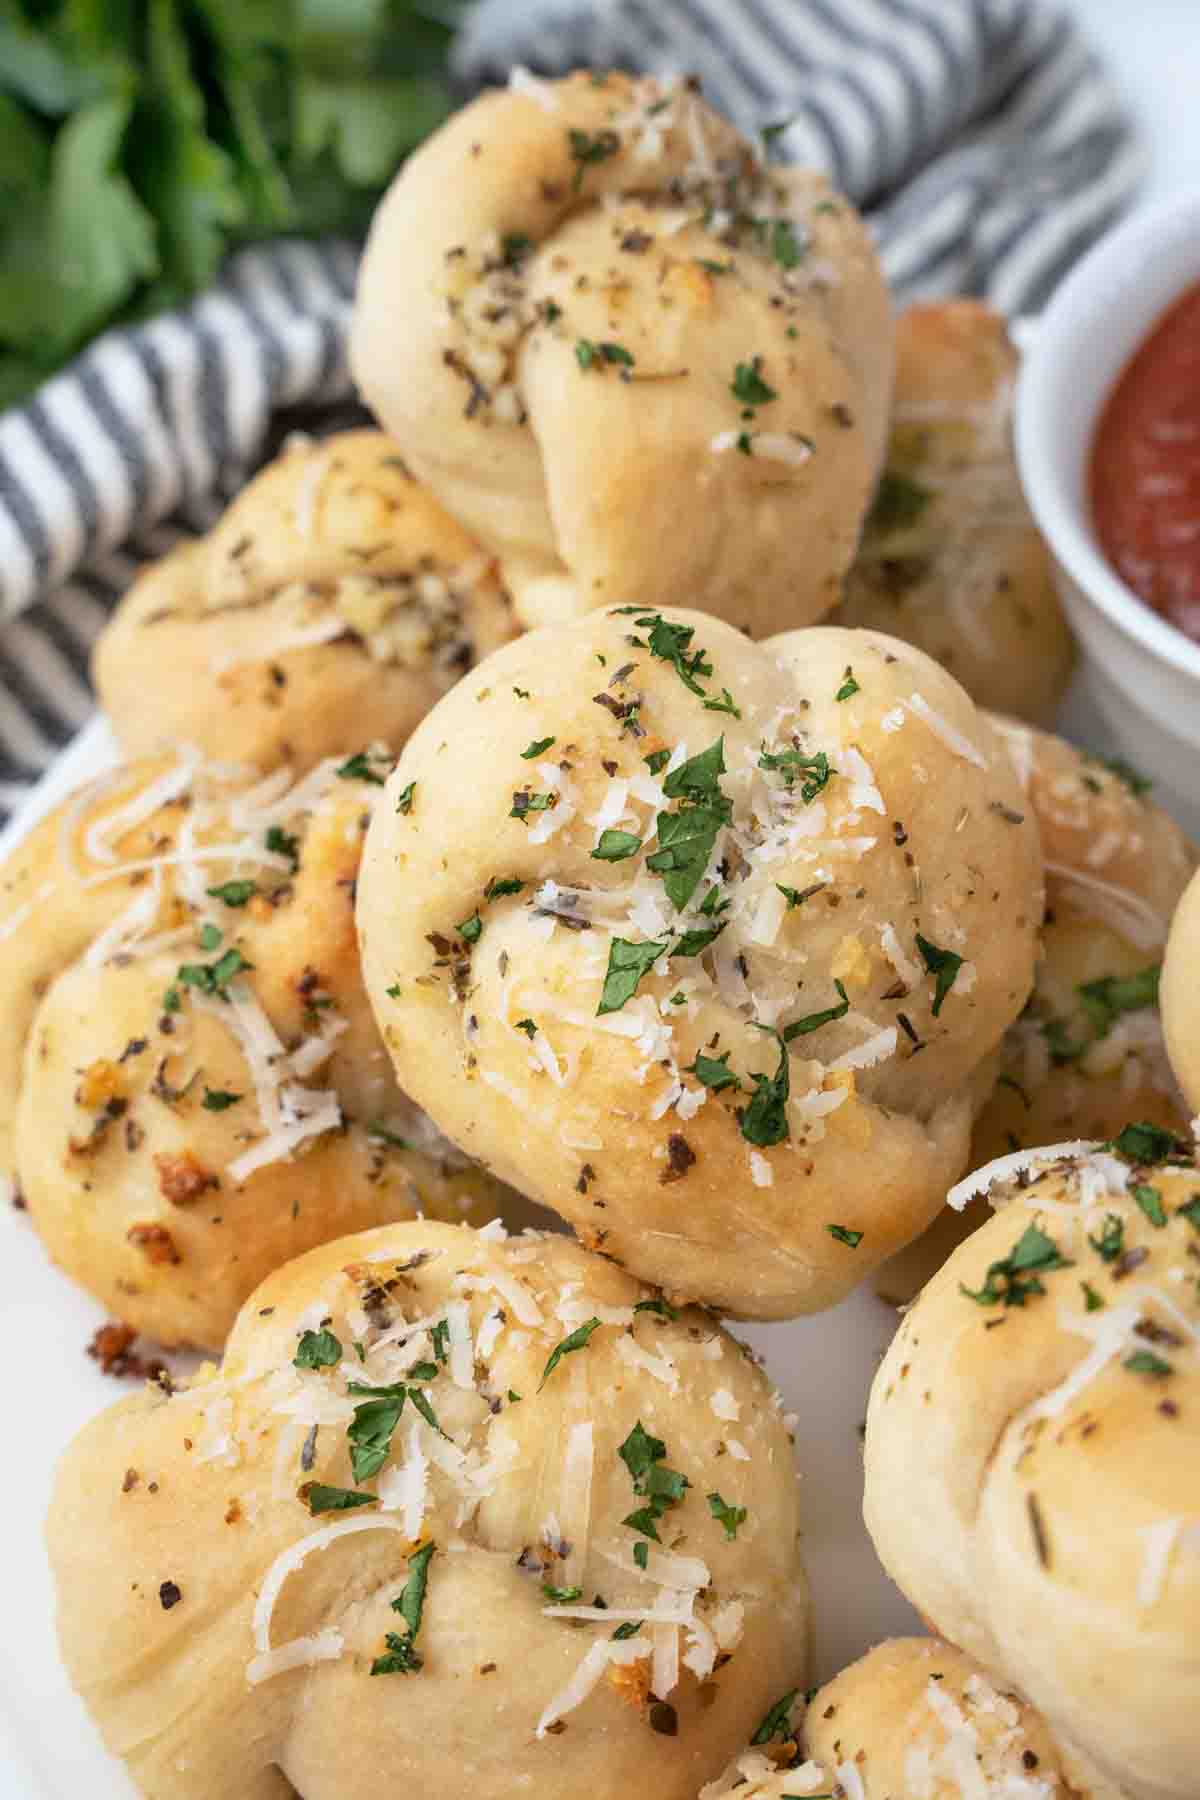
When it comes to making homemade dinner rolls, our pillowy soft, and chewy garlic knots are at the top of my list.
Brushed with a flavorful parmesan garlic herb butter and baked to a golden brown, these rolls are guaranteed to bring smiles to your dinner table.
Audio Player
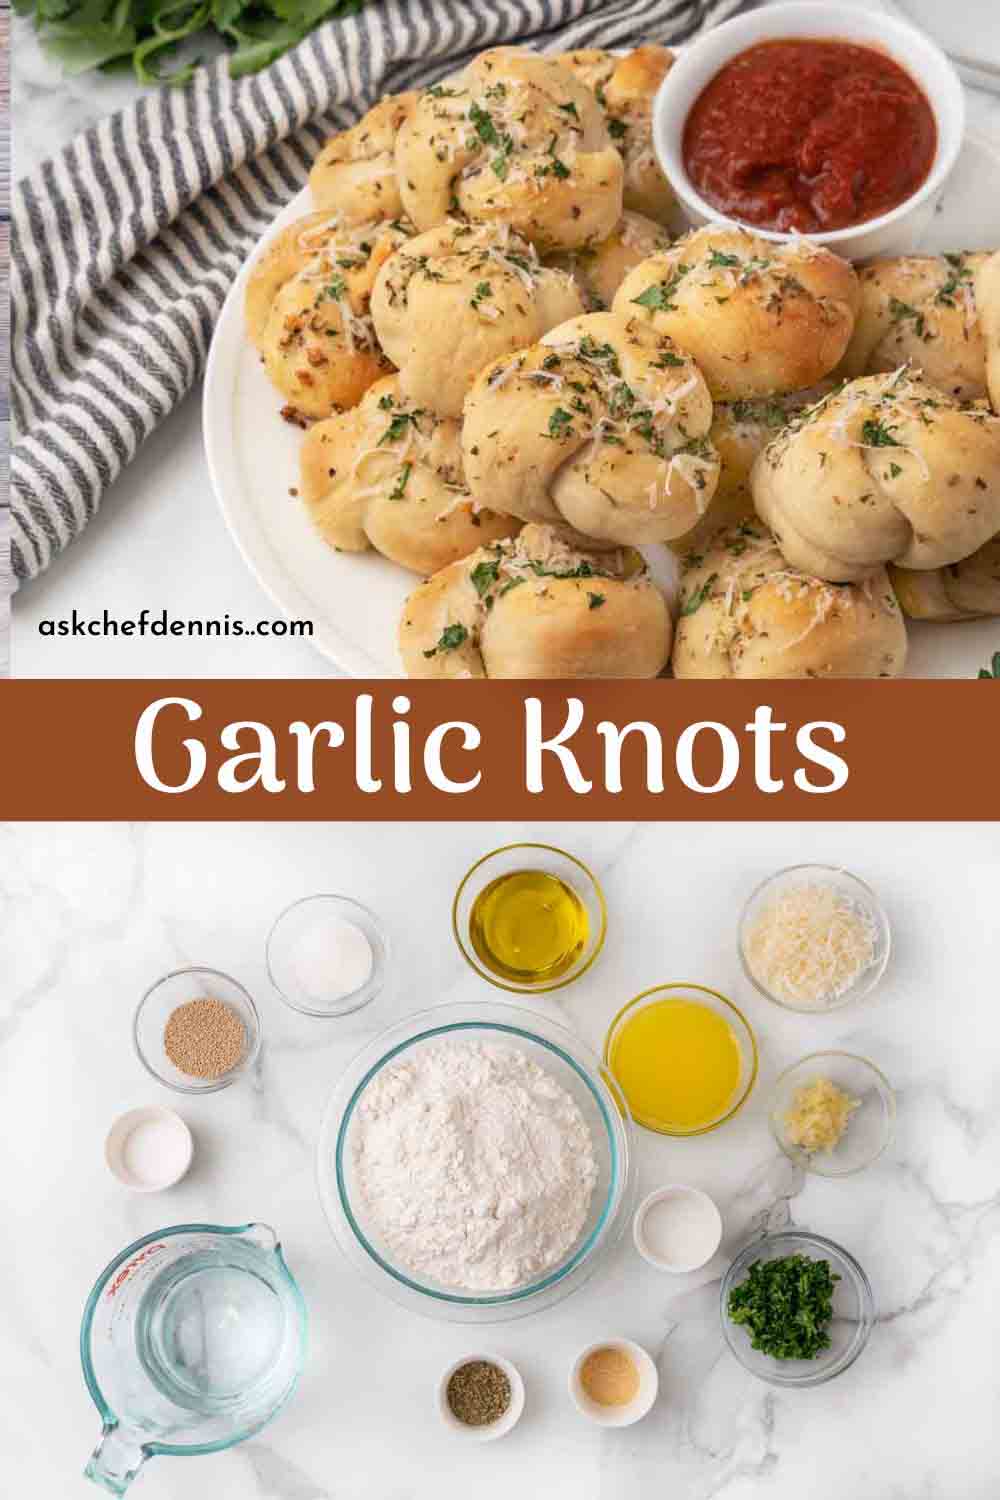
Generously coated in an easy-to-make sauce of butter, garlic, herbs, and parmesan, our homemade garlic knots will make a tasty addition to your dinner table.
They can also be served with marinara sauce or pizza sauce as a game-day snack or to treat your family to deliciousness!

Made with simple ingredients, our homemade garlic knots are the perfect side dish for many of your favorite entrees.
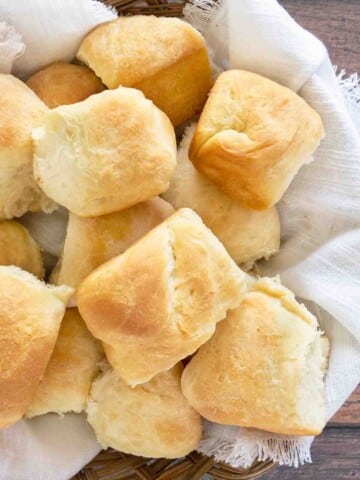
If you love homemade rolls and bread, make sure to try our classic dinner rolls and focaccia bread recipes.
Ingredients to make Garlic Knots
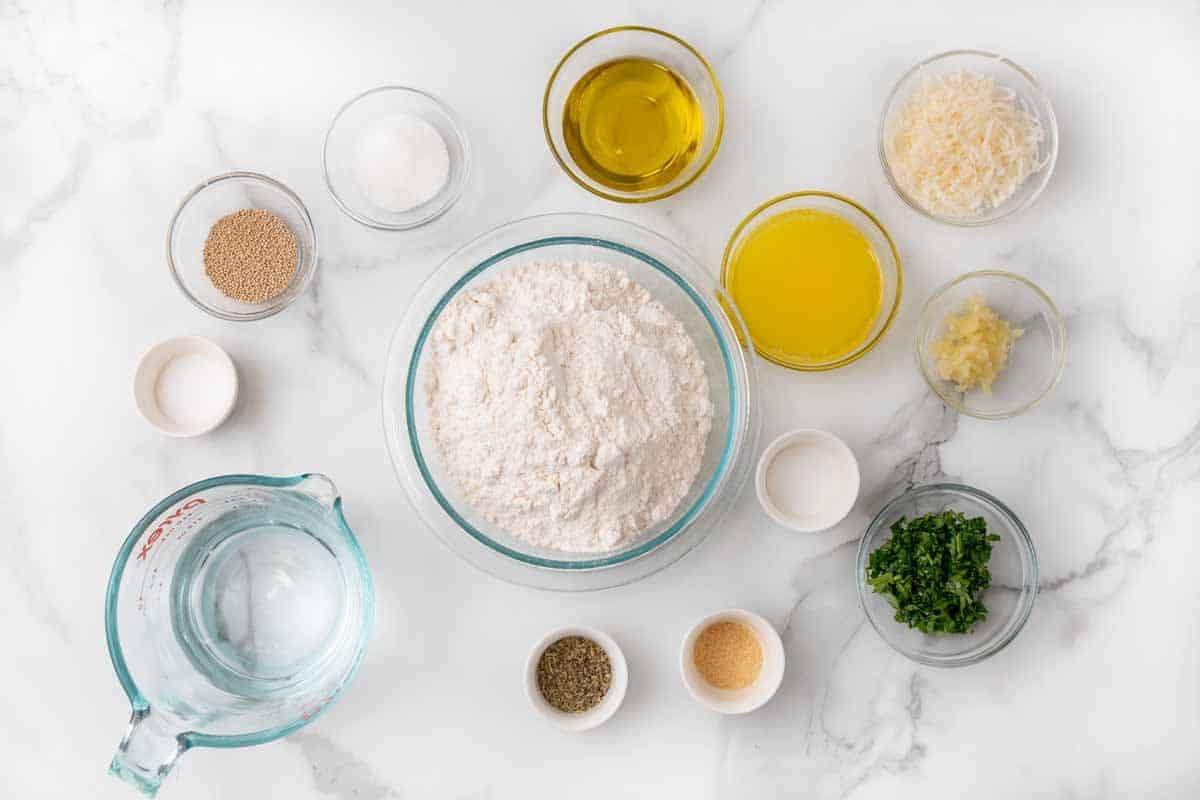
Let’s start by gathering the ingredients we need to make our easy garlic knots recipe recipe. In Chef Speak, this is called the Mise en Place, which translates into Everything in its Place.
Not only does setting your ingredients up ahead of time speed the cooking process, but it also helps ensure you have everything you need to make the dish.
How to make Garlic Knots
Fit your stand mixer with a dough hook.
*If you don’t have a stand mixer, use a large bowl and a wooden spoon to mix the dough.
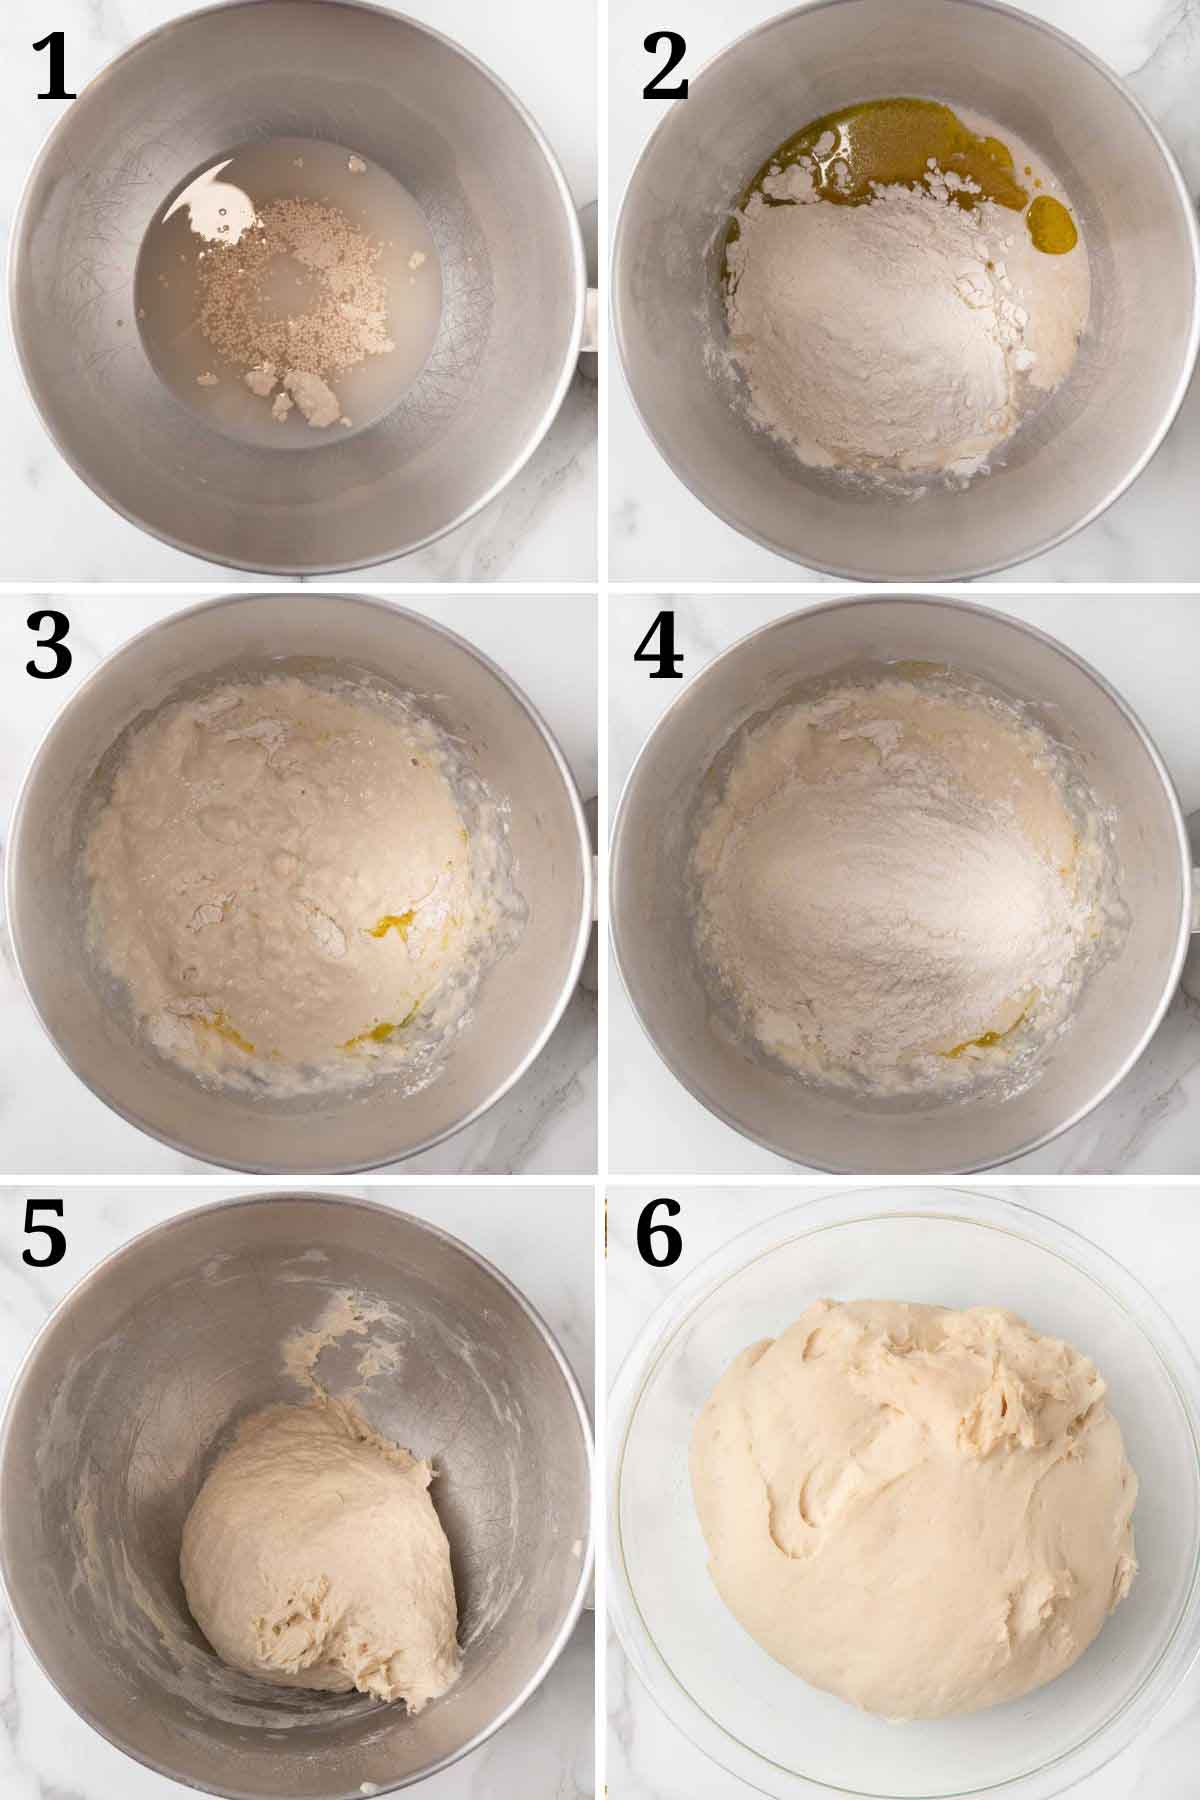
- Add the warm water, yeast, and granulated sugar to the bowl of your stand mixer and whisk to combine. Cover and allow to rest for 5 minutes.
- Add the olive oil, salt, garlic powder, and half of the all-purpose flour to the bowl.
- Beat for 15 seconds.
- Add the remaining flour.
- Beat on low speed for 2 minutes. Then, turn the mixer speed to high speed and continue to beat for 5 minutes (or knead by hand on a lightly floured surface). The dough should still feel a little soft.
*Poke the dough with your finger; it should slowly bounce back. - Lightly grease a large bowl with olive oil. Place the dough in the bowl, turning it to coat all sides with the oil, then cover the bowl with plastic wrap or a clean kitchen towel.
*Leave the dough to rise at room temperature for 1–2 hours or until double in size.
Chef Tips
- If the dough becomes too sticky during the kneading process, sprinkle one teaspoon of flour at a time on the dough or on the work surface/in the bowl to make a soft, slightly tacky dough. Do not add more flour than you need because it will dry out the dough.
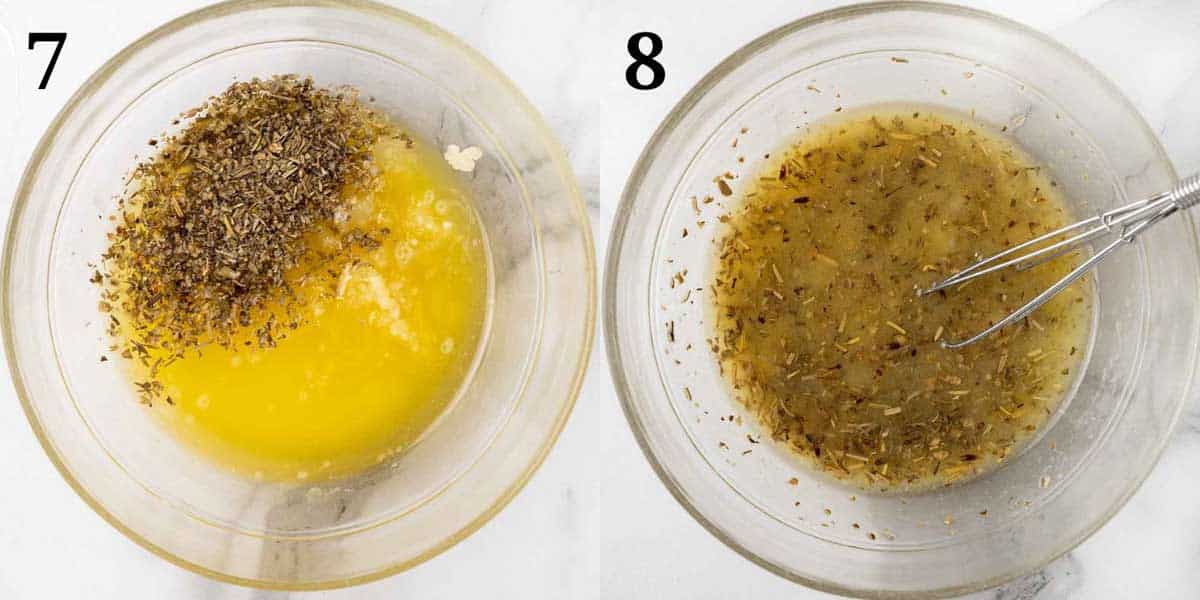
- In a small bowl, add the melted butter, chopped garlic, parmesan cheese, Italian seasoning, and salt.
- Whisk to combine.
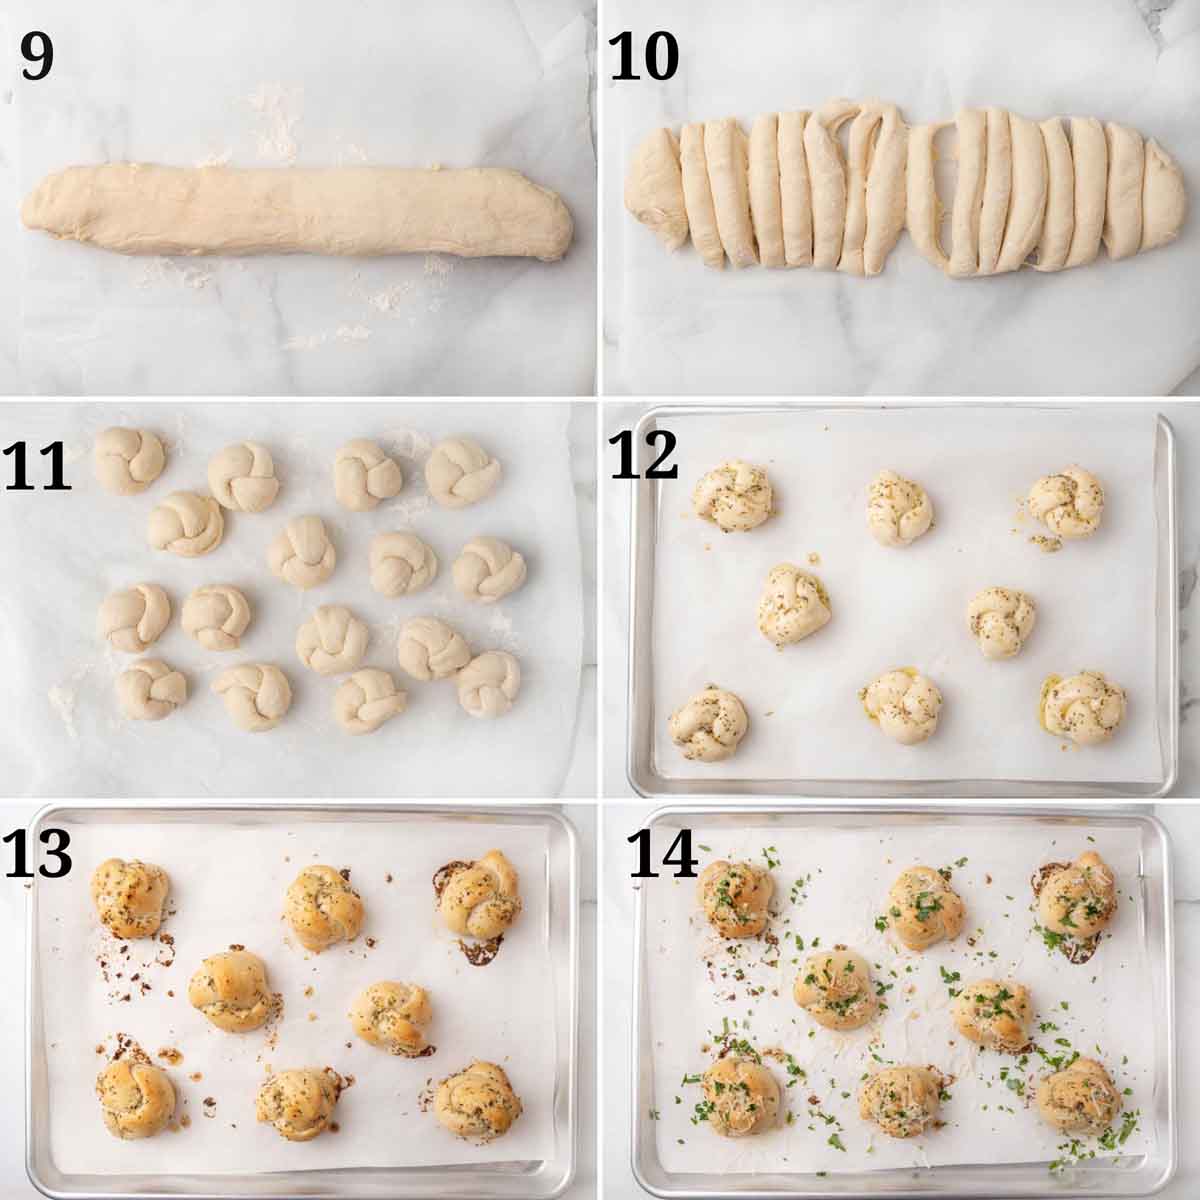
- When the dough has completed the first rise, punch it down to release the air. Then, using floured hands, place the dough on a lightly floured work surface and shape the dough into a 16-inch log (4 – 5 inches wide).
- Using a very sharp knife, slice the dough into sixteen one-inch strips.
- Roll each strip into an eight-inch rope. Tie each strip into a knot.
*You can tuck the ends of the knots underneath or leave them out. - Arrange the knots on two baking sheets lined with parchment paper. Cover the knots with clean kitchen towels (or plastic wrap), and let them rest for 30 to 45 minutes for the second rise.
- Brush the knots with the two-thirds of the garlic butter.
*Reserve the remainder of the butter mixture to brush on the garlic knots when they’re finished baking. - Bake for about 20–23 minutes or until golden brown on top. Remove the pans from the oven and brush the garlic knots with the remaining garlic butter.
*Sprinkle with parmesan cheese and chopped Italian parsley.
*Towards the end of the rise time, preheat oven to 400 degrees F.
You’ll love our homemade buttery garlic knots, and so will your friends and family. They’re easy to make and oh-so-delicious!
Leftovers can be stored in an airtight container at room temperature for 1-2 days and reheated in a 350-degree oven for 7-10 minutes. The garlic knots can also be stored in a freezer-safe container or ziplock bag in the freezer for up to two months.
Recipe FAQ’s
No, you don’t. As long as you cut the dough into the same number of strips, you can shape it into any twist you prefer, and you can even vary the shapes.
Yes, you can. Most grocery stores sell pizza dough that can be used to make rolls. They won’t be quite as soft as our homemade dough recipe, but they will still be garlicky, buttery, and delicious.
Pretty much just like you’d tie a regular knot, roll the dough into a rope shape, bring the two ends together, then cross one end over, under, and through the other. Easy peasy.
More Recipes You’ll Love!


Homemade Garlic Knots
Ingredients
Homemade Dough
- 1 ⅓ cups warm water between 100–110°F
- 2 ¼ teaspoons instant yeast 1 standard packet
- 1 Tablespoon granulated sugar
- 3 Tablespoons olive oil or melted butter
- 1 teaspoon table salt
- ½ teaspoon garlic powder
- 3 ½ cups all-purpose flour spooned & leveled, plus more for hands and work surface
Topping
- 5 tablespoon unsalted butter melted
- 3 cloves fresh garlic finely chopped
- 1 teaspoon Italian seasoning
- ¼ teaspoon table salt
- ¼ cup parmesan cheese grated
- 2 tablespoon Italian parsley finely chopped
Instructions
Dough
- Fit the dough hook to the mixer.
- Add the warm water, yeast, and granulated sugar to the bowl of your stand mixer and whisk to combine. Cover and allow to rest for 5 minutes.
- Add the olive oil, salt, garlic powder, and half of the all-purpose flour to the bowl.
- Beat for 15 seconds, then add the remaining flour.
- Add the remaining flour, then beat on low speed for 2 minutes.
- Turn the mixer speed to high speed and continue to beat for 5 minutes (or knead by hand on a lightly floured surface). The dough should still feel a little soft.*Poke the dough with your finger; it should slowly bounce back.
- Lightly grease a large bowl with olive oil. Place the dough in the bowl, turning it to coat all sides with the oil, then cover the bowl with plastic wrap or a clean kitchen towel.
- If the dough becomes too sticky during the kneading process, sprinkle one teaspoon of flour at a time on the dough or on the work surface/in the bowl to make a soft, slightly tacky dough. Do not add more flour than you need because it will dry out the dough.
- Leave the dough to rise at room temperature for 1–2 hours or until double in size.
- When the dough has completed the first rise, punch it down to release the air. Then, using floured hands, place the dough on a lightly floured work surface and shape the dough into a 16-inch log (4 – 5 inches wide).
- Using a very sharp knife, slice the dough into 16 1-inch strips.
- Roll each strip into an eight-inch rope. Tie each strip into a knot.*You can tuck the ends of the knots underneath or leave them out.
- Arrange the knots on two baking sheets lined with parchment paper. Cover the knots with clean kitchen towels (or plastic wrap), and let them rest for 30 to 45 minutes for the second rise.
- Towards the end of the rise time, preheat oven to 400°F .
Topping
- Add the melted butter, chopped fresh garlic, parmesan cheese, Italian seasoning, and salt to a small bowl and mix to combine.
- Brush the knots with the two-thirds of the garlic butter.*Reserve the remainder of the butter mixture to brush on the garlic knots when they’re finished baking.
- Bake for 20–23 minutes or until golden brown on top.
- Remove the pans from the oven and brush the garlic knots with the remaining garlic butter.*Sprinkle with parmesan cheese and chopped Italian parsley.
Leave a Comment