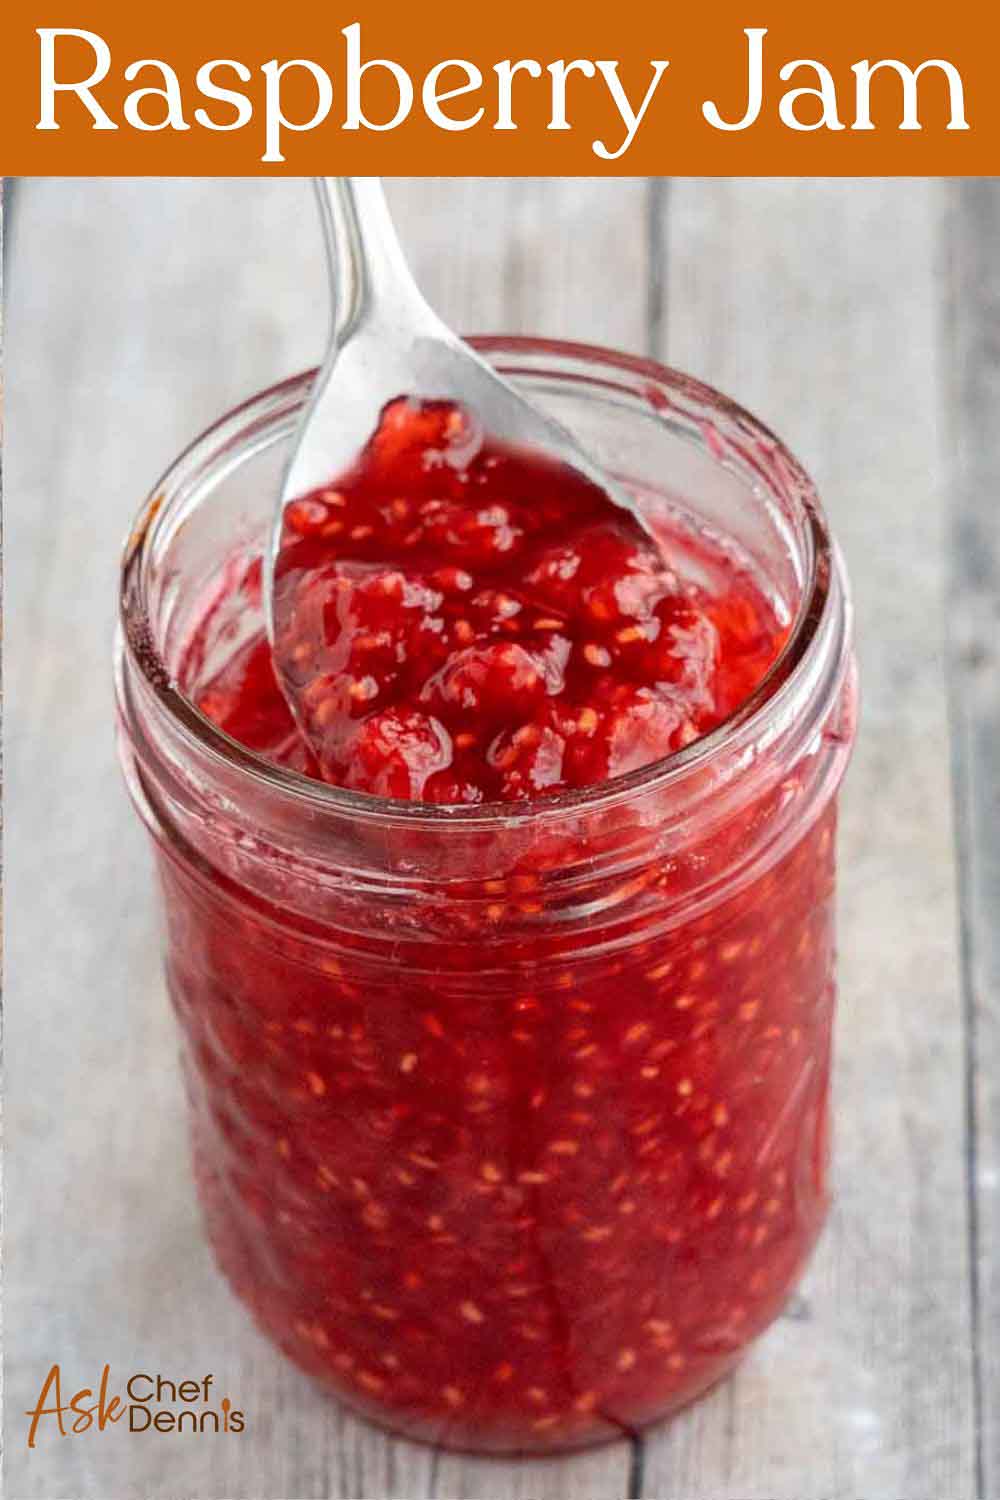
Our easy raspberry jam recipe turns fresh berries into a bright, tangy spread that makes your morning toast feel downright fancy. This homemade jam is sweet, juicy, and worth every minute at the stove.
And if a spoonful accidentally ends up straight in your mouth instead of on your ice cream? That’s just quality control.

Homemade jam remains the most delicious way to preserve the season’s fresh berries and ripe fruit, just like home cooks did long before freezers and fridges were around.
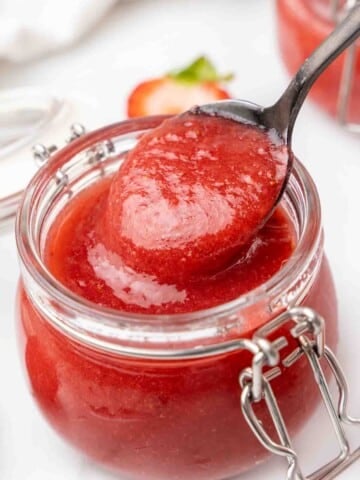
And while strawberry jam always hogs the spotlight, our homemade raspberry jam recipe has a tangy flavor and sweet richness that’s ready to knock strawberry off its pedestal.
This small-batch jam comes together with just three ingredients and no added pectin, making it perfect for first-time jammers.
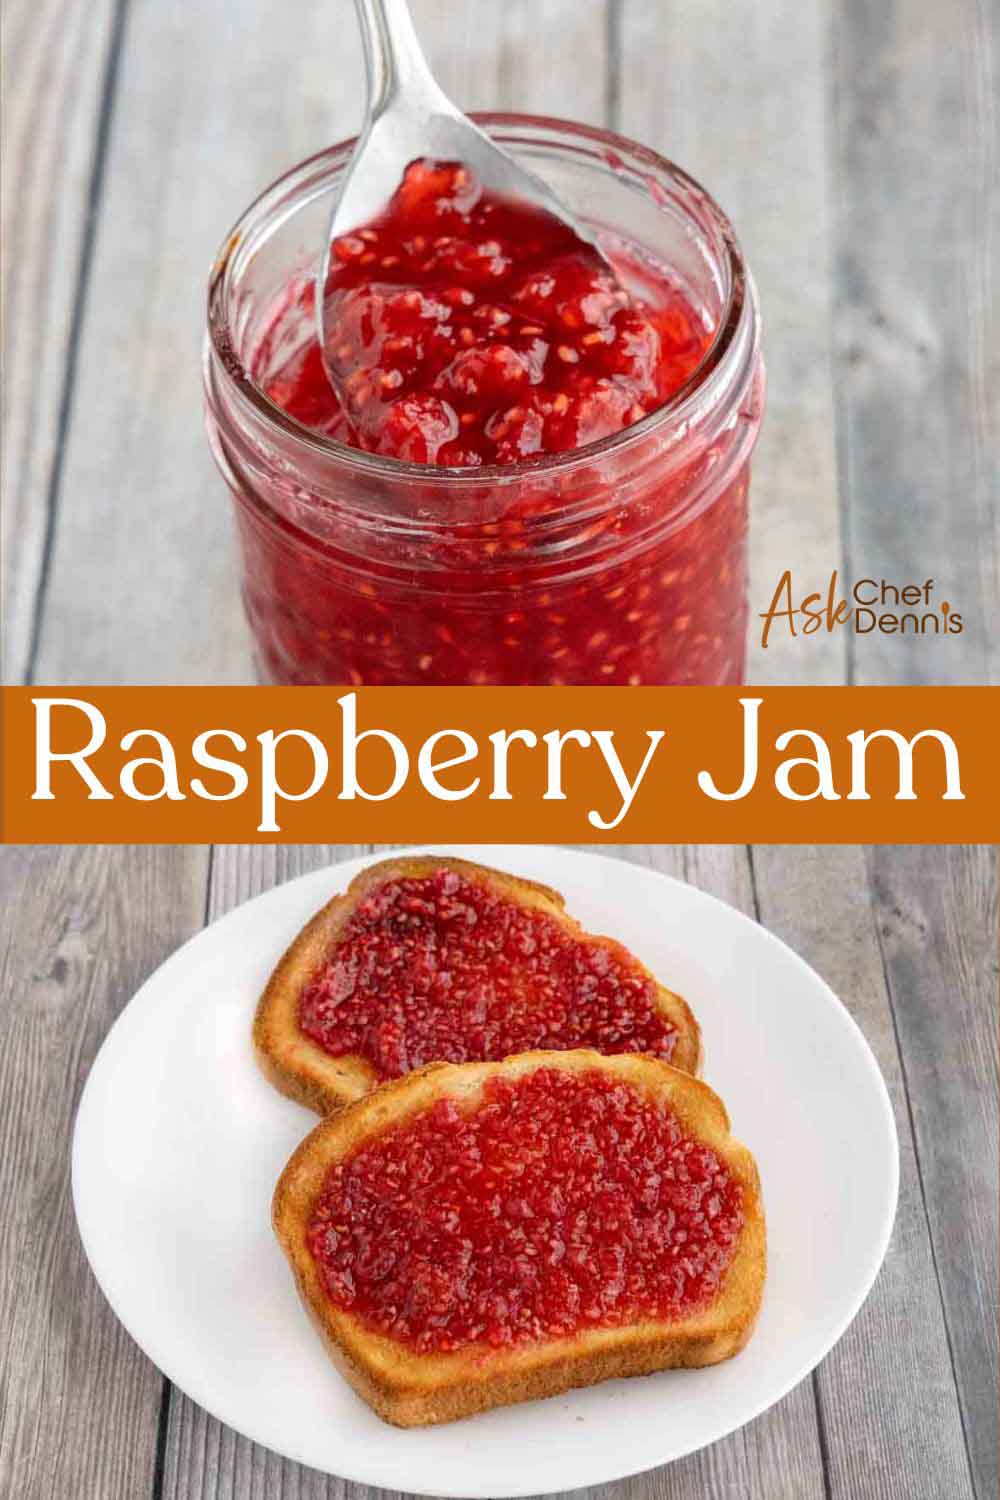
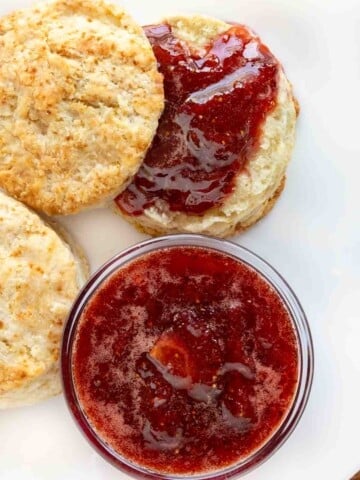
You can spread it on toast, swirl it into yogurt, or spoon it over pancakes and scones. Anything strawberry can do, raspberry can do better.
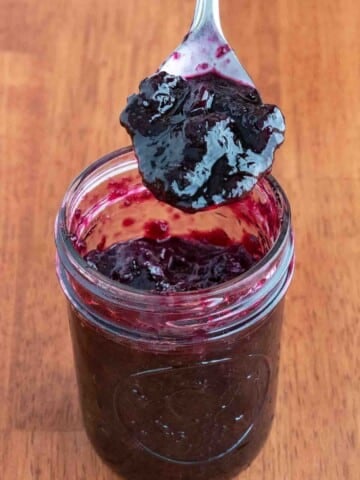
Spread this jam over a buttery homemade siscuit or a thick slice of honey beer bread for a breakfast that actually feels like a treat. And if homemade is your jam, don’t miss our easy recipes for strawberry jam and blueberry jam.
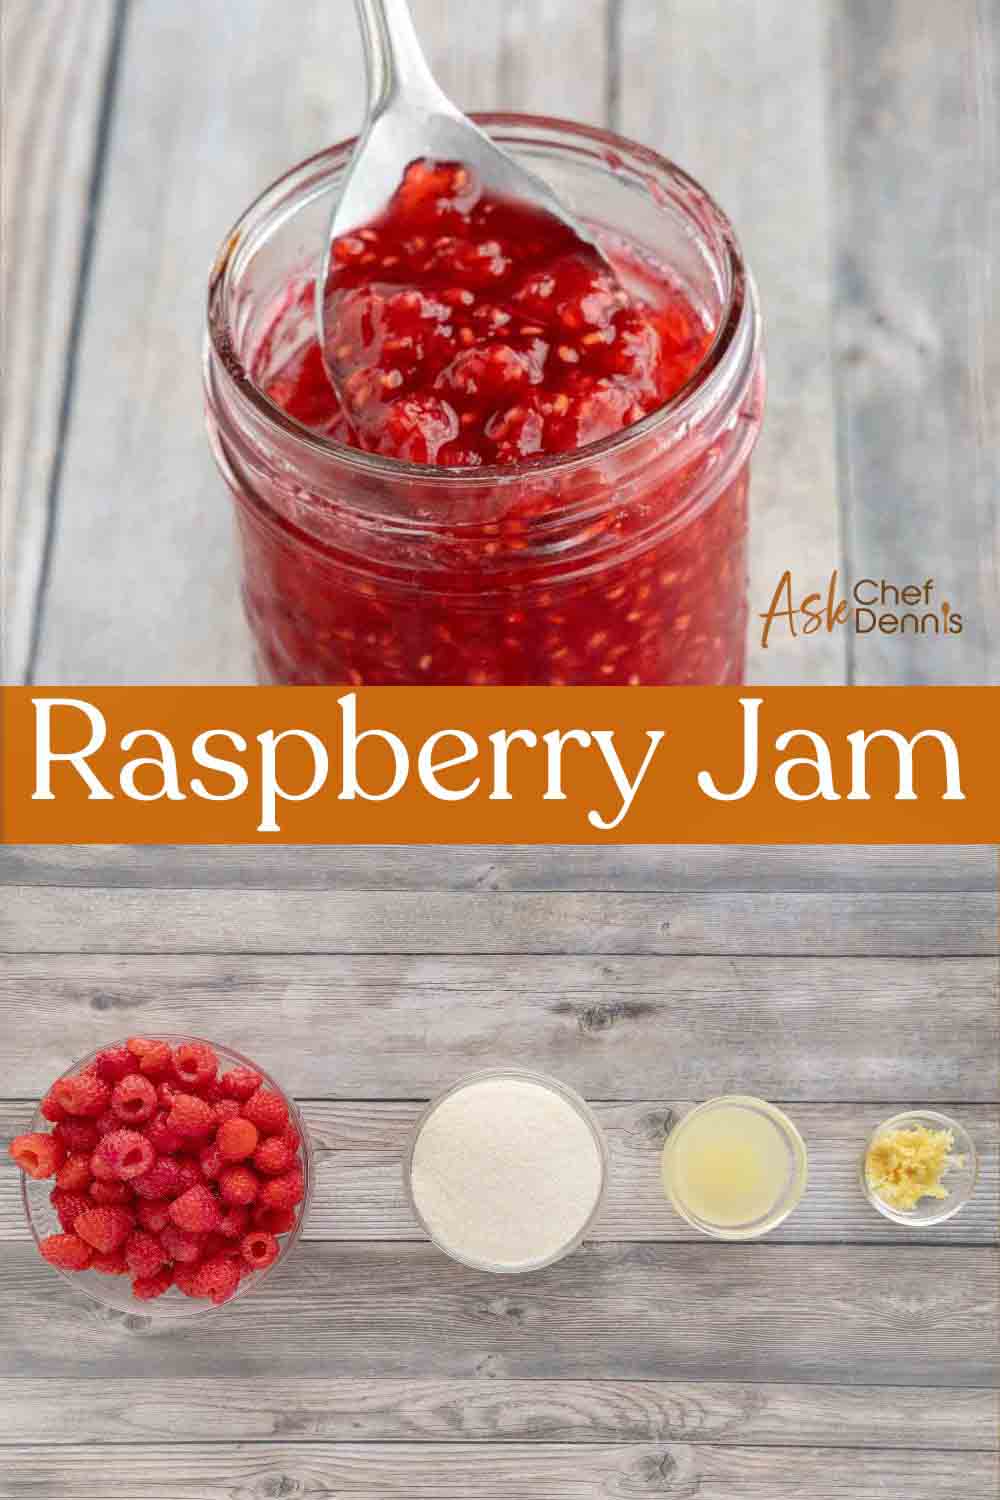
Ingredients
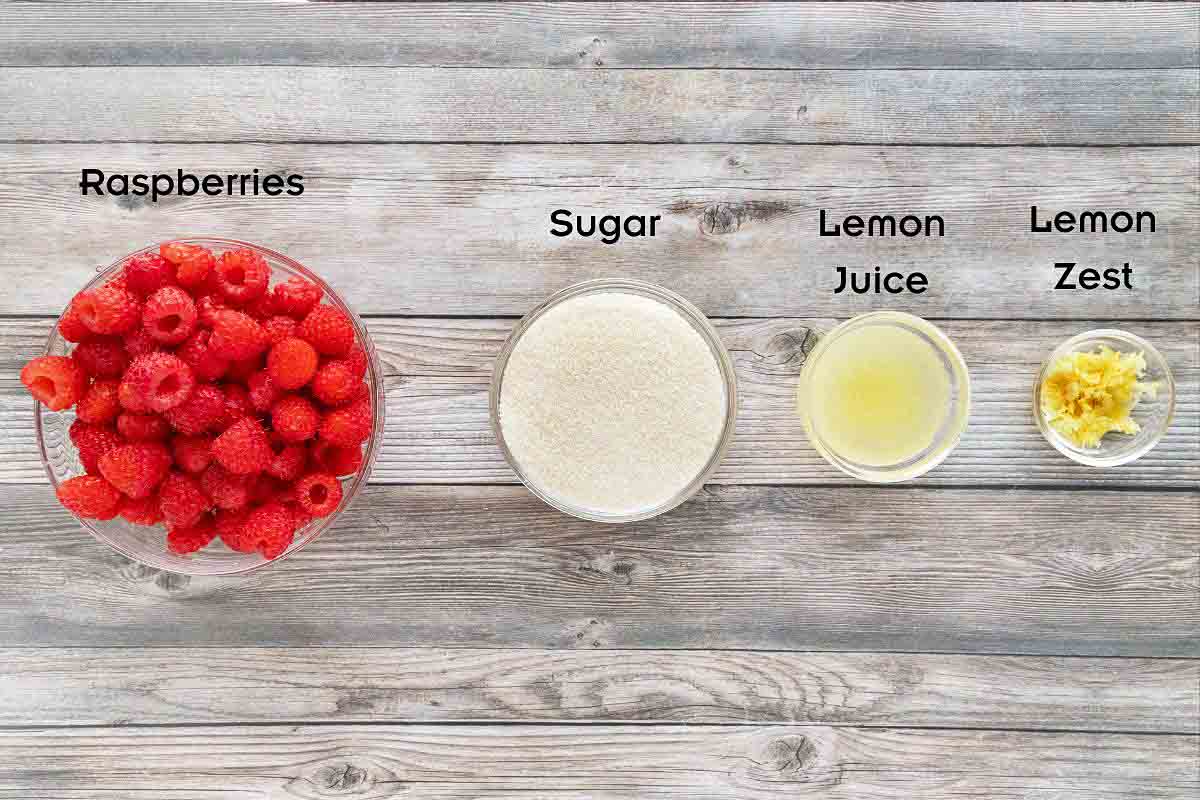
Let’s gather the necessary ingredients to prepare our easy raspberry jam recipe. Culinary professionals call this “Mise en Place,” which means “everything in its Place.”
Setting up your ingredients not only helps speed up the cooking process but also ensures you have all the necessary ingredients on hand to make the recipe.
Can I Change Up the Recipe?
Absolutely. We made the recipe with fresh raspberries, but you can use frozen raspberries straight from the freezer. Just expect a little extra liquid and slightly longer cooking time.
Raspberries pair beautifully with fruits like blackberries or peaches, so it’s easy to turn this into a mixed fruit jam. This is the perfect excuse to finally use up that mystery bag of frozen fruit that’s been hiding in the back of your freezer.
Swap the lemon juice for orange or lime for a brighter citrus note.
Or take the flavor in a whole new direction with a splash of vanilla extract, a pinch of cinnamon, or even a few fresh basil leaves.
How to Make Raspberry Jam
Follow along with my simple step-by-step instructions to learn how to make raspberry jam in your home kitchen.
- Place a small plate and a tablespoon in the freezer. Later, you can check the jam set with a gel test.
- Rinse the raspberries in cold running water. Use only ripe berries, fresh or frozen.
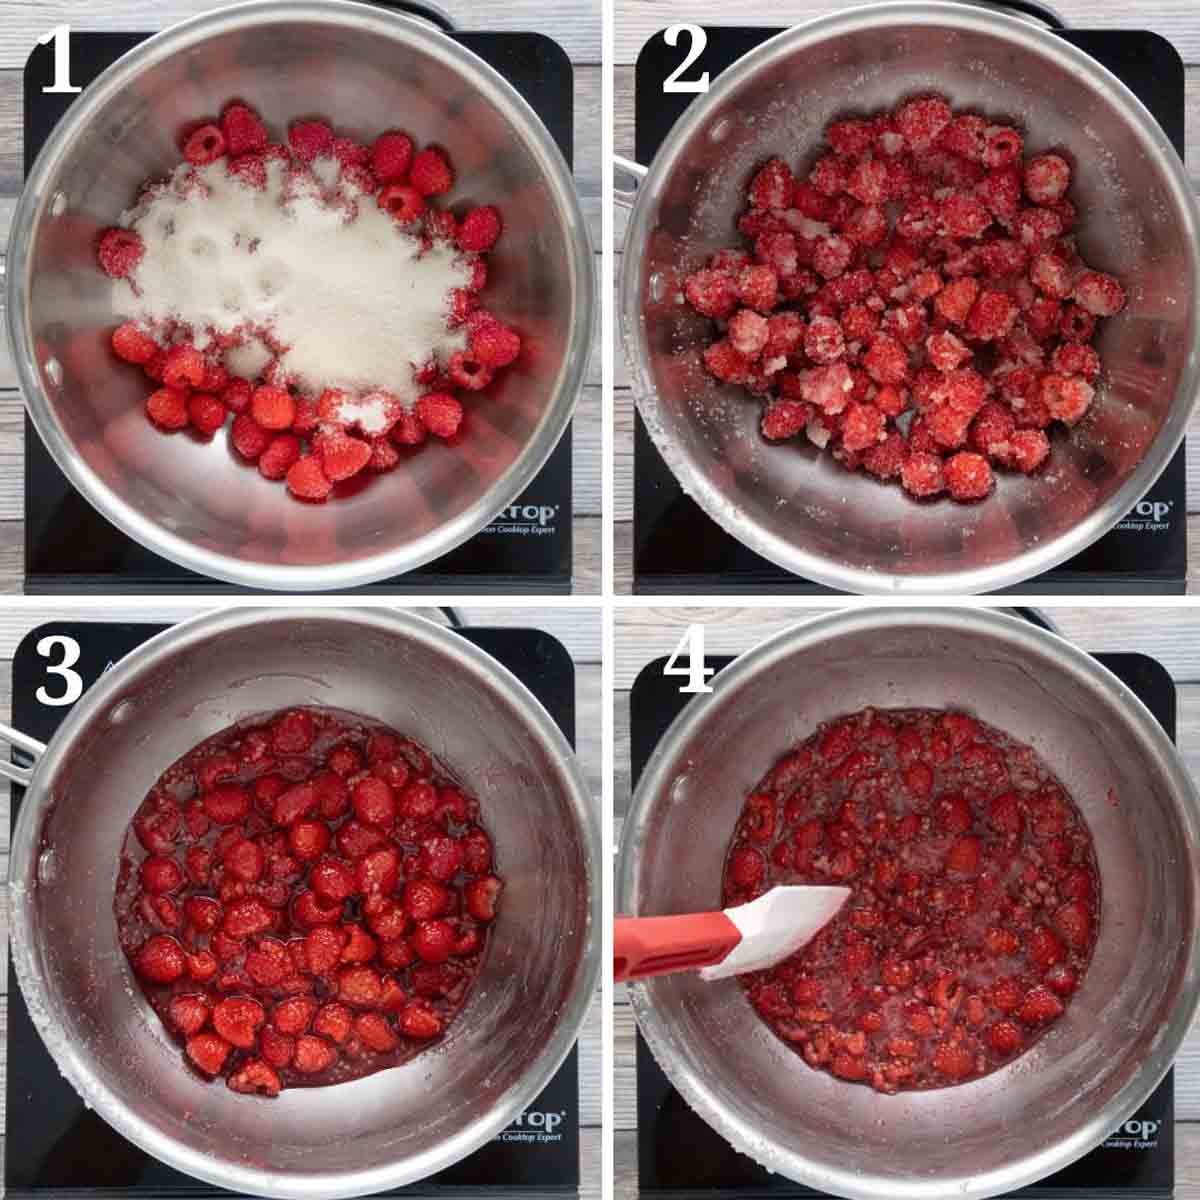
- Add the raspberries and the sugar to a saucepan over medium heat. A large saucepan works best to avoid overflow.
- Stir the mixture together to combine. Use a wooden spoon or heatproof spatula for best control.
- Heat for about 5 minutes, stirring occasionally, until it begins to bubble. This helps the sugar dissolve evenly.
- Add the lemon juice and lemon zest to the fruit mixture, stirring until thoroughly combined. Continue to heat the mixture until it reaches a light boil. A full rolling boil is not necessary at this stage.
*Use a candy thermometer to monitor the temperature, stirring regularly to prevent burning or sticking to the bottom of the pan.
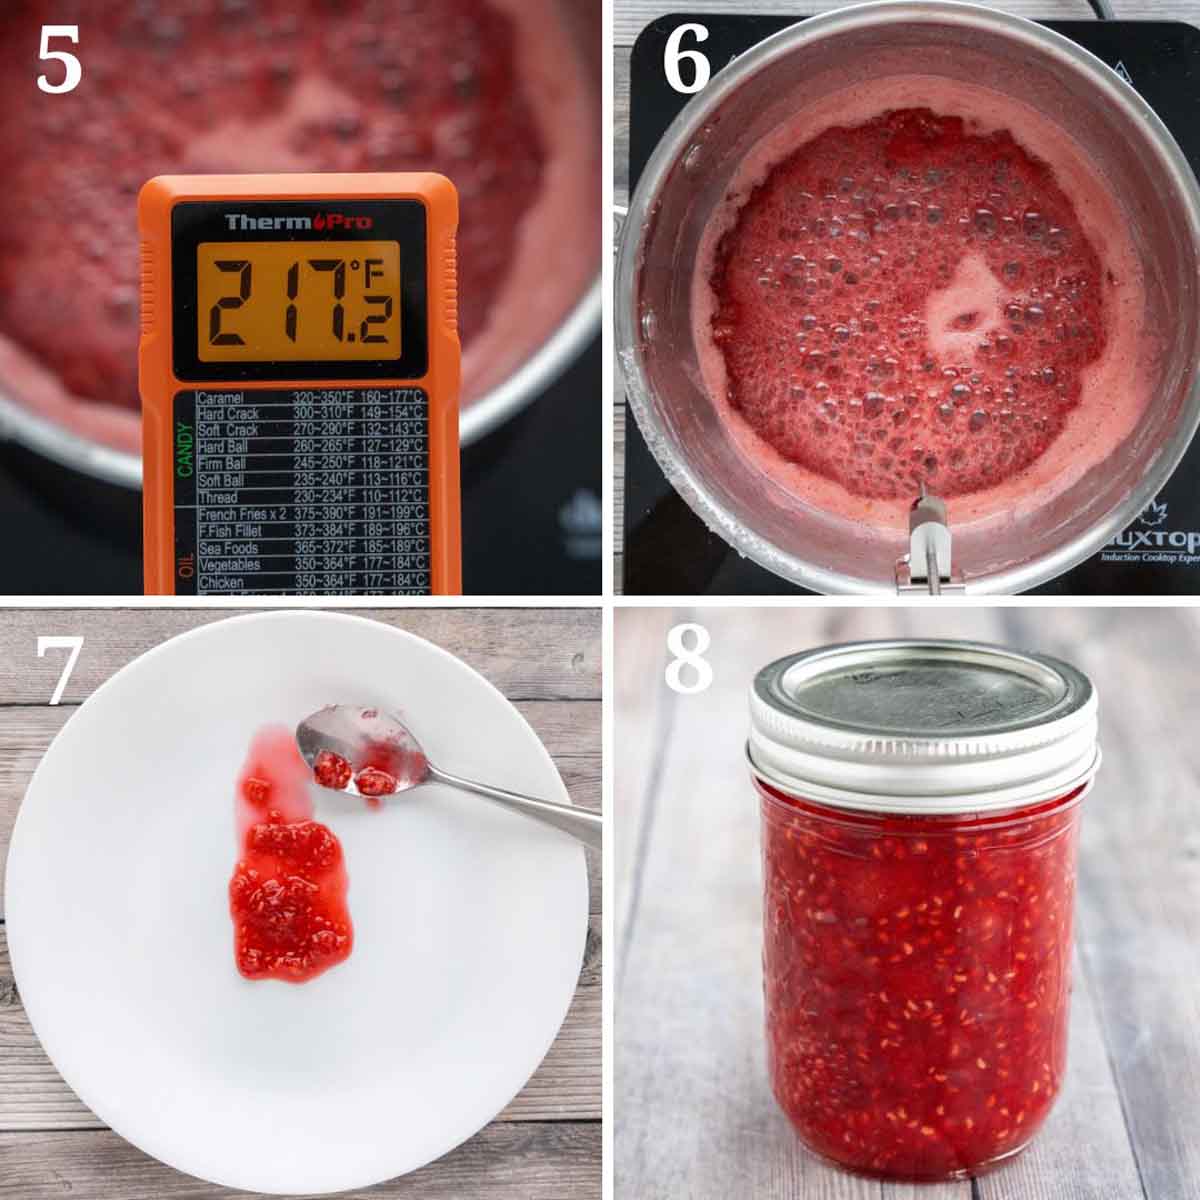
- When the mixture reaches 215-220°F, reduce the heat to low.
- Continue cooking until the jelly begins to thicken (7-10 minutes).
- Remove the plate and spoon from the freezer. Use the spoon to scoop a small amount of jam. Swipe it over the chilled plate and let it cool to test the consistency of the jam. If it wrinkles when pushed, you’ve reached the setting point.
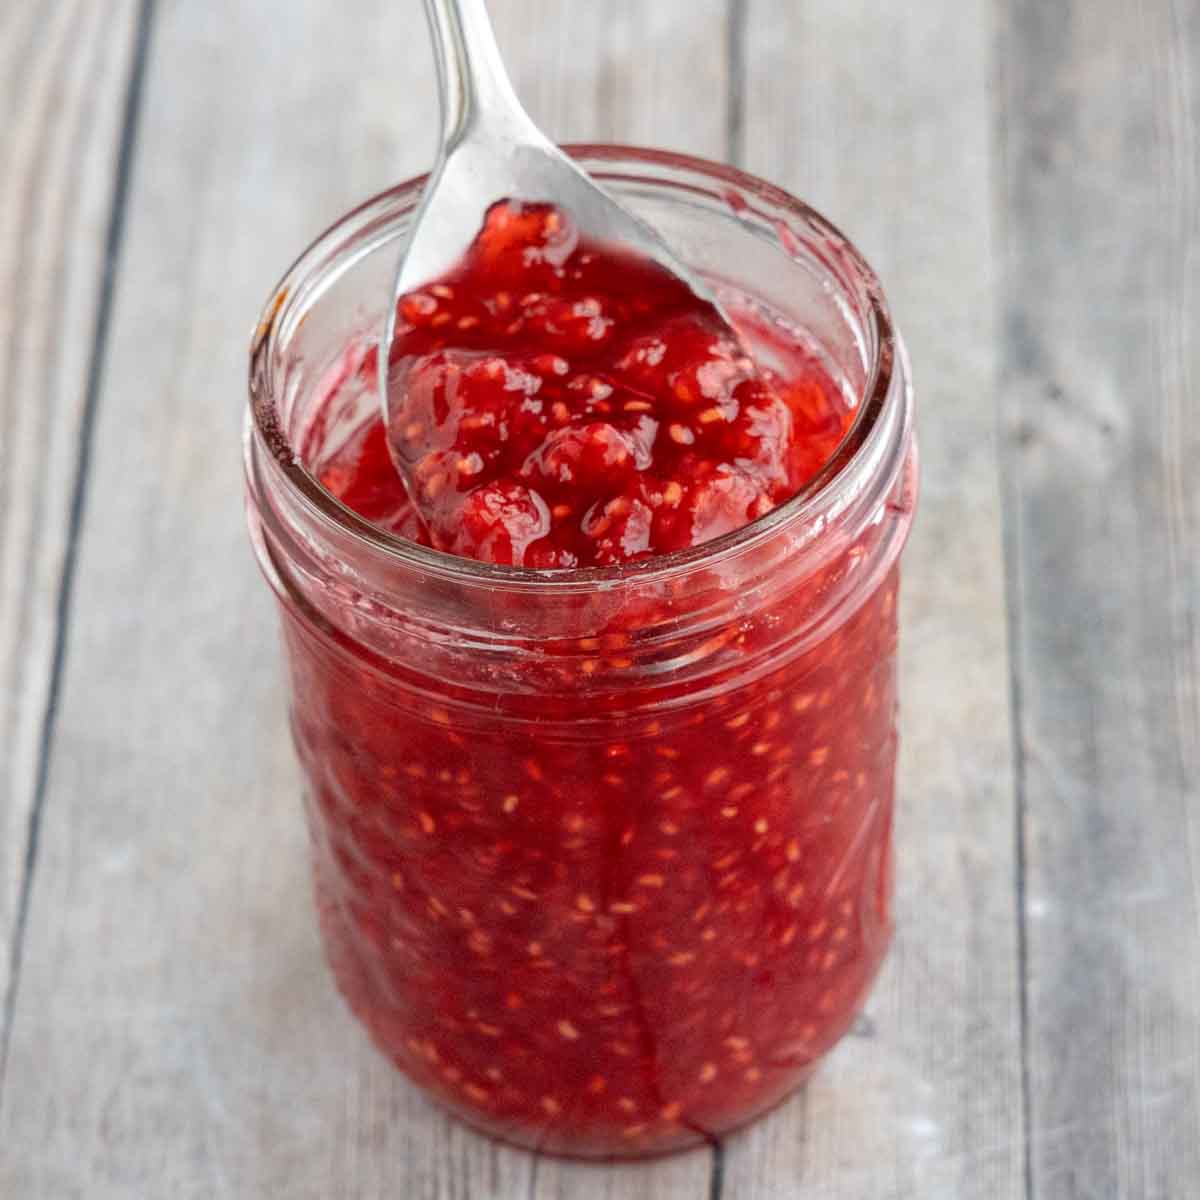
- Once the desired consistency is achieved, pour the jam mixture into a clean jam jar or mason jar. A wide-mouth funnel helps avoid spills. Let it cool completely before sealing or storing.
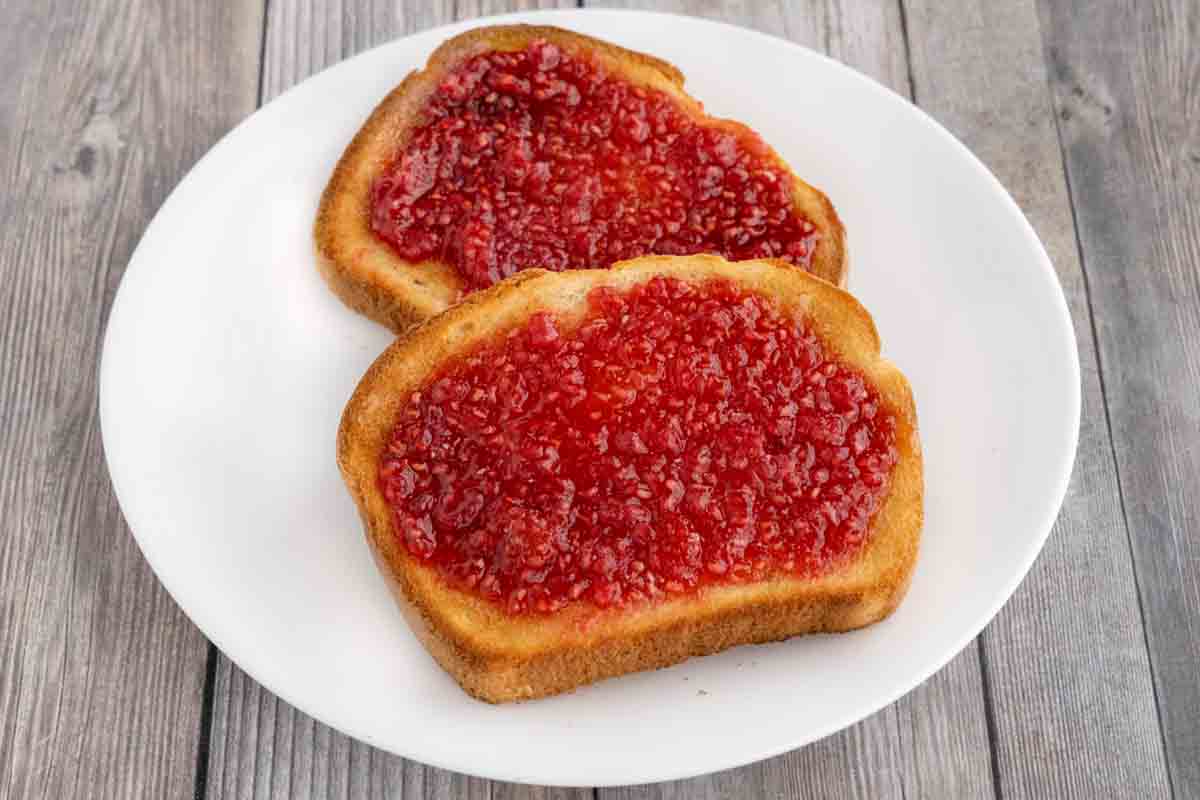
Serve it up at a slow weekend breakfast and watch it quietly take over the table, one scone, biscuit, and pancake at a time. After the first bite, your hand’s already on the toaster for round two.
This small batch of jam will last for 10 to 14 days in the fridge or up to three months as a freezer jam.
For a longer shelf life, process the filled jars in a hot water bath using a water bath canner, then store them in a dark place.
Recipe FAQs
Nope. A large pot or saucepan, a wooden spoon, and a clean glass jar or mason jar are all you need to make this small batch of raspberry jam.
You can use a sugar substitute, but it may affect how the jam sets. Sugar helps the fruit mixture thicken naturally, so if you’re using less sugar or a sugar-free option, expect a looser texture unless you add fruit pectin or another thickener.
Air bubbles can form when hot jam is poured too quickly or if you don’t release trapped steam before sealing. They’re harmless, but for the best finished product, gently run a teaspoon or butter knife through the jam in the jar to release any trapped bubbles before sealing.
More Recipes You’ll Love!


Easy Raspberry Jam Recipe
Ingredients
- 3 cups fresh raspberries
- 1 cup granulated sugar
- ¼ cup lemon juice
- 1 teaspoon lemon zest
Instructions
- Place a small plate and a tablespoon in the freezer.
- Rinse the raspberries in cold running water.
- Add the raspberries and the sugar to a saucepan over medium heat.
- Stir the mixture together to combine.
- Heat for about 5 minutes, stirring occasionally, until it begins to bubble.
- Add the lemon juice and lemon zest to the fruit mixture, stirring to combine thoroughly.
- Continue to heat the mixture until it reaches a light boil.Use a candy thermometer to monitor the temperature, stirring regularly to prevent burning or sticking to the bottom of the pan.
- When the mixture reaches 215°F, reduce the heat to low and continue cooking until the jelly begins to thicken (7-10 minutes).
- Remove the plate and spoon from the freezer. Use the spoon to scoop a spoonful of the jam. Swipe it over the plate and let it cool to test the consistency of the jam.
- Once the desired consistency is achieved, pour the jam into a clean jar and let it cool completely before storing in the refrigerator.
- A quick jam like this will last for 10-14 days in the fridge and up to 3 months in the freezer.
Leave a Comment