
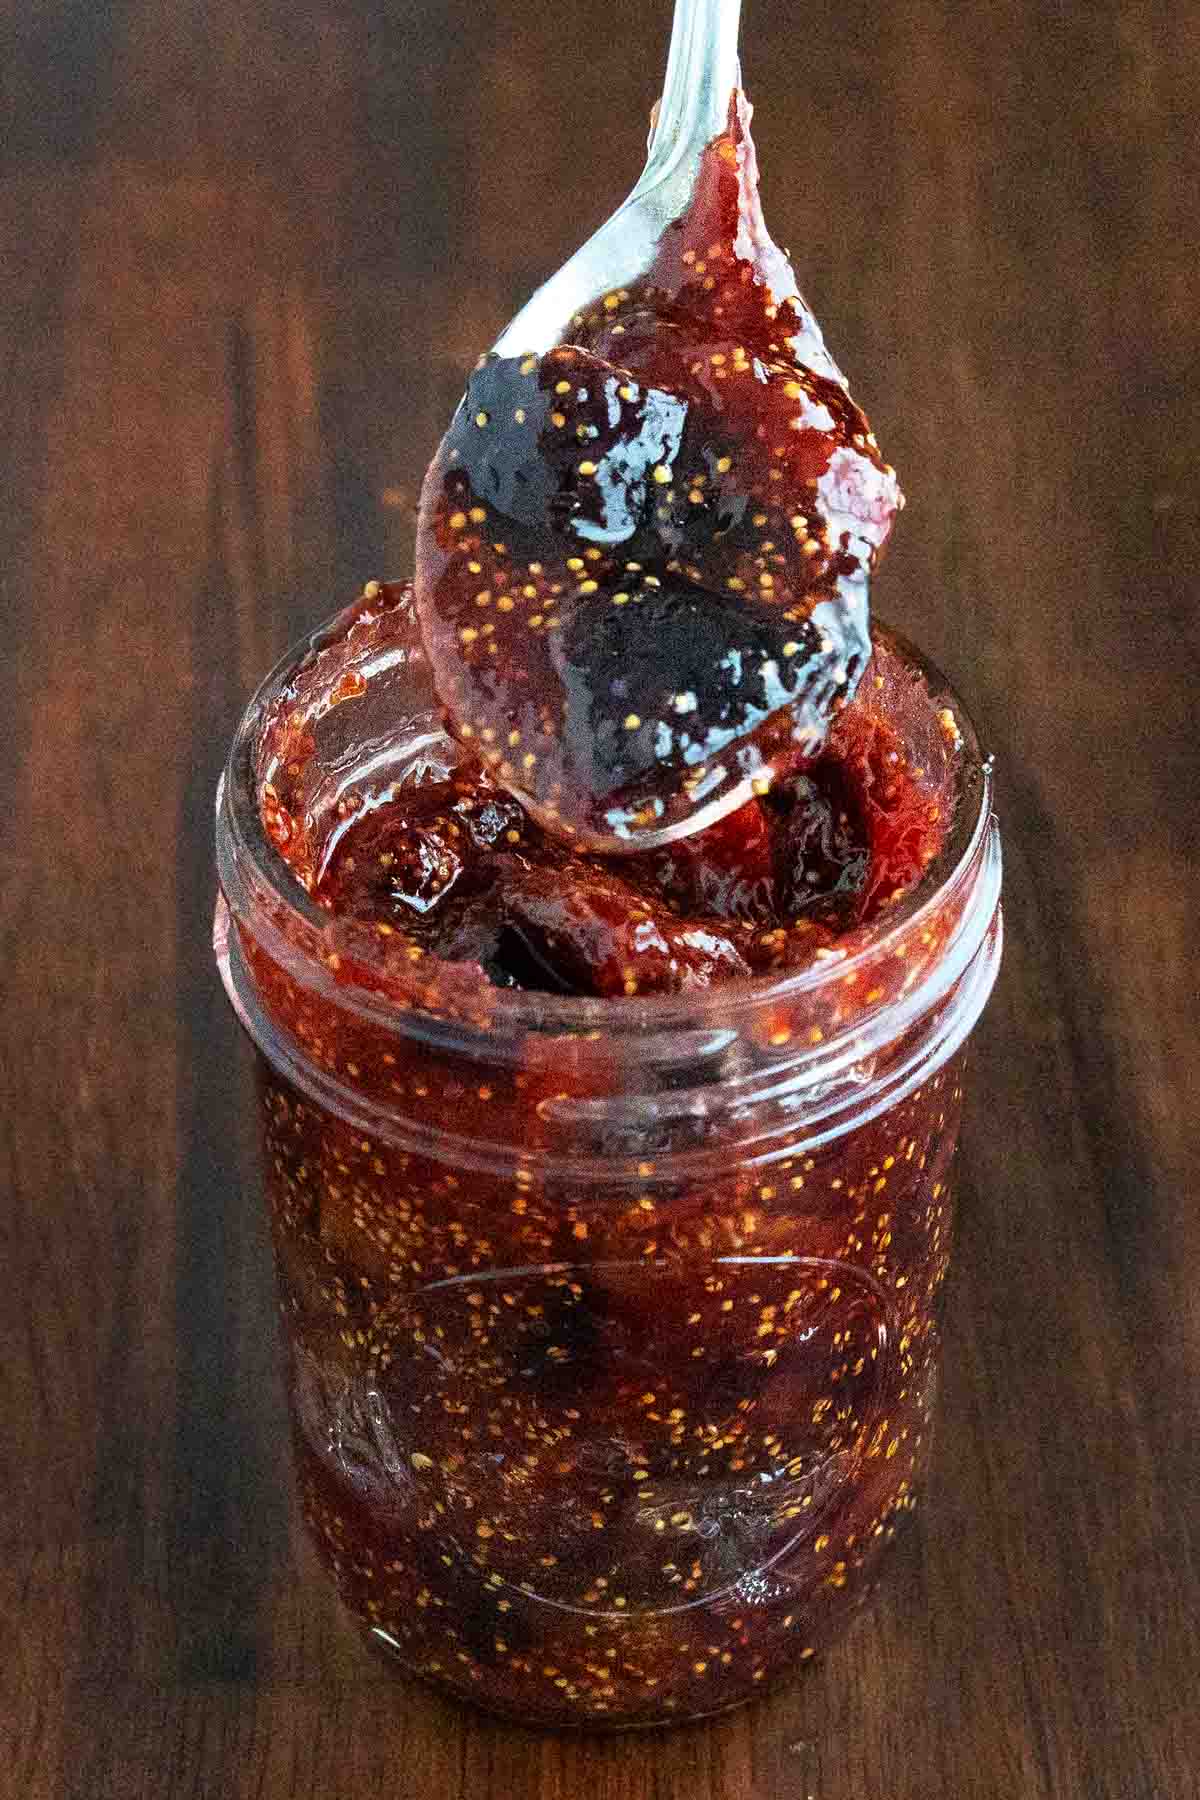
Our small-batch Fig Jam recipe is rich, sticky, and packed with that luscious, sun-ripened fruit flavor that makes fig season feel way too short. It’s quick, easy, and just as happy on a cracker with cheese as it is spooned over vanilla ice cream.
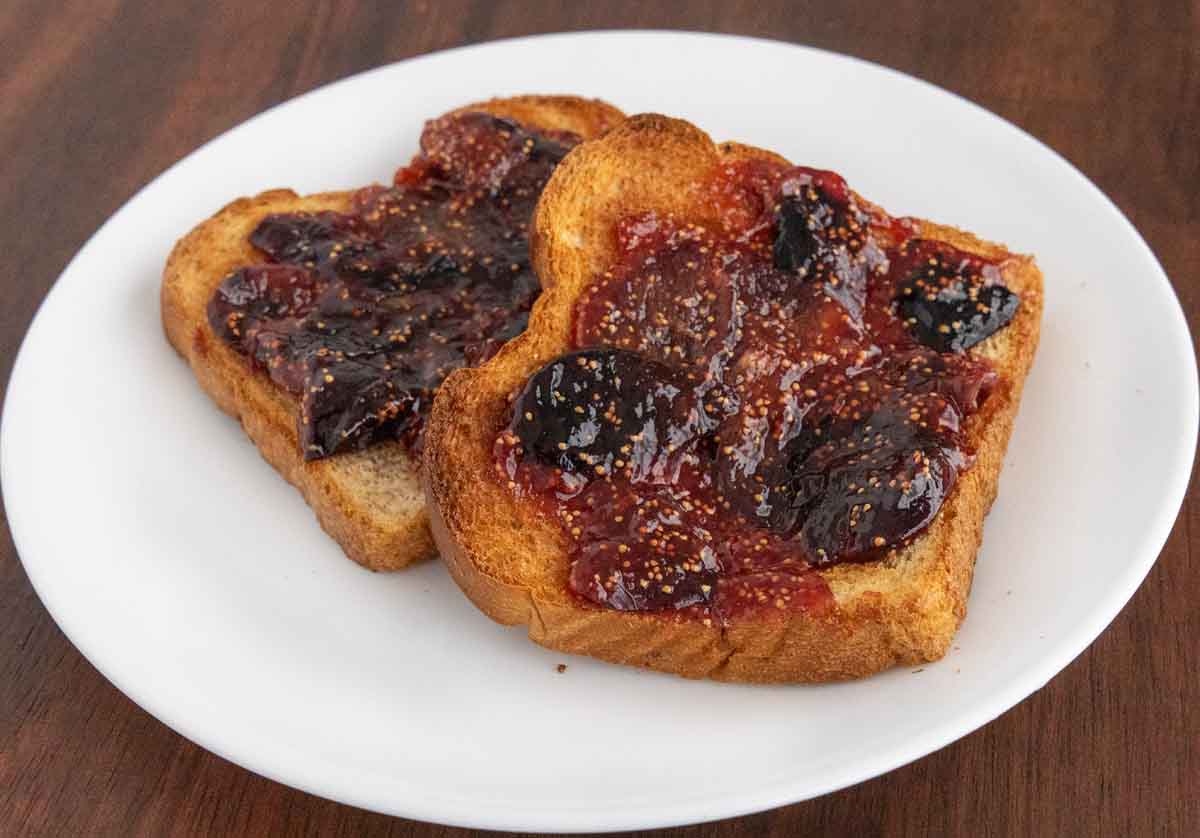
Fresh Fig Jam is just fancy enough to make your morning toast feel like it should be served with a linen napkin and a butler named Charles.
WANT TO SAVE THIS RECIPE?
Audio Player
Fig Jam goes way back to ancient Mediterranean kitchens, where Greeks and Romans simmered figs with honey to stretch the harvest and sweeten the season. Once cane sugar became accessible in the 17th and 18th centuries, cooks across Europe began turning ripe figs into a proper jam.
Canning methods developed in the early 1800s made it easier to keep jars on hand all year round, and now we can all carry on the tradition, minus the togas.
No fancy ingredients, no special equipment, and no weird steps you’ll need to Google mid-stir.
Our fig jam is practically made for holiday get-togethers, and while it’s not figgy pudding, it’ll definitely make their pudding figgy.
If you enjoy small-batch, homemade jams, check out our recipes for Strawberry, Raspberry, and Easy Blueberry Jam. They’re bright, fruity, and perfect for your breakfast table.
For something with a more savory edge, Caramelized Onion Jam brings deep, rich flavor that works beautifully with sandwiches, cheese boards, or roasted meats.
Ingredients For Fig Jam
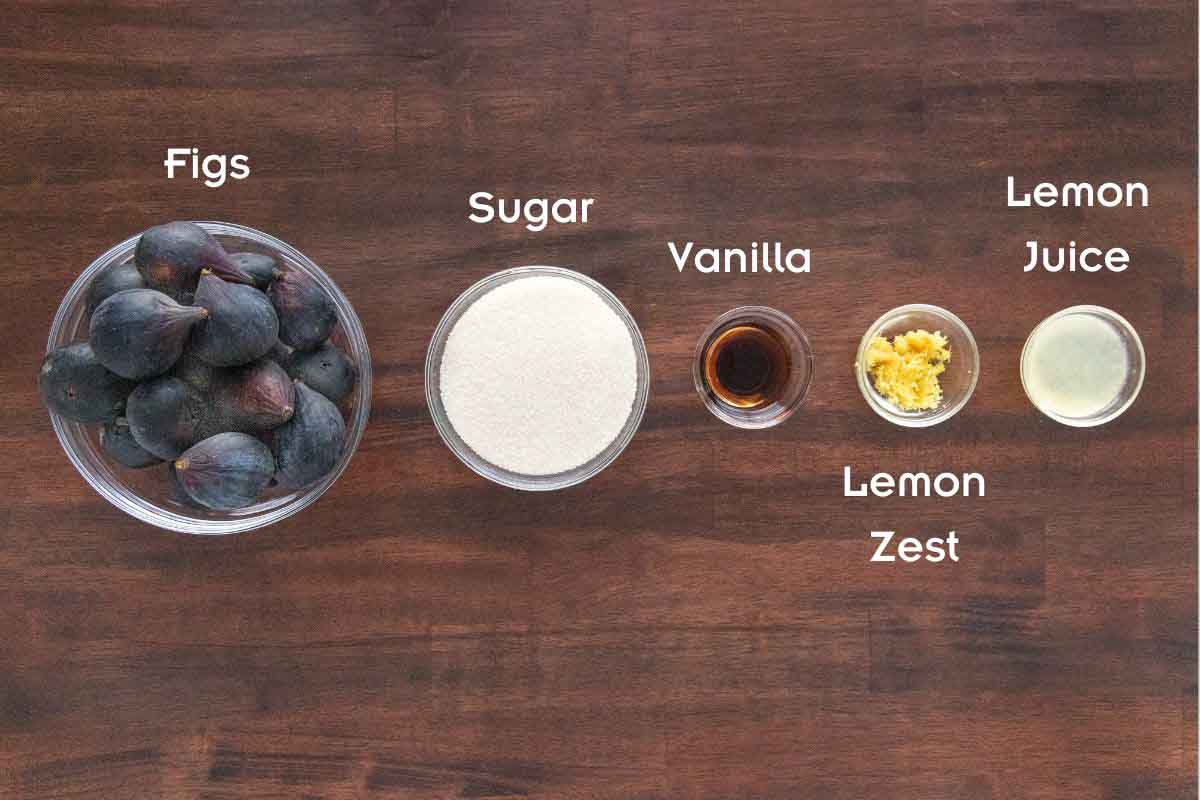
Gather the ingredients to prepare our easy fig jam recipe. Culinary professionals call this the “Mise en Place,” which means “everything in its Place.”
Setting up your ingredients not only helps speed up the cooking process but also ensures you have all the necessary ingredients on hand to make the recipe.
What Kind of Figs Should I Use?
We make our homemade Fig Jam recipe with fresh fruit, and the best choice is ripe Black Mission or Brown Turkey figs. These varieties are naturally sweet and soft, making them ideal for making rich, sweet Fig Jam.
If fig season has passed or your fig tree didn’t produce much this year, frozen figs or dried Calimyrna figs from the grocery store will work too. Thaw frozen figs fully and drain off any liquid. Dried figs should be chopped into smaller pieces and simmered with a small amount of water to soften before adding sugar.
Because figs have such a short season, it’s worth grabbing extra figs while they’re fresh. Look for ripe fruit that’s soft but not mushy, rinse them gently, trim the stems, and you’re ready for your first batch.
How to Make Fig Jam
Follow along with my simple step-by-step instructions to learn how to make Fig Jam in your home kitchen.
Place a small plate and a tablespoon in the freezer. This quick trick helps test the consistency of your homemade jam later.

- Rinse the figs in cold running water, removing any debris. For best results, use ripe fruit, and clean gently to preserve the soft skins.
- Slice the figs into halves and quarters. Chopped figs in smaller pieces will cook down more easily and help create a smoother jam.
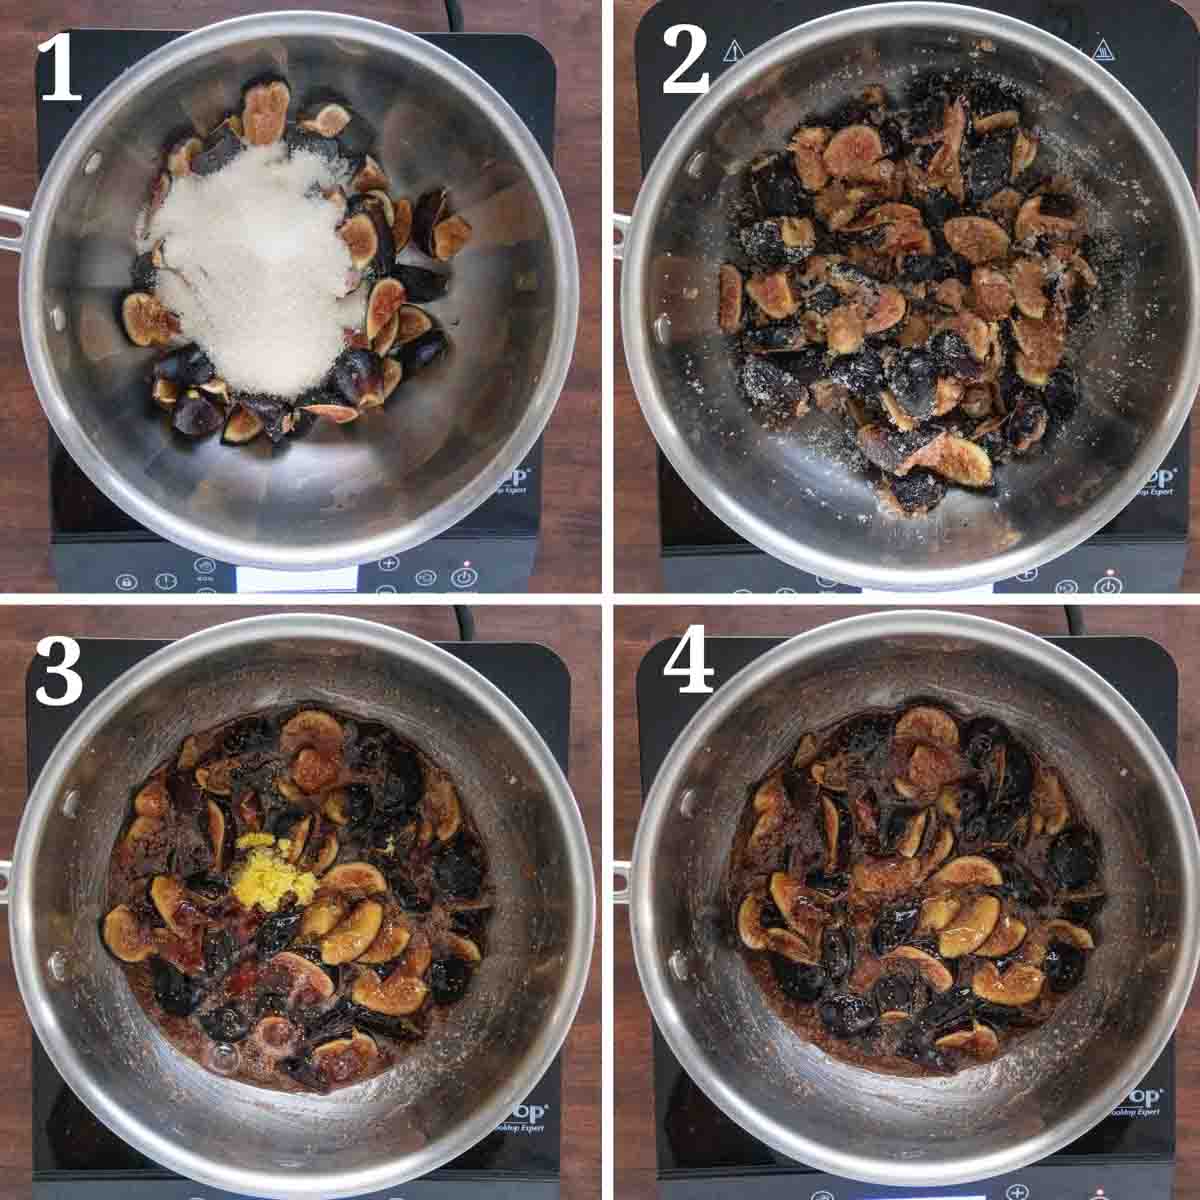
- Add the cut-up figs and granulated sugar to a saucepan over medium heat. A stainless steel medium saucepan works best for even cooking.
- Stir everything together with a wooden spoon and cook for about five minutes, continuing to stir as needed.
- Add the lemon juice, lemon zest, and vanilla extract to the fruit mixture. These simple ingredients enhance the flavor of this easy fig jam recipe.
- Stir to combine the ingredients thoroughly.
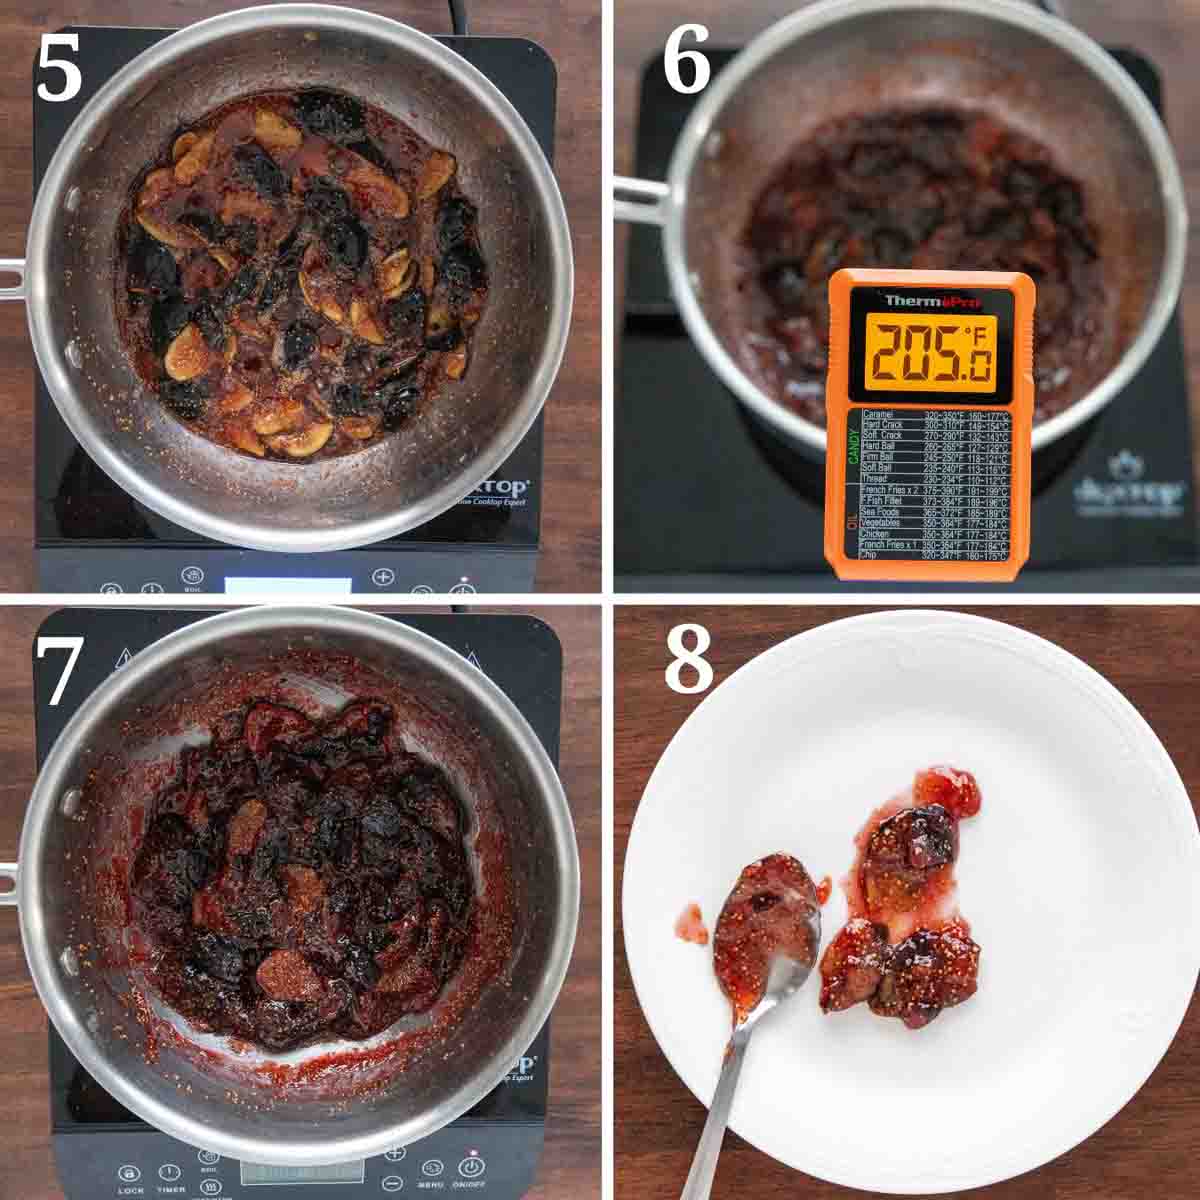
- Continue to heat the mixture until it reaches a light boil. Medium-high heat is enough to bring out the figs’ natural pectin. Use a candy thermometer to monitor the temperature, stirring regularly to prevent burning or sticking to the bottom of the pan.
- When the mixture reaches 205 degrees F., reduce the heat to low.
- Continue cooking until the jelly begins to thicken (7-10 minutes).
- Remove the plate and spoon from the freezer. Use the spoon to scoop a spoonful of the jam. Swipe it over the plate and let it cool to test the consistency of the jam. This is one of the best ways to check if your sweet jam is ready to jar.
Once the desired consistency is achieved, pour the jam into a clean jar and let it cool completely before storing in the refrigerator.

Break out our fig jam when you’re serving something worth slowing down for, like a cozy cheese board or a long brunch with friends. One bite in and you’ve got wild-eyed nodding across the table like they’ve just solved a mystery.
How to Store and Freeze
Let the jam cool to room temperature, then spoon it into clean glass jars with sterilized lids. Store it in the fridge and use within two weeks for best results.
To freeze, use airtight containers or freezer-safe jars, leaving a little space at the top. It’ll keep in the freezer for up to three months. Thaw overnight in the fridge when you’re ready for your next batch.
Recipe FAQs
If your jam is too thick, you can try adding a small amount of water and gently reheating it to achieve the desired consistency. Be cautious not to overheat, as this can affect the flavor. Alternatively, you can repurpose thick jam as a glaze for meats or a filling for baked goods.
Mold can develop due to cross-contamination from utensils. Using a spoon or knife that has come into contact with other foods, especially dairy products, can introduce mold spores into the jam. Always use clean utensils when serving to prevent this issue.
The white appearance is likely due to sugar crystallization, not spoilage. This can occur if the jam is stored in the refrigerator. To remedy this, gently reheat the jam on the stove until the crystals dissolve, restoring its smooth texture.
More Recipes You’ll Love!
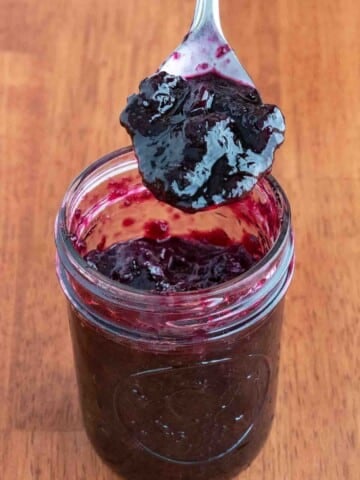


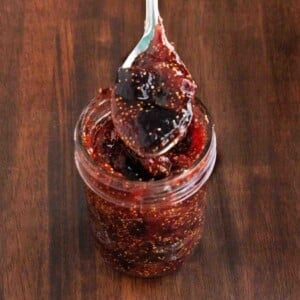
Fig Jam Recipe
Ingredients
- 3 cups fresh figs 2 pints
- 1 cup granulated sugar
- ¼ cup lemon juice
- 1 teaspoon lemon zest
- 1 teaspoon vanilla extract optional
WANT TO SAVE THIS RECIPE?
Instructions
- Place a small plate and a tablespoon in the freezer.
- Rinse the figs in cold running water, removing any debris.
- Slice the figs into halves and quarters.
- Add the cut-up figs and granulated sugar to a saucepan over medium heat.
- Stir the mixture together to combine and cook the mixture for about five minutes, stirring as needed.
- Add the lemon juice, lemon zest, and vanilla extract to the fruit mixture. Stirring to combine thoroughly.
- Continue to heat the mixture until it reaches a light boil.Use a candy thermometer to monitor the temperature, stirring regularly to prevent burning or sticking to the bottom of the pan.
- When the mixture reaches 205 degrees F. reduce the heat to low and continue cooking until the jelly begins to thicken (7-10 minutes).
- Remove the plate and spoon from the freezer. Use the spoon to scoop a spoonful of the jam. Swipe it over the plate and let it cool to test the consistency of the jam.
- Once the desired consistency is achieved, pour the jam into a clean jar and let it cool completely before storing in the refrigerator.
- A quick jam like this will last for 10-14 days in the fridge and up to 3 months in the freezer.
Jasmine W. says
This recipe looks delicious. Would I be able to waterbath can it to make it shelf-stable? Thank you!
Chef Dennis Littley says
I don’t see why not. Just do your normal canning process after making the jam.